Animation
|
|
If the imagery for a given object in a game was always the same, it would lack visual appeal. Furthermore, moving objects would not look as if they were moving in a realistic manner. The key to 2D animation is in alternating between animation frames, where one frame represents a game sprite in a given position at a given time. It's similar to the way in which film is recorded, as simply a consecutive series of images. In a programming sense, you need to create your own animation frames in a straightforward manner and then build the animation code to support its structure.
Animation with One-Dimensional Image Sheets
First, we will look at a basic linear animation set consisting of images of numbers from 0 to 9. The following image shows this animation set:
![]()
Figure 12-1:
The dimension of this entire image is 320x32 pixels with ten frames. One number fills one frame of the animation sheet. Thus, each frame of the animation set is 32x32 pixels in size. The red squares represent the top-left corner of each frame, which we will discuss in more detail in a moment. The important part of making animation sheets is the order of the frames. In this animation sheet, the numbers are in order, so we can access their position in the animation sheet in a linear fashion. But how do we handle drawing the frames?
We need an index for the animation sheet or a current state within the sheet that acts as a description of what should be drawn. We have used the numbers from 0 to 9 here on purpose to illustrate the index state because they are the values that you can use as the index values to store the current frame. Let's say that we have a counter variable that cycles in the main loop repeatedly from 0 to 9 (just an integer value), and we want to display this number as a bitmapped image using this one-dimensional animation sheet and drawing the correct frame relating to the counter value. We need to work out the top-left (x0, y0) and bottom-right (x1, y1) coordinates of the frame that we want to draw, which will use the Graphics object method drawImage that we saw in Chapter 9 for drawing a section of an image. So, if we say the current number of the counter variable is 4, we can work out these coordinates as follows, based on what we know about the dimensions of the animation sheet and its frames.
static final int FRAME_WIDTH = 32; static final int FRAME_HEIGHT = 32; int counter = 4; // our counter variable // Source image coordinates for the frame int srcX0 = counter*FRAME_WIDTH; int srcY0 = 0; int srcX1 = srcX0+FRAME_WIDTH; int srcY1 = FRAME_HEIGHT; // Destination coordinates to draw to int dstX0 = 50; int dstY0 = 50; int dstX1 = dstX0+FRAME_WIDTH; int dstY1 = dstY0+FRAME_HEIGHT; // render the single frame Graphics g = // a graphics object to draw onto g.drawImage(numberSheet, dstX0, dstY0, dstX1, dstY1, srcX0, srcY0, srcX1, srcY1, null);
This code illustrates how we can get the image coordinates for the frame that is represented by the counter variable, which in the code example is equal to 4. We begin by calculating the source coordinates; these are the coordinates on the actual image. We are looking at finding the position of that red square shown on the number sheet image earlier. This can be retrieved as simply the counter variable's value multiplied by the width of a single frame. So for the counter value 4, this would be 4x32, equaling pixel coordinate 128 on the tile sheet for the left position of the tile. The right coordinate is simply the left (128) plus the width of one frame, and the y coordinates are merely 0 to the height of one frame, as this animation sheet is one-dimensional. (We'll look at two-dimensional animation sheets in the next section.)
Let's create an example that loads in the animation sheet of numbers and then get it to cycle the value of a variable per loop and display the variable's value as a frame of the image, animating it based on a given state. The following example, AnimatedNumbers.java, is an applet program; the animation sheet is available on the companion CD.
Code Listing 12-1: AnimatedNumbers.java
import java.awt.*; import java.awt.image.*; import javax.swing.*; import java.awt.event.*; public class AnimatedNumbers extends JApplet implements Runnable { public void init() { getContentPane().setLayout(null); setSize(DISPLAY_WIDTH, DISPLAY_HEIGHT); setIgnoreRepaint(true); backBuffer = new BufferedImage(DISPLAY_WIDTH, DISPLAY_HEIGHT, BufferedImage.TYPE_INT_RGB); bbGraphics = (Graphics2D) backBuffer.getGraphics(); // load in animation image sheet numberSheet = getImage(getCodeBase(), "numbersheet.gif"); MediaTracker m = new MediaTracker(this); m.addImage(numberSheet, 0); try { m.waitForID(0); } catch(InterruptedException e) { System.out.println(e); } } public void start() { loop = new Thread(this); loop.start(); } public void stop() { loop = null; } public void run() { long startTime, waitTime, elapsedTime; // 1000/25 Frames Per Second = 40 millisecond delay int delayTime = 1000/25; Thread thisThread = Thread.currentThread(); while(loop==thisThread) { startTime = System.currentTimeMillis(); changeState(); // render to back buffer now render(bbGraphics); // render back buffer image to screen Graphics g = getGraphics(); g.drawImage(backBuffer, 0, 0, null); g.dispose(); // handle frame rate elapsedTime = System.currentTimeMillis() - startTime; waitTime = Math.max(delayTime - elapsedTime, 5); try { Thread.sleep(waitTime); } catch(InterruptedException e) {} } } public void changeState() { if(counter<9) counter++; else counter = 0; } public void render(Graphics g) { g.clearRect(0, 0, DISPLAY_WIDTH, DISPLAY_HEIGHT); int srcX0 = counter*FRAME_WIDTH; int srcY0 = 0; int srcX1 = srcX0+FRAME_WIDTH; int srcY1 = FRAME_HEIGHT; // start pos to center in applet int dstX0 = (DISPLAY_WIDTH-FRAME_WIDTH)/2; int dstY0 = (DISPLAY_HEIGHT-FRAME_HEIGHT)/2; int dstX1 = dstX0+FRAME_WIDTH; int dstY1 = dstY0+FRAME_HEIGHT; g.drawImage(numberSheet, dstX0, dstY0, dstX1, dstY1, srcX0, srcY0, srcX1, srcY1, null); } private Image numberSheet; private int counter = 0; // our counter variable private static final int FRAME_WIDTH = 32; private static final int FRAME_HEIGHT = 32; private Thread loop; private BufferedImage backBuffer; private Graphics2D bbGraphics; private static final int DISPLAY_WIDTH = 400; private static final int DISPLAY_HEIGHT = 400; } When you compile and run the applet, you should get the counter value animating in the center of the applet as a frame of animation similar to Figure 12-2. Note that you might want to slow down the frame rate a bit in this example, but for the sake of the next example, we have left it as is.
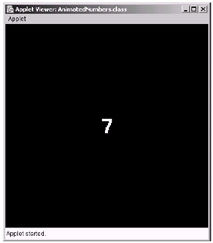
Figure 12-2:
The previous code is all very well, but it doesn't help if we have numbers with more than one digit. We will make two changes to the previous code to allow us to render numbers with multiple digits; this is going slightly off-track of animation in general, but we'll return with two-dimensional animations in a moment.
So, first you need to alter the changeState method so that it resets to zero when it is at a larger, multi-digit value, such as 999, instead of its current value of 9.
Next we need to rewrite the render method so that it handles drawing each digit in the variable counter. We will position the number in the center of the screen. Here is the code for a render method that will draw the entire number centered in the middle of the applet:
public void render(Graphics g) { g.clearRect(0, 0, DISPLAY_WIDTH, DISPLAY_HEIGHT); // calculate length of the counter in characters, // i.e. 945 = 3 digit characters int digitLength; int scope = 10; for(digitLength=1; scope<=counter; digitLength++) scope*=10; // the x left:right coordinates on the animation sheet int srcX0; // calculated later int srcX1; // calculated later // top left start position for centering in applet int dstX = (DISPLAY_WIDTH-(digitLength*FRAME_WIDTH))/2; int dstY = (DISPLAY_HEIGHT-FRAME_HEIGHT)/2; int base; int digit; for(int i=digitLength; i>0; i--) { base = (int)Math.pow(10, i); digit = (counter % base) / (base / 10); srcX0 = digit*FRAME_WIDTH; srcX1 = srcX0+FRAME_WIDTH; g.drawImage(numberSheet, dstX, dstY, dstX+FRAME_WIDTH, dstY+FRAME_HEIGHT, srcX0, 0, srcX1, FRAME_HEIGHT, null); dstX+=FRAME_WIDTH; } } When you make these two changes to the previous example, you can see that it will draw multiple-digit numbers in the applet as follows:
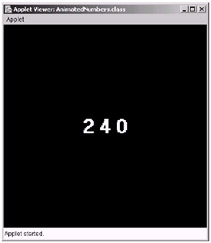
Figure 12-3:
Let's decode our main rendering loop in the case of the number shown (240) and see how this works:
for(int i=digitLength; i>0; i--) { We are going to iterate from the total number of digits to 1, so the variable i will iterate from 3 to 1 for the number 240.
base = (int)Math.pow(10, i); digit = (counter % base) / (base / 10);
In order to actually retrieve the digit that we are interested in, we need to perform some special code. First calculate the value of base in order to work out the current number. When we want to find the number 2, base will be assigned the value 10³ (10x10x10 = 1000). Then perform counter % base. This will give us the number from its current position TO the right side, in character terms. Thus, 240 % 1000 gives us 240, which isn't so relevant. But for the next digit in the next loop cycle, it is, as it will perform 240 % 100, which will give us the value 40. In the next loop cycle, it will perform 240 % 10, giving us the value 0. When we get the values 240, 40, and 0 for the respective iterations of this loop, we then divide the values by (base / 10), giving us the values 240 / 100 = 2, 40 / 10 = 4, and 0 / 1 = 0. So there we have it; we have retrieved the values 2, 4, and 0, stored in the variable digit, and we can then go on to render it.
Note that it would also be possible to make the number into a string object and get the character value using the charAt method and then change it back into an integer (or subtract the numeric value of the character 0 from your retrieved character). This would be more expensive and mean creating many string objects per loop. This is the reason that we retrieved the number of digits to begin with by cycling through powers of ten instead of converting to a string object and then calling its length method. We will look at the problem of creating objects a little later in this chapter in greater detail. Note you could get around this by using a StringBuffer to prevent further object creation also, but this would only be convenient if the value wasn't changed very often, as it involves consistent number-to-string conversions.
srcX0 = digit*FRAME_WIDTH; srcX1 = srcX0+FRAME_WIDTH; g.drawImage(numberSheet, dstX, dstY, dstX+FRAME_WIDTH, dstY+FRAME_HEIGHT, srcX0, 0, srcX1, FRAME_HEIGHT, null);
This is the basic rendering code that we saw in the last example—this time rendering the value of the digit variable.
dstX+=FRAME_WIDTH;
All that is left is to move the on-screen (destination) position where the next loop cycle will render the next frame.
} // end of method
Note that you could also cycle through the digits from right to left, taking the modulus of the number to get the rightmost digit. Then after rendering, divide the current number by 10 in each loop, basically shifting the digits rightward each time. This would obviously mean changing the screen position to draw each frame, also.
One thing that many games do, however, is fill a number to a specific, fixed amount of digits. If the actual number of digits in the current number is less than that fixed value, the number will be filled to this value, adding appropriate zeros onto the left-hand side of the number when drawn. For example, if the fixed amount of digits is 4, the number "72" would appear on screen as the number "0072." The great thing about our code is that all you need to do instead of calculating the length of digits is store the value in the variable digitLength. You can just set the digitLength to whatever you want it to be, and the algorithm for finding the current digit will find zeros for invalid character places on the right with its calculations. The following figure illustrates how it would look if you merely set the digitLength variable to 5, irrespective of the real number of digits, with the current value equal to 466.
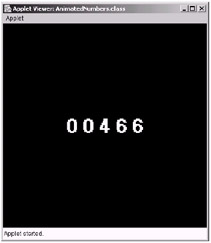
Figure 12-4:
Another consideration for this technique would be incorporating a negative (–) character into the animation sheet and adding a check to see if the value was less than 0. If so, you would render the minus frame first and move the destination x position along by the width of one frame before entering the render loop. For this, the negative character would be best placed on the end of the animation sheet so that it doesn't mess up the rendering code, or the rendering code could be changed appropriately.
With these techniques, you can now create bitmapped fonts of your own. In these previous examples, we have basically created just this but only supporting ten different frames consisting of the numbers 0 to 9. But this could easily be extended to incorporate a larger set, such as a full ASCII set or perhaps the ASCII range of 32 to 128, which contains the most important characters in the set. Creating a bitmapped character set as opposed to using drawString is faster because a bitmapped font is an equal copy (provided you don't scale it), whereas drawing from a TrueType font can be slow because it requires calculations to work out its form, based on its TrueType description when it is drawn. Also, monotype fonts actually look more structured, as they are characters with fixed widths and heights. So the strings WWWWW and LLLLL would span the same width in frames, whereas TrueType font characters are positioned next to each other after a short space following the edge of the last character. With monotype fonts you can be dedicated to a fixed area of the screen to contain that textual data as a bitmapped font.
We will now look at animation with two-dimensional image sheets and the coolest little example on the planet, StickWalker.
Animation with Two-Dimensional Image Sheets
The use of one-dimensional animation sheets has its limitations in circumstances where your primary frames will also have an animation state, making two-dimensional animation sheets a more realistic structure to build your animation code. For example, with the numbered animation sheets, we might also want to change the color of each of the numbers through a second animation counter. Adding an extra dimension onto the animation sheet will allow us to do this in a way that will be easy to handle in code. The following image is an illustration of a structure supporting different colored states for each number in the original one-dimensional animation sheet. (Note that the rows are, from the top, black, blue, green, and red.)
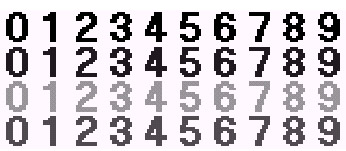
Figure 12-5:
As you can see, the x-axis of the new two-dimensional animation sheet is concerned with storing the actual data value (i.e., the numbers 0 to 9), whereas the y-axis is concerned with the color of that value. From this frame set, we want to be able to draw a given number in a selected color. For this we can use two indices: one for the number (x position) and one for the color (y position). The following code is an illustration of how we could draw the red number 7 using two index variables to control the value of the current frame.
static final int FRAME_WIDTH = 32; static final int FRAME_HEIGHT = 32; int value = 7; // the number we want to draw int color = 3; // the row index for the color // Obtain the coordinates in the image of the current frame // based on the value and color variables int srcX0 = value*FRAME_WIDTH; int srcY0 = color*FRAME_HEIGHT; int srcX1 = srcX0+FRAME_WIDTH; int srcY1 = srcY0+FRAME_HEIGHT; // Destination coordinates to draw to int dstX0 = 50; int dstY0 = 50; int dstX1 = dstX0+FRAME_WIDTH; int dstY1 = dstY0+FRAME_HEIGHT; // render the single frame Graphics g = // a graphics object to draw onto g.drawImage(coloredNumberSheet, dstX0, dstY0, dstX1, dstY1, srcX0, srcY0, srcX1, srcY1, null);
A more practical example of using two-dimensional animation sheets is for game character animations. Typically, a 2D character will have various directions of movements, having a different pose in each direction. For example, a character looking downward will look different than when it is facing upward. These are the direction characteristics of the character's graphical representation. However, for each of the directional poses, the character may also need a walk cycle so that it looks like it is walking when it is moved in a given direction. This is the perfect setup for a two-dimensional animation sheet, as we saw with the colored numbers. In the following example, we are going to make a character walk continuously from the left edge to the right edge of the screen, while animating the walk cycle and changing the direction appropriately. The following image is the animation set that will be loaded into the program. Note that the background of the character's animation sheet image is set to transparent in the .gif file that is available on the companion CD-ROM.
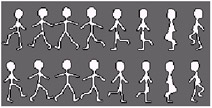
Figure 12-6:
The idea for this example is that an animation counter cycles through the x coordinate of the frame constantly and does not interfere with the directional counter that we also use. The following example, StickWalker, shows this character walking between the left and right edges of the screen. Each frame in this animation sheet is 32x64 pixels in size.
Note that a background image is also drawn in this example. (The background image is also available on the companion CD.) Here is the code for the applet program StickWalker.java.
Code Listing 12-2: StickWalker.java
import java.awt.*; import java.awt.image.*; import javax.swing.*; import java.awt.event.*; public class StickWalker extends JApplet implements Runnable { public void init() { getContentPane().setLayout(null); setSize(DISPLAY_WIDTH, DISPLAY_HEIGHT); setIgnoreRepaint(true); backBuffer = new BufferedImage(DISPLAY_WIDTH, DISPLAY_HEIGHT, BufferedImage.TYPE_INT_RGB); bbGraphics = (Graphics2D) backBuffer.getGraphics(); // load in animation image sheet characterSheet = getImage(getCodeBase(), "stickmansheet.gif"); backgroundImage = getImage(getCodeBase(), "backdrop.gif"); MediaTracker m = new MediaTracker(this); m.addImage(characterSheet, 0); m.addImage(backgroundImage, 0); try { m.waitForID(0); } catch(InterruptedException e) { System.out.println(e); } // assign start walk animation, direction and position walkAnim = 0; walkDir = 0; xPos = 200; yPos = 184; // work frame limits on the fly MAX_WALK_ANIMATIONS = characterSheet.getWidth(null) / FRAME_WIDTH; MAX_WALK_DIRECTIONS = characterSheet.getHeight(null) / FRAME_HEIGHT; } public void start() { loop = new Thread(this); loop.start(); } public void stop() { loop = null; } public void run() { long startTime, waitTime, elapsedTime; // 1000/25 Frames Per Second = 40 millisecond delay int delayTime = 1000/25; Thread thisThread = Thread.currentThread(); while(loop==thisThread) { startTime = System.currentTimeMillis(); walk(); // render to back buffer now render(bbGraphics); // render back buffer image to screen Graphics g = getGraphics(); g.drawImage(backBuffer, 0, 0, null); g.dispose(); // handle frame rate elapsedTime = System.currentTimeMillis() - startTime; waitTime = Math.max(delayTime - elapsedTime, 5); try { Thread.sleep(waitTime); } catch(InterruptedException e) {} } } public void walk() { // handle animations walkAnim++; if(walkAnim >= MAX_WALK_ANIMATIONS) walkAnim = 0; // move character position and handle direction changing switch(walkDir) { case 0: // left xPos-=4; if(xPos<0) { xPos = 0; walkDir = 1; } break; case 1: // right xPos+=4; if(xPos+FRAME_WIDTH>DISPLAY_WIDTH) { xPos = DISPLAY_WIDTH-FRAME_WIDTH; walkDir = 0; } break; } } public void render(Graphics g) { g.drawImage(backgroundImage, 0, 0, null); // render current frame to current screen position int srcX0 = walkAnim*FRAME_WIDTH; int srcY0 = walkDir*FRAME_HEIGHT; int srcX1 = srcX0+FRAME_WIDTH; int srcY1 = srcY0+FRAME_HEIGHT; g.drawImage(characterSheet, xPos, yPos, xPos+FRAME_WIDTH, yPos+FRAME_HEIGHT, srcX0, srcY0, srcX1, srcY1, null); } private Image characterSheet; private int xPos; private int yPos; private int walkAnim; private int walkDir; private int MAX_WALK_ANIMATIONS; private int MAX_WALK_DIRECTIONS; private static final int FRAME_WIDTH = 32; private static final int FRAME_HEIGHT = 64; private Image backgroundImage; private Thread loop; private BufferedImage backBuffer; private Graphics2D bbGraphics; private static final int DISPLAY_WIDTH = 400; private static final int DISPLAY_HEIGHT = 400; } When you compile and run, you will hopefully get an animated character walking across the screen in a very artistic fashion (who says programmers aren't artistic? :)).
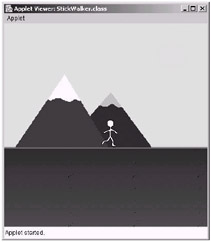
Figure 12-7:
The walk direction is controlled using the variable walkDir. The value of this variable is 0 for left and 1 for right. The animation state of the character's walk movement is controlled using the variable walkAnim, which cycles continuously (once per main loop cycle) from 0 to 7 (as there are eight walk animations for a given direction). In the walk method, we first handle the walk animation state and then the walk movement and possible direction change. The code in this area is quite self-explanatory. One thing to note about this example is the way in which we store the maximum number of frames for the animation and walk (x and y) frames of the animation sheet, with the following code:
MAX_WALK_ANIMATIONS = characterSheet.getWidth(null) / FRAME_WIDTH; MAX_WALK_DIRECTIONS = characterSheet.getHeight(null) / FRAME_HEIGHT;
Once the character sheet has been loaded in completely using the media tracker, we can then work out the number of frames, which for the animation sheet used was eight across and two down, at run time. We do this by simply dividing the width of the image by the width of one frame and the same for the height of the image and the height of one frame. This sort of code makes a program more reusable and is very good programming practice. If the image is later changed by the artist, perhaps to contain 16 walk animations instead of eight in our example, the code will not need changing, as the variable MAX_WALK_ANIMATIONS is calculated based on the image loaded in, and this variable is used in the walk method when we change the variable walkAnim also. We would obviously need to make some specific code changes if the direction rows of the image changed, however. For example, if the artist added two extra rows for up and down movements to the animation sheet, we would need to support these directions by adding movement code for them, but the variable MAX_WALK_ DIRECTIONS would still be set to its correct value.
Note that in the previous code, the methods getWidth and getHeight of the image characterSheet were both passed the parameter null. The parameter type is ImageObserver, and this is used for watching the loading progress of an image, which we are not concerned with, as we have used the MediaTracker class to load our images completely before continuing. The ImageObserver was discussed back in Chapter 9, "Graphics."
Mapping One Dimension to Two
As we mentioned at the beginning, there needs to be an efficient mix between the artwork and the programming, where you can build the most efficient code to support the animation sheet in question. Having the frames ordered linearly is the most basic and effective way to achieve this. However, it might be more practical that this not be the case from an artist's point of view (although programmers might disagree) or perhaps the format of an animation sheet must be the way it is for a certain reason. One case could be that instead of having a large linear sequence in one dimension, such as the ASCII character set of length 256 characters, the animation sheet could be made two-dimensional using 16x16 frames to make up the full 256, instead of just 256 frames in one row. The best structure would be for the characters to span from left to right, move down a row and start at the beginning again, move left to right, and so on, so that character number 16 appeared in the frame directly below character 0.
We would now need to find the x and y indices for a given ASCII character value's integer form, such as the character (capital) A, which is really the number 65, based on the structure (16x16 frames) of the animation sheet. We can do this simply with the following code:
// number of frame in sheet across and down int TOTAL_FRAMES_X = 16; int TOTAL_FRAMES_Y = 16; char myChar = 'A'; int value = myChar; // equals 65, just to simplify this example int frameXIndex = value % TOTAL_FRAMES_X; int frameYIndex = value / TOTAL_FRAMES_X;
Yes, this is right; both use the TOTAL_FRAMES_X value. If we imagine that we want to access the character with value 17, just think about where its frame would be positioned on the animation sheet. Frame 16 would be the frame at the first column and the second row, underneath frame 0, as the first row of frames span from 0 to 15. So frame 17 would be at the second column and second row, giving the indices of (1, 1), as the first row and first column are indices (0, 0). Using this algorithm, we can calculate these indices from (value = 17) % (TOTAL_FRAMES_X = 16), giving us 1 for the x indices, and (value = 17) / (TOTAL_FRAMES_X = 16), giving us 1 also for the y indices. If value was 15, these indices would work out as (15, 0). For the bottom-right corner and value 255, these indices would work out as (15, 15)
Alternatively, there could come a time where you have two indices and want a one-dimensional value for those indices. For example, what if we wanted to know which character is at the frame with indices (1, 4) in the animation sheet? We could do this with the following formula:
// number of frame in sheet across and down int TOTAL_FRAMES_X = 16; int TOTAL_FRAMES_Y = 16; // 2 Dimensional frame indices int xIndex = 1; int yIndex = 4; char myChar = xIndex + (yIndex*TOTAL_FRAMES_X);
The character in the 16x16 frame animation sheet in this case would be the character with ASCII value 1+(4*16), which is 65—the capital letter A.
More commonly, this is the technique used to find the position in an image raster based on the screen's x, y position. An example of an image raster is an array of elements, with each element storing the pixel data (e.g., its color, its alpha component) on the image. As this array is a one-dimensional array, with the first element representing the pixel at the top-left corner of the image and the last element representing the pixel at the bottom-right corner of the image, you need some way to set the pixel at position x, y. Using this technique, you can work out the position in the raster to which the x and y coordinates refer. You can obtain the raster of a BufferedImage object in Java and go into lower-level pixel manipulation yourself, but this is not covered in this book.
|
|
EAN: 2147483647
Pages: 237