Defining a New Site
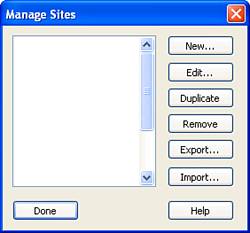
| Site management in Dreamweaver begins with defining a site. When you define a site in Dreamweaver, you're essentially establishing a reference between Dreamweaver and the files on your computer. Dreamweaver then takes a snapshot of those files and caches them. By caching the files, Dreamweaver can automatically detect whether changes are made to image paths, links, and so on and can automatically fix them for you. Of course, we'll get to all that as we progress through the chapter; for now, keep in mind that everything begins with defining a new site. You can begin the process of defining a site by selecting Manage Sites from the Site menu. The Manage Sites dialog appears, similar to Figure 4.3. Figure 4.3. The Manage Sites dialog allows you to create new or edit existing sites.
The Manage Sites dialog includes various buttons, each constituting specific functionality. That functionality is outlined here:
Now that you have an idea how the Manage Sites dialog works and the functionality it encapsulates, let's actually create a new site. Choose the Site option from the New button's submenu. The Site Definition window appears, similar to Figure 4.4. Figure 4.4. The Site Definition window features a wizard that guides you through the process of defining a new site.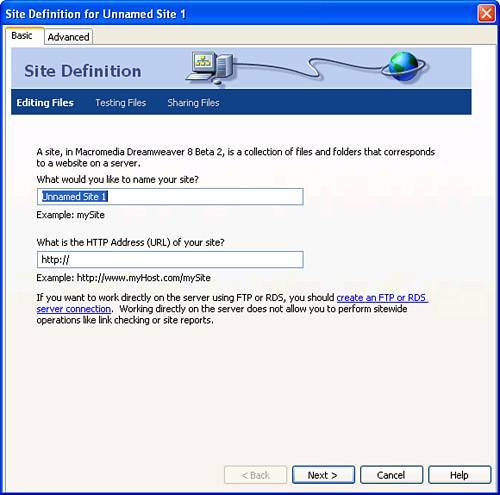 The Site Definition window is split into two tabs: Basic and Advanced options. The next section sheds light on each. The Site Definition WindowWith the Site Definition window open, notice that the interface is split into two tabs: Basic and Advanced. You can use either tab to define a new site, however, the options provided in each tab are dramatically different. If you're a beginning web developer who doesn't understand the myriad of terms and acronyms, the Basic tab, which guides you through an easy-to-understand wizard, is probably for you. If, however, you're a seasoned veteran who wants fine control over your site management experience, the Advanced tab is the selection you should pick. Don't worry if you're unsure; I'll walk through both options starting with the Basic tab. When the Site Definition window opens for the first time, notice that it defaults to the Basic tab. The Basic tab provides an easy-to-use and easy-to-understand wizard that gently guides you through the site definition process. The first window that appears simply asks you for the site name. By defining a site, we're only creating a reference between Dreamweaver and the files on the computer so that Dreamweaver can help you manage those files better than the operating system could. The name you enter here is merely a unique name for that reference, nothing more. I'll enter Dorknozzle. Below the name option, you'll find a text box that refers to the URL of your site. If the site you're defining contains a valid HTTP address (for example, http://www.dorknozzle.info), enter that here. In the long run, entering the HTTP address for your website helps Dreamweaver manage site root relative links and absolute links (those that refer to your website) through its link checker. When you finish entering these values, click Next. The second window of the Basic window appears, similar to Figure 4.5. Figure 4.5. The second window in the Basic tab allows you to choose a server technology.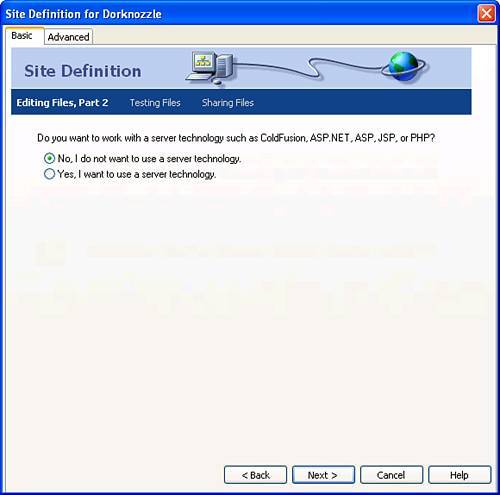 From this second screen, you'll choose to work with a server technology or not. Although we'll be working with server technologies in Part V, "Dynamic Web Page Creation," for now, we'll choose the radio button titled "No, I do not want to use a server technology" and click Next. The third part of the Basic window appears similar to Figure 4.6. Figure 4.6. The third window allows you to set a path to the files on your local computer.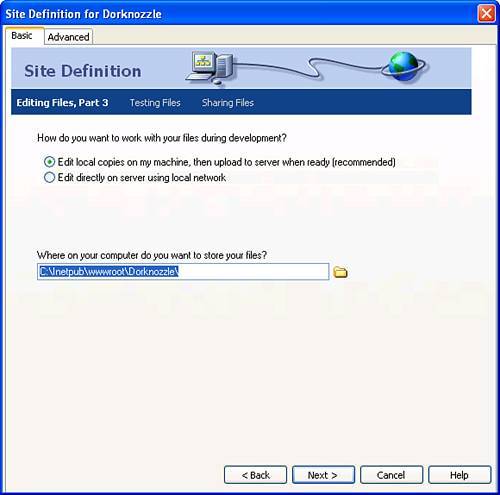 Once again, the practice of defining a site is the process of establishing a reference between Dreamweaver and the files on your local computer. On this third screen, you essentially tell Dreamweaver where those files are located. You'll want to choose the "Edit local copies on my machine, then upload to server when ready" option. Use the folder icon to browse to the folder where your files are located. If you've been working out of the same location I have, your text box should have the path C:\Dorknozzle populated. Of course you don't have to use the same path I do, but it is recommended so that we're on the same page throughout the book. NOTE The second radio button allows you to work with files directly off the network. Assuming that your organization's web server physically resides on the network and you don't feel the need to test your work before uploading to the web server, go ahead and check this option. Then point the path to the location of the files on the web server. When you've configured the third screen, click Next. Assuming that you're not using a server technology (in which case, the submenu skips over Testing Files and goes directly to Sharing Files), the fourth part of the Basic window appears similar to Figure 4.7. Figure 4.7. The fourth part of the Basic window allows you to set the properties, including path and connection options to the remote computer.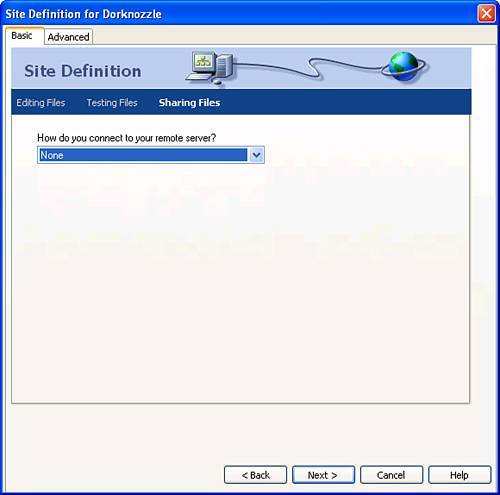 Now that you've set the path to the files on your local computer, it's time to set the path and connection settings to the remote server. Dreamweaver's built in FTP client will allow you to transfer files between your local computer and the remote computer (typically a web server that can be accessed by the general public). It's for this reason that you'll want to configure this screen by selecting one of the following options from the Remote Server menu:
Although we could get away with choosing None for most of our examples, it would defeat the purpose of learning about one of the more important features built into Dreamweaver: the FTP client. For this reason, I'll choose FTP. However, unless you've purchased web space from a third-party web hosting company, you may want to choose None and re-reference the FTP sections of this chapter when you can follow along with your own settings. After selecting the FTP option from the Remote Server menu, the screen tailors itself to allow you to configure path and connection details for your remote computer (see Figure 4.8). Figure 4.8. The FTP option allows you to set a remote path and connection information.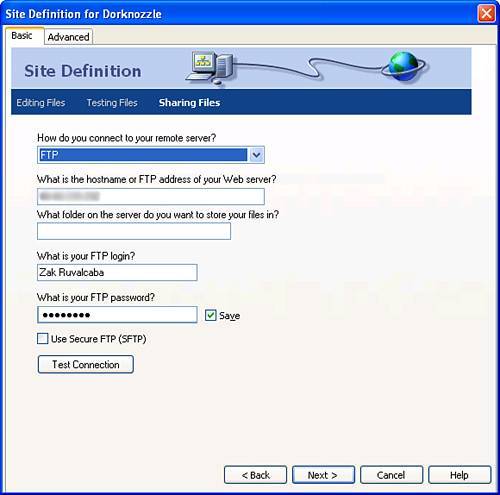 The screen exposes the following options:
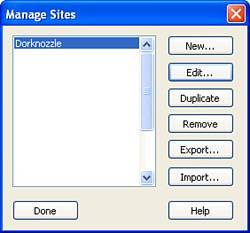
NOTE In this example, I've defined FTP settings for the Dorknozzle project. Because there's no practical way for me to share my FTP information with all the readers of this book, you'll be on your own to find a web hosting provider for the FTP examples throughout the book. After you've configured the screen, click Next. The fifth part of the Basic window appears similar to Figure 4.9. Figure 4.9. Configure this screen to enable Dreamweaver's built-in source control features.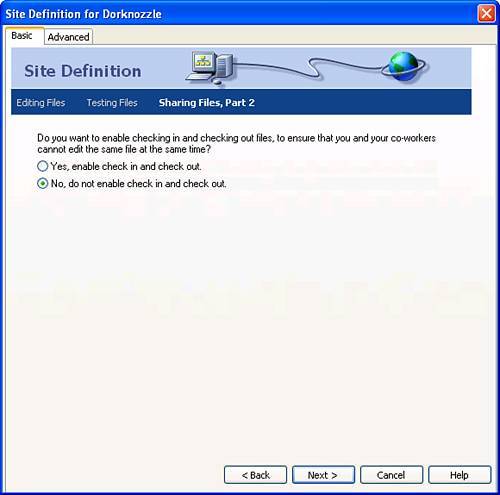 As you may have guessed from reviewing this screen, Dreamweaver's built-in source control features can be configured here. Because we'll be exploring this functionality with more detail in Chapter 12, "Building Dreamweaver Websites within Teams," for now, click the radio button titled "No, do not enable check in and check out" and click Next. Finally, the sixth screen appears allowing you to review the settings you've made in the wizard (see Figure 4.10). Figure 4.10. Review your site definition settings in the Summary screen. If you see errors, click the Back button until you get to the screen that contains the problems. If everything looks good, click Done. Dreamweaver scans the folder and file structure of your local files, caches them, and then adds the site reference to the Manage Sites dialog, similar to Figure 4.11. Figure 4.11. The newly defined site name is added to the Manage Sites dialog.
To begin working with your newly defined site, click Done to close the Manage Sites dialog. You probably noticed a sentence in the summary screen (refer back to Figure 4.10) that reads Your site can be further configured using the Advanced Tab. The next few sections provide a detailed look at the Advanced tab's features. To open your site and use the Advanced tab, select your site from the Manage Sites dialog (you can open the Manage Sites dialog by choosing the Manage Sites option from the Site menu) and click Edit. When the Site Definition for Dorknozzle dialog appears, choose the Advanced tab. The screen resembles Figure 4.12. Figure 4.12. The Advanced interface features various configurable categories. The Advanced interface is separated into the following configurable categories:
Let's review each. The Local Info CategorySimilar to the first two screens in the Basic tab, the Local Info category (shown in Figure 4.12) allows you to configure the following information:
Because we've already configured most of these options in the Basic tab, I'll leave the configuration alone and move directly to the Remote Info category. The Remote Info CategorySimilar to the remote configuration screen in the Basic tab, the Remote Info category, also shown in Figure 4.13, allows you to further configure remote computer options such as firewall settings, passive FTP, etc. Figure 4.13. Use the Remote Info category in the Advanced tab to configure further options such as firewall settings and passive FTP.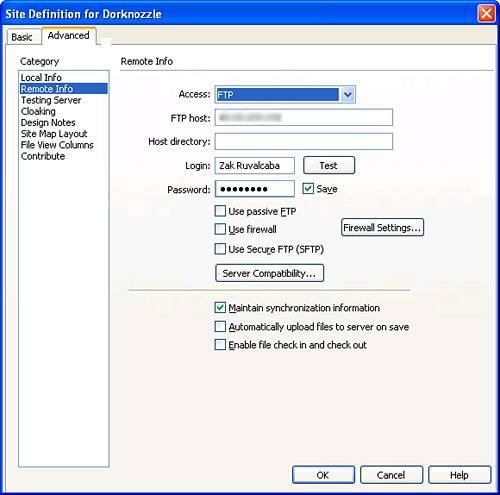 A detailed list of features and functionality is listed here:
Again, we've managed to configure most of the options that we need to this point when we used the Basic tab. For now, I'll leave the configurations alone and move onto the Testing Server category. The Testing Server CategoryOnce you start working with server-side technologies (ASP, ASP.NET, ColdFusion, or PHP to name a few), the Testing Server category, shown in Figure 4.14, becomes more useful. Figure 4.14. The Testing Server category allows you to choose a server technology and an access method.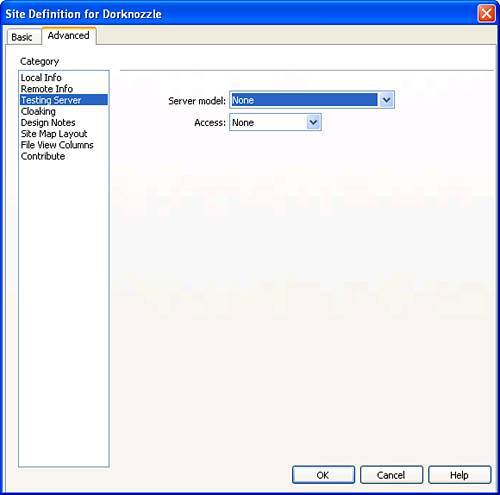 A detailed list of features and functionality exposed by the Testing Server category is presented here:
Because we're not working with server technologies just yet, I'll keep the option None for both Server Model and Access menus. The Cloaking CategoryAs we progress through the chapter, you'll learn about features such as site synchronization, file Get and Put, and more. As you work with some of these operations, you might decide that you'll need to exclude files in an effort to improve the performance of Dreamweaver's site-scanning capabilities. Furthermore, you might decide to explicitly exclude certain files from consideration during these operations. The Cloaking category exists for this reason. Shown in Figure 4.15, the Cloaking category of the Site definition dialog allows you to hide folders and ultimately files and prevent them from being used within a variety of Dreamweaver operations including site synchronization, Get and Put, find and replace, and more. This category also provides the option of tweaking cloaking options to cloak only those files with specific extensions. Figure 4.15. The Cloaking category allows you to enable or disable cloaking and even allows you to cloak files with specific extensions.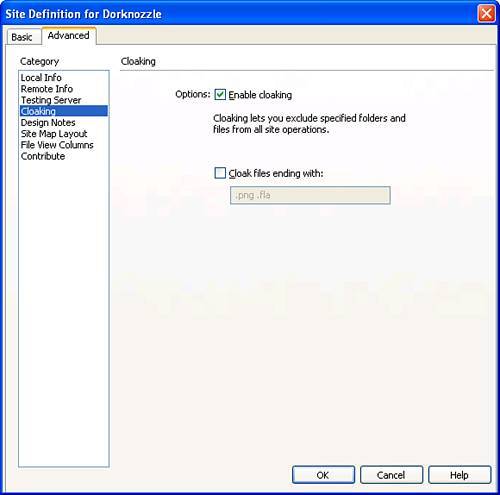 The Cloaking category exposes the following functionality:
Because we'll be discussing cloaking in more detail later in the chapter, make sure that the Enable Cloaking check box is selected. The Design Notes CategoryCovered in more detail in Chapter 12, "Building Dreamweaver Websites within Teams," Design Notes let you share and edit information about pages within a site with members of a team. By enabling Design Notes on the screen shown in Figure 4.16, you can create text-based notes which are in turn saved to a _notes folder in the site's root. Figure 4.16. Enable collaborative note sharing for a site using Design Notes.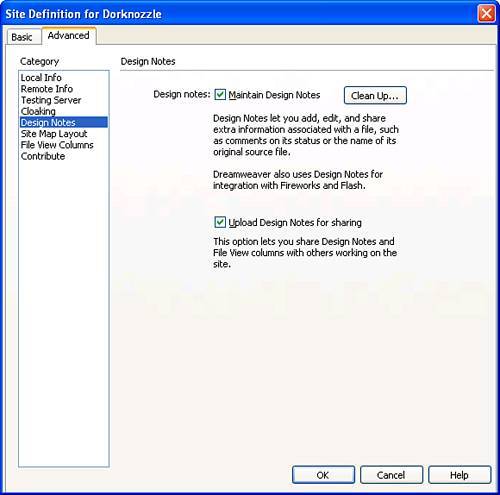 A complete list of features available through the Design Notes category is listed here:
Although we won't be discussing Design Notes until Chapter 12, it won't affect our work if we enable these options now. So make sure that the Design Notes check box is selected and that the Upload Design Notes for Sharing check box is selected as well. The Site Map Layout CategoryAnother benefit to defining a site in Dreamweaver is to take advantage of the site map feature. The Dreamweaver site map, discussed in more detail later in this chapter, is a visual organization of files and links within your defined site. Shown in Figure 4.17, the Site Map Layout category facilitates configuration of the site map feature. Figure 4.17. Configure Dreamweaver's site map feature from the Site Map Layout category.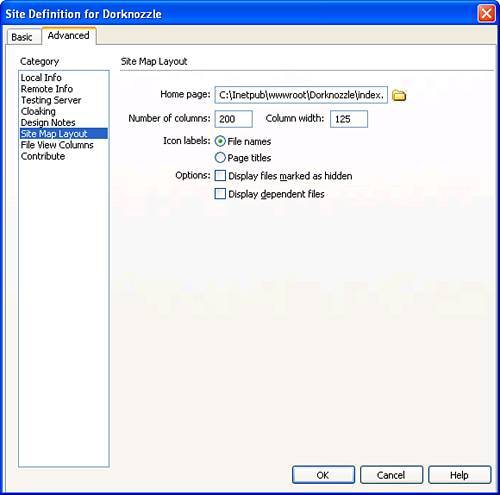 The Site Map Layout category can be broken down into the following list of features:
Generally, the default options in this category will suffice. As long as the path to index.htm is listed in the Home Page text box, we're ready to move on. The File View Columns CategoryLike your operating system's file explorer, the Dreamweaver Site Management window (covered later) supports the customization of columns to be made visible or hidden. The File View Columns category shown in Figure 4.18 allows you to show or hide Name, Notes, Size, Type, Modified, and Checked Out By columns. Figure 4.18. Use the File View Columns category to show or hide columns in the Site Management window.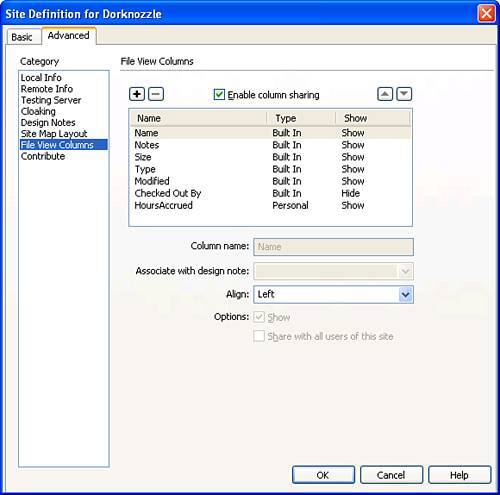 The File View Columns category can be broken down into the following list of features:
It's fine if the Notes column is hidden because we won't be working with Design Notes until Chapter 12, "Building Dreamweaver Websites within Teams." Also, because we won't be using the Check In and Check Out functionality until Chapter 12, go ahead and select the Checked Out By column name in the File View Columns pane and uncheck the Show check box. The Contribute CategoryMacromedia's Contribute makes it easy for content managers in your organization to add and modify content on the website without the need to know Dreamweaver. You can make your site accessible through Contribute by enabling the check box in the Contribute category screen, shown in Figure 4.19. Figure 4.19. Enable Contribute compatibility by enabling this check box.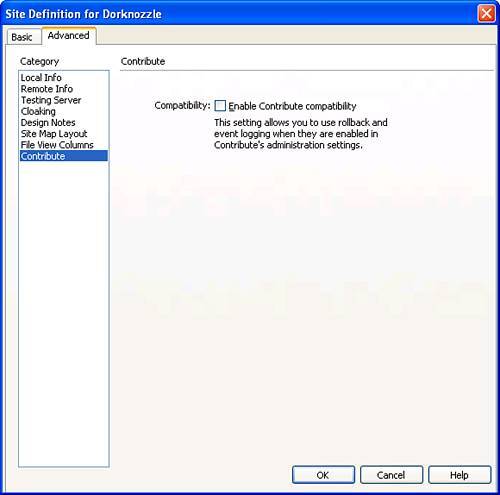 It's important to note however, that Dreamweaver does not allow you to select this option if an Access method has not been chosen first. Contribute is covered in much more detail in Chapter 13, "Managing Website Content Management Using Contribute." |
EAN: 2147483647
Pages: 237