| One of the SQL-generation tools I've become fond of is MySQL Maestro, released by the SQL Maestro Group. Of the many features the MySQL Maestro DBMS exposes, the Visual Query Builder is the one I've found to be the most useful and the one that (from what I can tell) is lacking in other free tools and editors available from the MySQL Web site. Of course, with the functionality that MySQL Maestro exposes also comes a price. As of this writing, the single non-commercial license of MySQL Maestro sells for about $70. Not bad considering the enterprise-level features it provides. Even if you don't have $70 handy, you can download a free 30-day trial edition that will get you up to speed when working with the examples in this section. To download and install the free 30-day trial edition of MySQL Maestro, follow these steps: 1. | Open a browser and navigate to http://www.sqlmaestro.com/products/maestro/download.html.
| 2. | Click the Download button for the MySQL Maestro executable file. You are prompted to save the file to your computer. Do so now.
| 3. | Locate the ZIP package on your computer and extract the MyMaestro.exe file from it.
|
That's it! You're now ready to begin using MySQL Maestro. To connect to your database using MySQL Maestro, follow these steps: 1. | Double-click the MyMaestro.exe file to open MySQL Maestro.
| 2. | Select the Manage Existing Database option from the Getting Started menu. The Create Database Profiles Wizard appears.
| 3. | Enter your Host name, User name, and Password in the text boxes provided and click Next similar to Figure 24.8.
Figure 24.8. Connect to your local instance of MySQL using the Create Database Profiles Wizard. 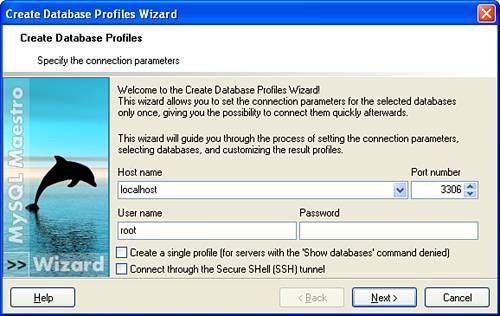
| 4. | Choose the Dorknozzle database from the Available Databases list and click the single-arrow icon to move the Dorknozzle database over to the Selected Databases list similar to Figure 24.9. Click Next.
Figure 24.9. Select the Dorknozzle database and move it over to the Selected Databases list. 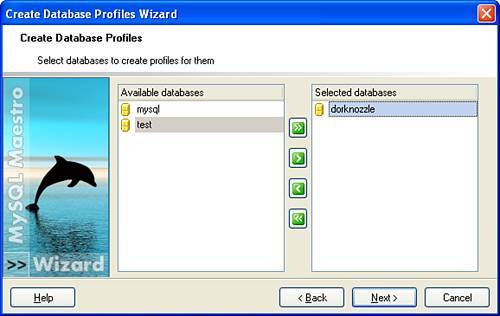
| 5. | Click Ready to begin managing your database.
|
Now that you've entered the necessary credentials to begin working with the Dorknozzle database using MySQL Maestro, you can work with the Query Builder. To work with the Query Builder, follow these steps: 1. | Right-click the Dorknozzle instance in the database list and choose Connect to Database similar to Figure 24.10. A connection to the Dorknozzle database is established.
Figure 24.10. Choose the Connect to Database option to establish a connection to the Dorknozzle database. 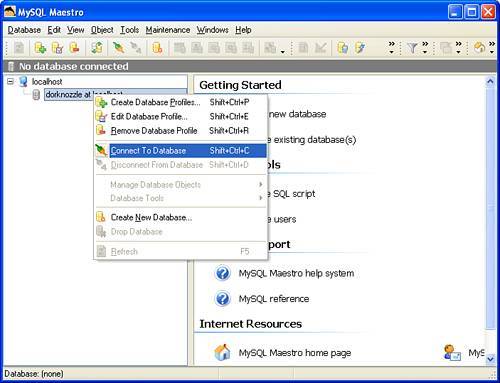
| 2. | To work with the Query Builder, right-click the Dorknozzle database option in the database list and choose the Visual Query Builder option from the Database Tools submenu, similar to Figure 24.11. The Query Builder opens with the Diagram tab selected.
Figure 24.11. Choose the Visual Query Builder option from the Database Tools submenu. 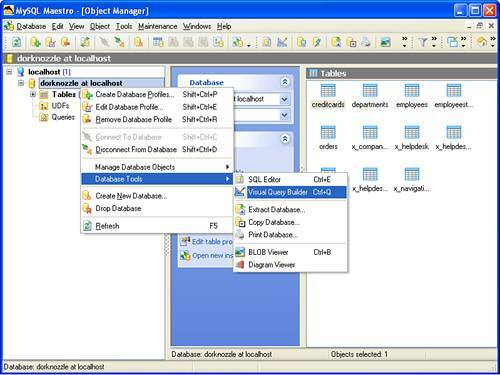
| 3. | To begin building a visual query, right-click the Diagram window and choose the Add Table(s) option similar to Figure 24.12. The Add Tables dialog appears.
Figure 24.12. Choose the Add Table(s) option by right-clicking the Diagram window. 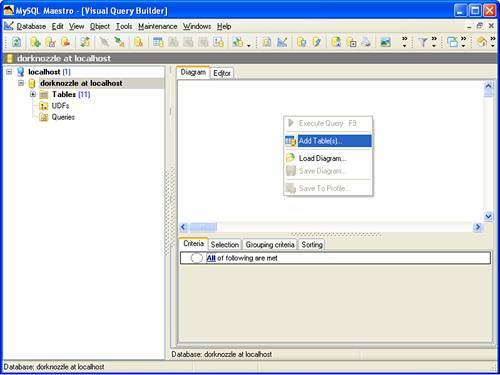
| 4. | Select both the CreditCards and Employees tables from the Add Tables list and click OK. The two tables are added to the diagram.
| 5. | To create a query that joins the Employees table and the CreditCards table based on their EmployeeID fields, we must first establish a relationship between the EmployeeID primary key in the Employees table and the EmployeeID foreign key in the CreditCards table. To do this, simply click, hold, and drag the EmployeeID field from the Employees table into the EmployeeID field in the CreditCards table. As you can see from Figure 24.13, a line is added to the diagram that represents the relationship between the two tables.
Figure 24.13. Drag the EmployeeID field from the Employees table into the EmployeeID field in the CreditCards table to establish a relationship. 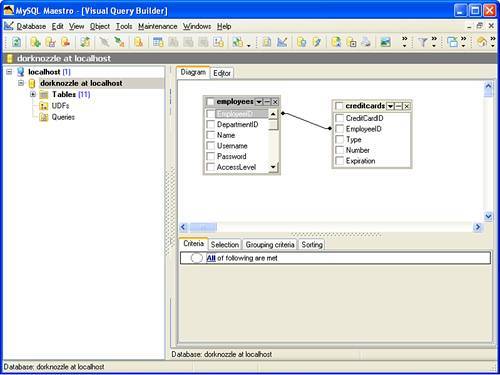
| 6. | Choose the fields (by clicking the check boxes) you want to include in the query. When finished, the result appears similar to Figure 24.14.
Figure 24.14. Choose the fields to include in your query by clicking the check boxes for each table. 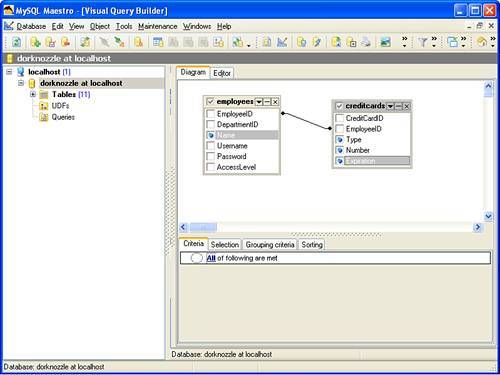
|
To run the query and see the results within a spreadsheet view, right-click the Diagram window and choose Execute Query. The result of the query is presented in a datasheet view similar to Figure 24.15. Figure 24.15. Run the query by right-clicking the Diagram window and choosing Execute Query. The result is presented to you in a spreadsheet view. 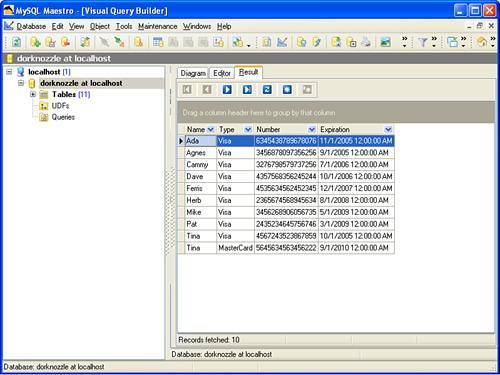
Of course, the benefit to using the Query Builder is that we can copy the SQL code and potentially use it in Dreamweaver. To do this, choose the Editor tab. As you can see from Figure 24.16, MySQL Maestro generates the necessary SQL code for the query. Figure 24.16. Select the Editor tab to see the SQL code that MySQL Maestro generates for the built query. 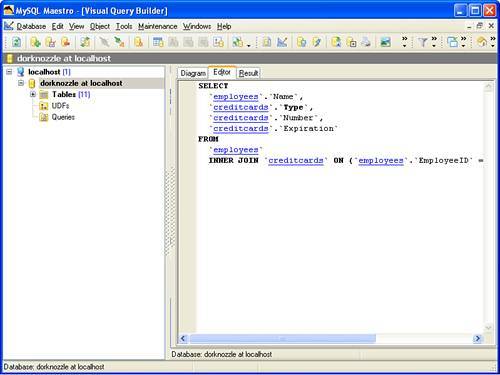
|