Monitoring ISA Server
|
| < Day Day Up > |
|
You can use the monitoring functions of the ISA Server to create and view reports on the usage and statistics of ISA Server, as well as to view alerts about the functioning of the server.
Reporting
ISA Server supports a number of reports, but before you can use any of them, you need to set up Monitoring Configuration on the ISA Server. Once you have configured monitoring, you can view reports or save the information to a Microsoft Excel workbook for additional reporting and manipulation.
Monitoring
To configure monitoring, complete the following steps:
-
In the ISA Management console tree, click Monitoring Configuration. Right-click Report Jobs, select New, Report Job from the shortcut menu to open the Report Job Properties dialog box, shown in Figure 16-31.
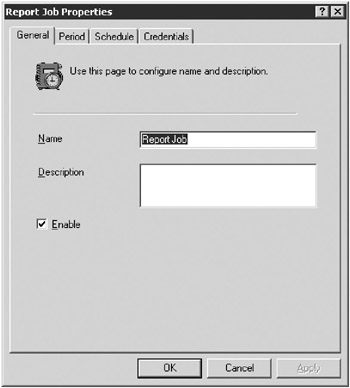
Figure 16-31: The General page of the Report Job Properties dialog box. -
On the General page, type a name and a description for the new report job, and select the Enable check box.
-
Click the Period tab and choose whether the report is a Daily, Weekly, Monthly, or Yearly report. You can also create a custom period for the report.
-
Click the Schedule tab to create a schedule for this report. The default is an immediate report that isn’t repeated. If you want a daily report, make sure you change the recurrence pattern to Generate Every Day, as shown in Figure 16-32.
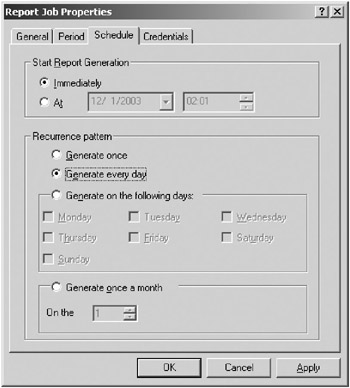
Figure 16-32: Selecting Generate Every Day for a daily report. -
Click the Credentials tab, and type the user name and password information that will be used to generate the report. This should be an administrative account.
-
After you make all your selections, click OK. If you specified immediate report generation, the report is generated now; otherwise, it will be generated when you scheduled it to run.
Report Period vs. Report Schedule
One of the most confusing aspects of reports is the difference between the period of the report and the schedule that the report runs on. The period is the length of time that the report covers—daily, weekly, monthly, or yearly. You specify the time period for the statistics that the report will cover. The schedule is the frequency with which the report is generated. These two might well line up, but they don’t really have to. For example, you might want a monthly report that covers the usage over the last year so that you can easily track trends. In this case, you’d set the period for the report job to yearly, but set the schedule to generate the report once a month.
Viewing a Report
To view a report, complete the following steps:
-
In the ISA Management console tree, open Monitoring and then Reports. There are five report types listed: Summary, Web Usage, Application Usage, Traffic & Utilization, and Security.
-
Click the type of report you want to see, and then in the details pane, double-click the Report Job that you want to view. The report opens in Internet Explorer, as shown in Figure 16-33.
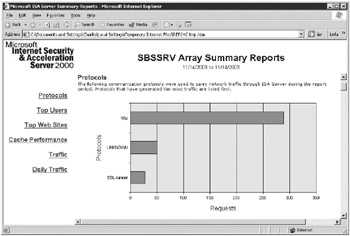
Figure 16-33: A daily Summary report for SBSSRV showing the protocols used in the last 24 hours.
Saving a Report to Excel
To save the report information to an Excel workbook, complete the following steps:
-
In the ISA Management console tree, open Monitoring and then click Reports.
-
Right-click the Report Job you want to save and select Save As to save the report to an Excel file.
Sessions
You can use the ISA Management console to view the current ISA Sessions on your network. You can also disconnect sessions if necessary.
To view the current sessions, complete the following steps:
-
In the ISA Management console tree, open Monitoring and then Sessions. You see a list of the current sessions in the details pane, as shown in Figure 16-34.
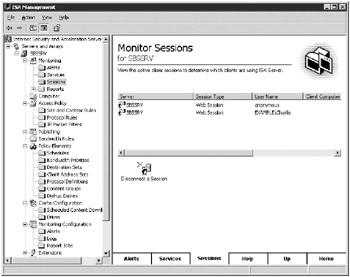
Figure 16-34: Monitoring the ISA sessions of server SBSSRV. -
If you want to disconnect a session, select it and click Disconnect A Session.
Alerts
ISA Server comes with more than 40 alerts that are monitored. These include intrusion attempts, startup, shutdown, and status of various parts of the ISA Server. Most of these are automatically enabled during the initial configuration of ISA Server with a default action of reporting to the Event Log. You can configure additional actions, enable or disable various alerts, change the events that trigger the alert, or create custom alerts.
Viewing Current Alerts
To view any current alerts, or alerts that haven’t been reset, complete the following steps:
-
In the ISA Management console tree, open Monitoring and then click Alerts. You’ll see a list of alerts in the details pane, as shown in Figure 16-35.
-
If you want to reset an alert, select it and click Reset Alert.
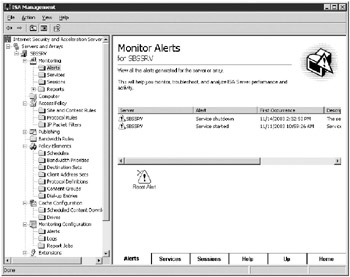
Figure 16-35: The current ISA Server alerts on SBSSRV.
Enabling or Disabling an Alert
To enable or disable an alert, complete the following steps:
-
In the ISA Management console tree, open Monitoring Configuration and then click Alerts.
-
Select the alert you want to enable or disable in the details pane. If the alert is currently disabled, the alert icon will include a red down arrow, as shown in Figure 16-36.
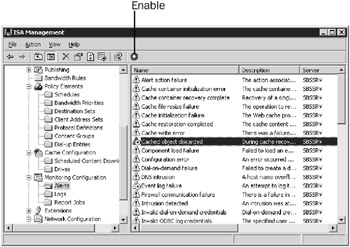
Figure 16-36: The cached object’s discarded alert, currently disabled. -
To enable an alert that is currently disabled, click the Enable button (green up arrow) on the toolbar.
-
To disable an alert that is currently enabled, click the Disable button (red down arrow) on the toolbar.
Creating a New Alert
To create a new alert, complete the following steps:
-
In the ISA Management console tree, click Monitoring Configuration.
-
Right-click Alerts, select New, Alert from the shortcut menu to open the New Alert Wizard.
-
Type a name for this alert and click Next.
-
On the Events And Conditions page, select the type of event that will trigger the alert from the Event drop-down list, as shown in Figure 16-37. If there are additional conditions associated with the event, select the conditions that control the trigger. Click Next.
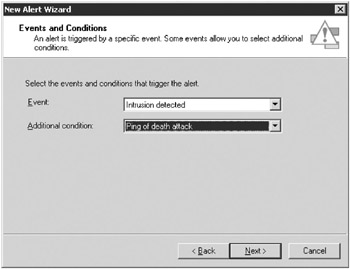
Figure 16-37: Adding an event and the additional conditions that trigger the alert. -
On the Actions page select the actions that will be taken when the alert is triggered, as shown in Figure 16-38. Click Next.
-
If you selected an e-mail action, you are prompted to fill in the details of the e-mail server and accounts, as shown in Figure 16-39.
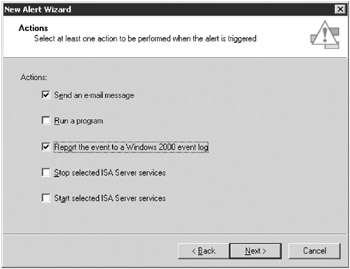
Figure 16-38: Selecting the actions that will be triggered by the alert.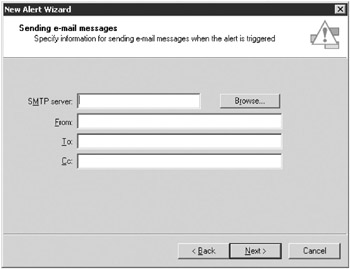
Figure 16-39: Specifying the SMTP server and the accounts to use for the e-mail event. -
If you selected a program action, you are prompted to fill in the details of the program, as shown in Figure 16-40.
Tip You can use the program action to handle actions that aren’t easily configured using the New Alert Wizard by itself. For example, you can run a script to execute a complicated action or send e-mail that requires more advanced configuration.

Figure 16-40: The Running A Program page of the New Alert Wizard. -
If you selected a stop service action, you’ll see the Stopping Services page that lets you select which ISA Server services you want to stop. If you want to stop other services not part of ISA Server, you’ll need to use a program action to run a script that stops those services.
-
If you selected a start service action, you see the Starting Services page that lets you select which ISA Server services you want to start. If you want to start other services not part of ISA Server, you need to use a program action to run a script that starts those services.
-
Click Next on the action pages as necessary. You get a final summary page of the new alert that will be created. Review the settings and then click Finish to create the alert. If an error is displayed indicating that ISA Server cannot save the new object, an alert with the same settings might already be defined.
Modifying an Alert
To modify an existing alert, complete the following steps:
-
In the ISA Management console tree, open Monitoring Configuration and then Alerts.
-
In the details pane, double-click the alert you want to modify. The Properties dialog box opens.
-
Click the Events tab, as shown in Figure 16-41.
-
Change the events, conditions, number, or frequency of events necessary to trigger the alert, or change when the recurring actions are performed.

Figure 16-41: Changing the details of which and how many events trigger an alert. -
Click the Actions tab to modify the actions that will be taken when an alert is triggered.
-
Click OK when you complete your changes to the alert.
|
| < Day Day Up > |
|
EAN: 2147483647
Pages: 224