Using the Type Tools
To generate text, choose the Type tool ![]() , click the point in the image where you want the text to appear, and enter the text from the keyboard. You can preprogram the Type tool prior to entering the text by entering values in the Options bar or in the Character or Paragraph palettes, or you can highlight the text after it has been entered and modify its specifications.
, click the point in the image where you want the text to appear, and enter the text from the keyboard. You can preprogram the Type tool prior to entering the text by entering values in the Options bar or in the Character or Paragraph palettes, or you can highlight the text after it has been entered and modify its specifications.
Use these functions to modify text:
-
To highlight text so that it can be edited, click in front of it and drag over it.
-
To select a word, double-click it.
-
To select a line of text, triple-click it.
-
To select all characters in a bounding box, quadruple-click anywhere in the box, or press
 /Ctrl-A (Select All).
When you select or format text on a Type layer, the Type tool shifts into edit mode. Before you can perform other operations, you must commit the changes by clicking the check mark or pressing Enter/Return, or cancel by clicking the Cancel icon or pressing Esc.
Choosing Horizontal or Vertical Type
There are four variations of the Type tool to choose from in the Type Tool cluster, as shown in Figure 8.6.
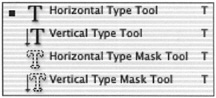
Figure 8.6: The Type Tool cluster
At the top is the basic Type tool, or Horizontal Type tool, which you ll use most of the time; it generates a Type layer. The variation immediately below it, the Vertical Type tool, generates a column of vertical characters, as seen in Figure 8.7. It too, creates a Type layer. Next are the Horizontal and Vertical Type Mask tools, which do not generate Type layers but instead produce a selection marquee in the shape of the specified character. When you enter text with these tools, it appears as a red mask until you commit the type. They can be used for generating type on existing layers or for pasting visual elements into the type to produce interesting type/image combinations, as shown in Figure 8.8.
Figure 8.7: Text generated with the Vertical Type tool

Figure 8.8: An image pasted into a type mask
| Note | All of the type on a layer must be either vertical or horizontal. |
Setting Type Characteristics
You can use the Type tool Options bar, shown in Figure 8.9, to set type characteristics.
Figure 8.9: The Type tool Options bar
The Options bar displays these type characteristics:
Orientation The icon to the right of the Type tool Preset picker toggles between a horizontal and a vertical orientation of type.
Font Choose a font and style from the menus .
Size Choose a size in points from the list or enter a numeric value.
Anti-Alias This setting determines how the type blends into its background in varying degrees. The None option produces a jagged character; Strong makes a heavier character; Crisp, a sharper character; and Smooth, a softer character.
Alignment From the Options bar you can align either flush left, centered, or flush right. The type aligns to the insertion point. When the type is vertically oriented, the top, center, or bottom of the text aligns to the insertion point. To justify type, use the Paragraph palette discussed later in the chapter.
Color Click the swatch and select a fill color for the type from the Color Picker.
Warp Text You can place your text on a path , twist it, or bend it by using this function (see Warping Text later in this chapter).
Character/Paragraph This icon opens the Character and Paragraph palettes, where you can enter global specifications for your text.
Commit/Cancel After you input your type specs , click one of these buttons ![]()
![]() to commit the edit or to cancel it.
to commit the edit or to cancel it.
Entering Type in a Bounding Box
There are three ways of entering type in Photoshop: from a point, on a vector path, or within a bounding box as a paragraph. The bounding box lets you control the flow of text (see Figure 8.10). As you enter text in the bounding box, it automatically inserts a soft return at the end of each line. After the bounding box has been drawn and the type entered, you can size the box to reflow the text by dragging its corner handles.
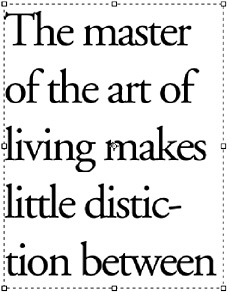
Figure 8.10: A bounding box around paragraph text
To enter text in a bounding box, follow these steps:
-
Choose the Type tool.
-
Click in your image and drag to the size you want the bounding box to be. Release the mouse, and the bounding box appears.
-
Set your type specifications in the Options bar and enter the text.
-
If needed, readjust the size of the bounding box by dragging any of the corner or side points.
| Note | You can convert point text to paragraph text and vice versa. Target the Type layer and choose Layer ’ Type ’ Convert To Point Text or Convert To Paragraph Text. You can also convert the type to a work path or a shape (see Chapter 9 to learn more about paths). |
Placing Type on a Path
| New | This new feature lets you place type on a preexisting vector path as you would formerly have done in a program such as Adobe Illustrator, Macromedia FreeHand, or CorelDRAW. (See Chapter 9, Drawing Paths, to learn more about paths.) The cross at the beginning of the text is the entry point or the leftmost extremity of the text. The circle at the end of the text is the rightmost extremity . A cross will appear in this circle to indicate that there is text that has over flowed and is not visible. These elements can be moved to alter the position of the text on the path. These two elements also determine the alignment of the text when a specific alignment option is applied. |
To enter type on a path, follow these steps:
-
Draw either a shape layer or a path by using the Pen tool or any of the shape tools.
-
Choose any variation of the Type tool
 . Click on the path or on the outside of the shape. Enter the text as in Figure 8.11.
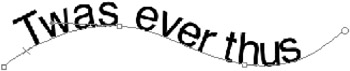
Figure 8.11: Type on a curved path -
If you want to move the text along the path or to the inside of the shape, choose the Path Selection tool
 . Click on the cross at the beginning of the text or the circle at the end of the text, depending on the alignment, and drag it into the desired position as in Figure 8.12.
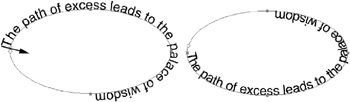
Figure 8.12: Moving type into a shape
EAN: 2147483647
Pages: 355