Creating and Applying Actions
When a multimillion-dollar Hollywood movie is produced, everybody involved in the production, including the director, actors, and cinematographer, follows a script. A script is simply written dialog with accompanying directions. Just like the movies, computers also use scripts. Unlike actors, however, computers never ad-lib; they follow the script to the letter! When you record an Action, you are actually writing a script that tells the software what sequence of operations to perform. Fortunately, recording a script for Photoshop is a lot easier than writing a script for a movie.
Almost any single operation or sequence of operations can be recorded into an Action, except for some of the manual tools such as the Airbrush and Paintbrush. You can program an Action to select the Paintbrush, but you can t create an Action to paint with that brush. Likewise, the zoom tools, window commands, and view commands cannot be recorded. The tools from which you can record an Action are the Marquees, Polygon, Lasso, Magic Wand, Crop, Slice, Magic Eraser, Background Eraser, Gradient, Paint Bucket, Type, Shape, Note, Color Sampler, Healing Brush, and Patch. You can record many of the menu commands and you can insert many menu commands that can t be recorded.
Before you record an Action, envision the end product first. Try to imagine what you want the image to look like. Then ask yourself what processes need to be applied to accomplish that end. It s also a good idea to walk through and test the steps before recording them.
As you will see, Actions are flexible. You can create a sequence of Actions and then apply a single Action from the sequence to your image. Or you can apply the same Action with different settings to the image.
Understanding the Actions Palette
Actions are recorded and played in the Actions palette, shown with its pull-down menu in Figure 23.1. Choose Window ’ Actions to access the palette. When you first open the palette, you see a set called Default Actions.atn. A set is simply a folder in which groups of Actions are stored. Every Action must be contained within a set.
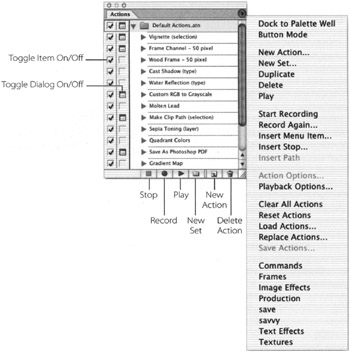
Figure 23.1: The Actions palette with its pull-down menu
Expand the Default Actions set by clicking its down arrow. You ll see a list of Actions that Adobe includes with Photoshop. Actions are applied to the image in sequence from top to bottom. When a check mark appears in the Item On/Off box (in the far-left column of the palette) next to an Action or set s name , it will be applied to the image when played. If the item isn t checked, the Action will be skipped . By checking or clearing the Item On/Off boxes, you can determine which Actions will be applied in a sequence. When the Dialog On/Off box (in the second column of the Actions palette) is checked, the Action will pause to display a dialog box so that you can change the settings.
The pull-down menu provides commands to save, load, duplicate, and create new Actions and sets. Button mode displays a button interface on the Actions palette; in this mode, you simply click an Action s name to run it with the default or existing settings. The bottom section of the Actions pull-down menu provides many additional default Actions. Just click one of these Actions to load it in the Actions palette. Experiment with the default Actions and get to know their capabilities.
| Note | Actions can be nested within other Action sets; you ll notice that the Actions inside the Default Actions set have, in turn , substeps . These are also Actions, but for clarity, I ll refer to these sub-Actions as operations within an Action . |
Applying an Action Step by Step
To see how the Actions palette applies commands to an image, try running one of the Default Actions. In this exercise, you ll create a cameo vignette of an image:
-
Open the toddler.psd file in the ch23 folder on the Photoshop CS Savvy CD. Duplicate the file (Image ’ Duplicate) and save the copy to your disk.
-
Choose the Elliptical Marquee
 . Place your cursor on the center of the image. Click Option (Mac) or Alt (Win), and drag to generate an elliptical selection from a center point (see Figure 23.2).
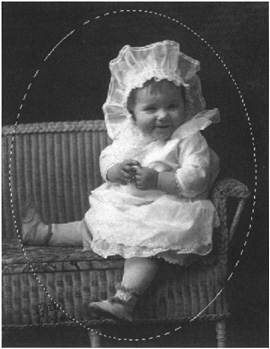
Figure 23.2: The toddler, selected -
Expand the Default Actions set. Target the Vignette Action and expand it to display the sequence of operations contained within the Action (see Figure 23.3).
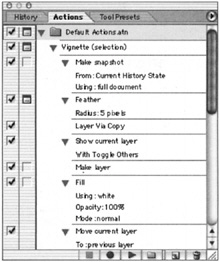
Figure 23.3: The Vignette Action and its operations -
You will use the default settings, so click each of the Dialog On/Off icons
 in the second column on the left, to turn off each one.
 -
Target the Vignette Action and click the triangular Play button
 at the bottom of the Actions palette. When the Action has finished running, the image should look like Figure 23.4.
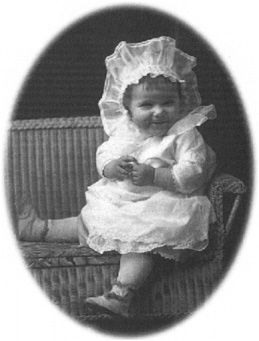
Figure 23.4: New Set dialog box
Recording an Action
Of course, you can create your own Actions and apply them to images. You can name, color-code , and specify a function key for an Action so that all you have to do is press the key to apply it. You ll go through making an Action step by step as you perform a tonal adjustment, eliminate moir patterns, convert, and colorize an image. You ll work on two images cut from an old yearbook. Here are the steps:
-
Open the file Becky_1964.psd from the ch23 folder on the CD.
-
Choose Window ’ Actions. From the pull-down menu, choose New Set. Name the set Yearbook Photos , as in Figure 23.5.
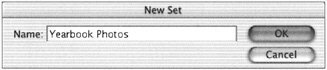
Figure 23.5: New Set dialog box -
From the pull-down menu, choose New Action. In the dialog box, name the Action Becky (see Figure 23.6). From the Function Key list, choose F2. Click the Record button
 in the dialog box. The record button
  at the bottom of the actions palette turns red to remind you that your next steps will be recorded.
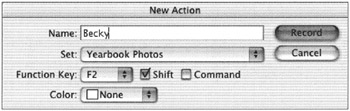
Figure 23.6: New Action dialog box -
Choose Image ’ Adjustments ’ Levels. Drag the Black Shadow slider until the value in the box reads 10. Drag the White Highlight slider to 189 and the Gray Midtone slider to 1.34. Click OK.
-
Choose Filter ’ Blur ’ Gaussian Blur, and set the Radius to 1.0 to eliminate the moir pattern.
-
Choose Filter ’ Sharpen ’ Unsharp Mask and set the following values: Amount: 66%, Radius: 3.4 pixels, Threshold: 2 levels.
-
Choose Image ’ Mode ’ RGB Color to convert the image so that you can colorize it.
-
Choose Image ’ Adjustments ’ Hue/Saturation and check Colorize. Enter 239 for the Hue, 12 for the Saturation, and 0 for the Lightness. Click OK.
-
Click the Stop Recording button
 . The Actions palette should look like Figure 23.7, and the image should look like the after version in Figure 23.8. You ll use this recorded set throughout this chapter.
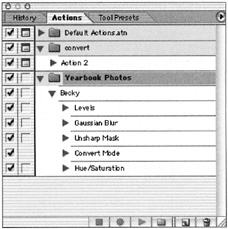
Figure 23.7: The Actions palette with the Yearbook Photos Actions set and the Becky Actions
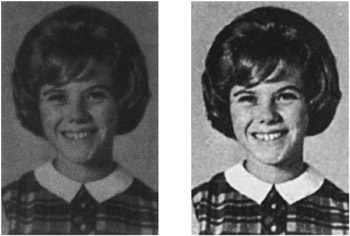
Figure 23.8: The Becky 1964 yearbook image before (left) and after (right) the Yearbook Photos set was applied
| Note | Watch out ”you need to exercise caution when recording. Remember that almost anything you do is being recorded. If the image does not appear the way you want it to or if you make a mistake, stop recording, drag the Action or Action Set step to the trash, and rerecord it. |
Applying Actions to Another Image
Obviously, the main purpose of using Actions is to repeat a command or series of commands. But because the settings often need to be readjusted to achieve good results on a different image, you can stop the Action during the process of applying it. In this exercise, you ll apply the Actions recorded in the preceding section to a second image, which will require that you change some of the settings as the Action is playing.
-
Open Becky_1965.psd from the ch23 folder on the CD.
-
In the Actions palette, click the Dialog On/Off icons (in the second column) next to Levels, Gaussian Blur, and Unsharp Mask to turn them on, so that the Action will pause and present the operation s dialog box. You can make the necessary changes to accommodate the different image and then continue to run the Action.
-
Target the Becky Action and press Shift-F2. The Play button turns red, and the Action begins to play.
-
As the Action runs, enter new values in the dialog boxes as they appear. Levels: 15 for the shadow and 220 for the highlight; Gaussian Blur: 0.8; Unsharp Mask: 47% for the Amount, 2.9 pixels for the Radius, and 4 levels for the Threshold. Click OK in each box. The new settings are applied, and the Action continues to run. The Convert Mode and Hue/Saturation operations are applied without interruption. The image will look like Figure 23.9.

Figure 23.9: The Becky 1965 image, before (left) and after (right) the Becky Actions have been applied
Inserting a Stop
You can pause any Action in order to perform a task that is not recordable, such as painting a stroke with the Paintbrush. To insert a stop:
-
Select the Action or operation at the end of which you want to insert the stop.
-
Choose Insert Stop from the Actions palette menu.
-
In the dialog box that appears, type a message that reminds you what to do manually (see Figure 23.10). Check the Allow Continue box if you want to display a dialog box that lets you choose to stop or continue. Click OK.
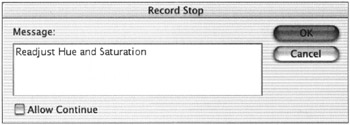
Figure 23.10: Record Stop dialog box
Undoing an Action
Because an Action is a sequence of operations, choosing Edit ’ Undo or pressing ![]() -Z (Mac) or Ctrl-Z (Win) will undo only the last operation in the sequence, not the entire Action. Instead, press
-Z (Mac) or Ctrl-Z (Win) will undo only the last operation in the sequence, not the entire Action. Instead, press ![]() -Option-Z or Ctrl-Alt-Z as many times as necessary to step backward through the operations. You can also undo a sequence of Actions by clicking the state in the History palette just above the first applied state of the Action.
-Option-Z or Ctrl-Alt-Z as many times as necessary to step backward through the operations. You can also undo a sequence of Actions by clicking the state in the History palette just above the first applied state of the Action.
| Note | As some actions contain many more than 20 steps (the default number of history states), it s a good idea to take a snapshot before running the action. |
Saving and Loading an Action
After you ve compiled a series of operations into an Action, you ll want to save the Action to your disk. From the Actions palette, choose Save Actions with the Action set targeted . Then choose a destination on the disk. Add the extension .atn to the Action s name. (Even Mac users should do this, both to anticipate platform problems and to identify the file as an Action.) To load an Action, choose Load Action from the pull-down menu and locate the file where you saved it.
| Note | Actions must be saved and loaded in sets. |
Controlling the Speed of an Action
The Playback Options dialog box (accessed from the Actions palette menu) lets you control how fast an Action is played. Choosing Accelerated plays the Action as quickly as possible (see Figure 23.11). Step By Step waits until the Action is finished and the image redrawn before playing the next Action. Pause For lets you enter a number of seconds between operations within an Action.
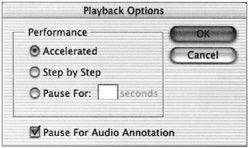
Figure 23.11: Playback Options dialog box
Editing, Moving, and Discarding an Action
You can edit the settings of an operation within an Action when it s not running by double-clicking its name in the Actions palette. A document must be open (although you can insert a stop with no document open). The operation s dialog box appears so you can change the settings. The next time you run the Action, the new settings will be applied.
Actions can be repositioned in the stack. An Action s position in the stack can greatly affect the final outcome of the image. To reposition an Action, click and drag it within the Actions palette; release the mouse when it s positioned in the desired location.
To discard an Action, drag it to the trash icon in the Actions palette.
Inserting Unrecordable Commands
Some menu items that cannot be recorded as Actions can be inserted at the end of an Action. To insert a menu item:
-
Target an Action in the Actions palette by clicking it.
-
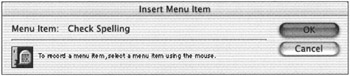
Choose Insert Menu Item from the Actions palette menu.
-
With the Insert Menu Item dialog box displayed, choose a command from the menu at the top of the screen.
| Note | Image Ready CS now features Conditionals, actions that bring the power of limited logic to choose whether an action step is performed. See Chapter 25. |
EAN: 2147483647
Pages: 355