| Grouping two or more objects connects those objects with an additional node, called group(n) (Figure 6.3); you use this node when you want to perform an action to both objects, such as moving them at the same time. Even though the objects are grouped, you can still select one and move or perform an action on it without affecting the other objects in the group. Alternatively, you can select the group node and have your actions affect the grouped objects as if they were a single object (Figure 6.4). Figure 6.3. The top node is used to change values of the entire group without changing the current values of the individual objects. 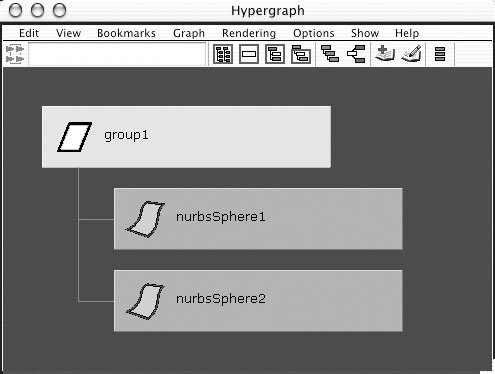
Figure 6.4. Rotating the group node rotates all the surfaces in the group at the same time around the group's pivot point. 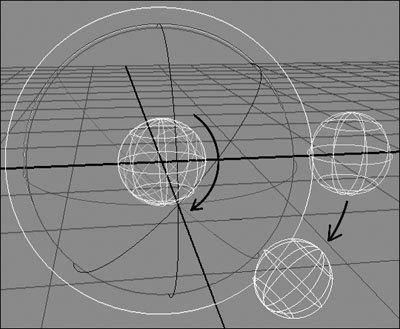
To group two or more objects together: 1. | Marquee-select two or more surfaces with the Arrow tool (Figure 6.5), or  -click to select multiple objects. -click to select multiple objects.
Figure 6.5. You can drag a marquee to select multiple surfaces. The marquee only needs to touch a part of the surface. 
| 2. | Choose Edit > Group (Figure 6.6), or press  . .
Figure 6.6. Select Edit > Group to group objects together. 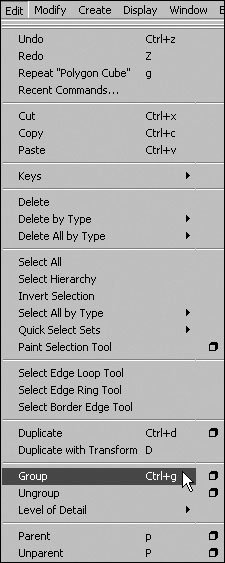
The objects are grouped together with an additional node.
| | | 3. | Choose Window > Hypergraph.
The Hypergraph opens in a new window.
| 4. | Press  to zoom the Hypergraph to the selection. to zoom the Hypergraph to the selection.
There is now one more node than the number of objects. This additional node is the group node, named group [n] (Figure 6.7).
Figure 6.7. The top node is created at the same time the group is created. You use it to control the nodes beneath it. 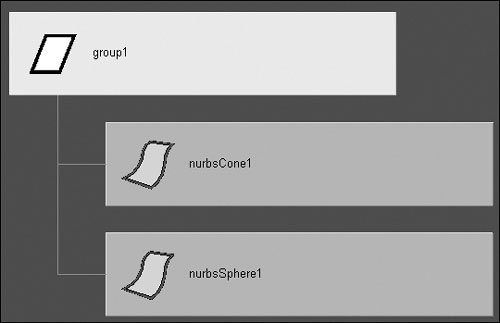
|
 Tips Tips
You can select the group node and set the Pick mask to hierarchy mode to move the grouped objects together, or you can select a surface's node and set the Pick mask to object mode to move that surface separately from the group. An object can only be part of one group at a time.
To ungroup an object: 1. | Select the group node. You can find it in the Hypergraph (Figure 6.8).
Figure 6.8. The group node's default name is group[n], with n representing the number of groups created so far. 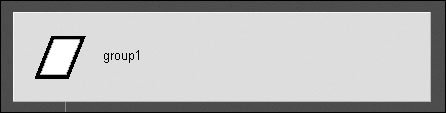
| 2. | Choose Edit > Ungroup (Figure 6.9).
Figure 6.9. Select Edit > Ungroup to pull objects out of the group. 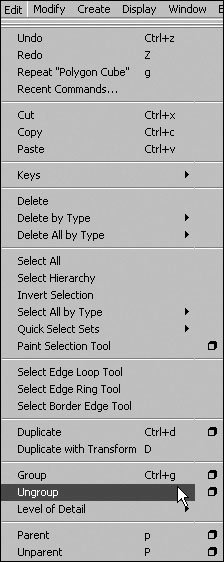
The geometry is no longer grouped, and the group node is deleted.
|
Groups and the Outliner The Hypergraph shows the actual node hierarchy, but it can be unwieldy to use for everyday selections. You can also use the Outliner to display, select, and ungroup your objects. To use the Outliner to manipulate groups: 1. | Choose Create > Polygon Primitives > Cube.
Repeat this step three times so you have three cubes.
| | | 2. | Choose Window > Outliner.
You can see the three cubes sitting at the scene level, which means they haven't been grouped or parented to anything (Figure 6.10).
Figure 6.10. Items not in a hierarchy are displayed on the same far-left level in the Outliner, whereas grouped items are shifted right a notch. 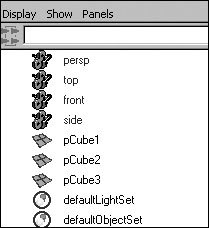
| 3. | Select all three cubes, and press to group them.
The cubes are placed under the group node named group1 (Figure 6.11).
Figure 6.11. Items that are grouped are placed under their group name. You may need to expand the group by clicking the plus sign. 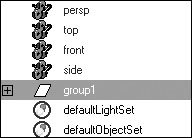
| 4. | Click the plus next to group1 in the Outliner to expand the group and show its contents.
You're now able to see the cubes. You can select them by clicking them here, rather than clicking in the view or Hypergraph.
| 5. | Click pCube1 with the middle mouse button, and drag up. Don't release the mouse button.
A gray line appears, to indicate where you'll reposition the cube in the hierarchy if you let go of the mouse (Figure 6.12).
Figure 6.12. A single gray line appears, to indicate the insertion spot for the object. 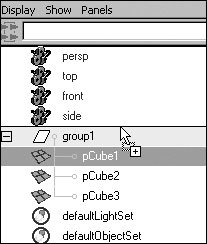
| 6. | Position the line between the group1 node and the side camera, and release the mouse button.
The cube is removed from the group (Figure 6.13). You can also place items into a group in a similar manner by dragging them onto the group in the Outliner.
Figure 6.13. Place an object in any group by dragging and dropping. 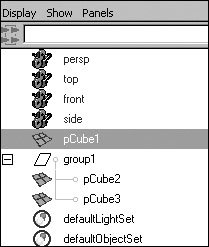
|
Tip
You can easily select a group node or move through objects in a group by using the arrow keys. This technique is helpful if the Outliner is closed, or if you have nested groups and wish to quickly select the group directly above without moving to the Outliner. To move within the hierarchy using the arrow keys: 1. | Start with the cubes from the previous task.
| 2. | Select pCube3, and press  . .
The selection moves up in the hierarchy, and the group is selected (Figure 6.14).
Figure 6.14. On the left, pCube3 is selected. After you press , pCube3 becomes deselected and the whole group is selected. 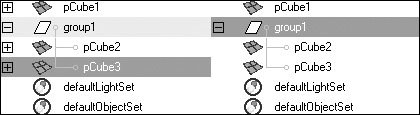
| 3. | Press  . .
The selection moves back into the group, so pCube2 is selected (Figure 6.15).
Figure 6.15. moves the selection into the next available branch down the hierarchy; in this case, it selects pCube2. 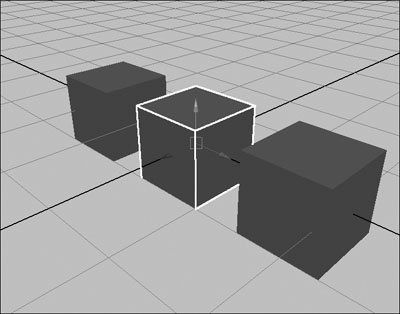
| 4. | Press  . .
pCube3 is selected again (Figure 6.16).
Figure 6.16. Using  and cycles through the objects within your group. and cycles through the objects within your group. 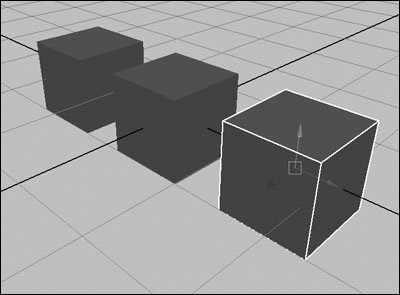
|
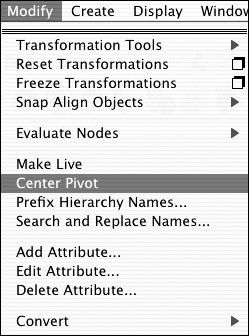
Transforming groups Once objects are grouped together, they can be translated, rotated, or scaled as if they are a single object. Maya creates an extra group node to give you an additional pivot point to use as the center point the objects rotate or scale around. When an object is grouped, the pivot point of the group node is placed at the origin. You can then move the pivot point anywhere in the scene to determine its rotation and scale center point. To translate, rotate, or scale a group: 1. | Select the group node in the Hypergraph or Outliner, or click one of the grouped objects with the Pick mask set to hierarchy mode  to select the group node. to select the group node.
| 2. | Select the Rotate, Scale, or Move tool in the toolbar, or use its respective hotkey.
| 3. | Press  to go into pivot-point edit mode. to go into pivot-point edit mode.
| 4. | Move the pivot point to the position you want the group to rotate around or scale from (Figure 6.17).
Figure 6.17. The group node's pivot point is used as the center point for the entire group. New groups start with their pivots at the origin. 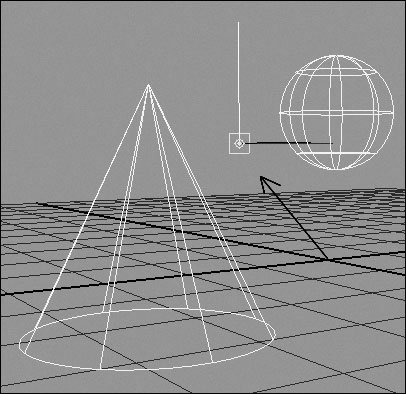
You can ignore this step if you're just translating the object.
| 5. | Press to get out of pivot-point edit mode.
| 6. | Translate, rotate, or scale the group by selecting a manipulator's axis and dragging left or right in the pane with the middle mouse button to change the axes' value (Figure 6.18).
Figure 6.18. You translate, rotate, or scale a group the same way you do an individual object. 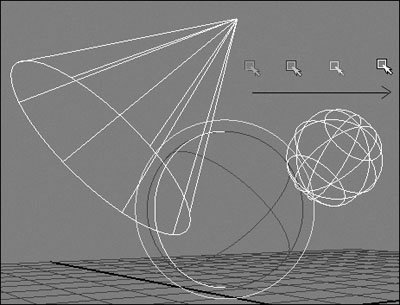
|
Tip
|