| Maya provides duplication shortcuts for modeling objects with repetitive geometryfor example, a staircase or flower petals. To model a flower in a minimum number of steps, you could make one petal, and then reproduce it many times around the center (Figure 4.38). Figure 4.38. This flower was made with two objects and one duplication, which placed the petals around the center. 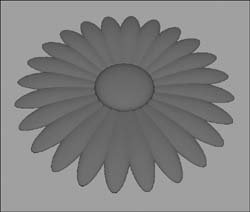
You can use the Duplicate tool for simple object duplications as well as for more complex duplications, including ones that apply changes to the rotation, translation, and scale of an object. You can also use the Duplicate tool to mirror and create instances of objects. You can duplicate objects either with or without their Inputs or History nodes (Figure 4.39). (See Chapter 1, "Maya Basics," for more information on construction history.) It's important to note, however, that history duplication is set to off by default. Figure 4.39. The sphere's Inputs node holds its editable history attributes. 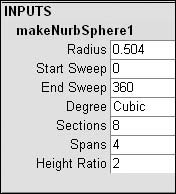
To duplicate an object: 1. | Select an object.
| 2. | From the Edit menu, select the box next to Duplicate (Figure 4.40).
Figure 4.40. From the Edit menu, select the box next to Duplicate to open the Duplicate Options dialog box. 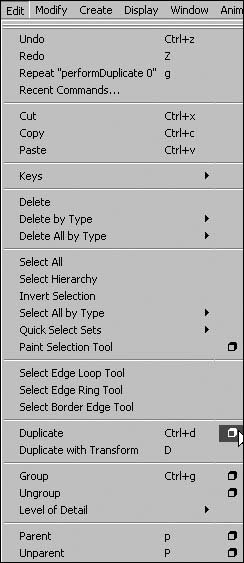
The Duplicate Options dialog box opens.
| | | 3. | Enter the number of duplicates desired in the Number of Copies field (Figure 4.41.
Figure 4.41. Enter the number of duplicates desired in the Number of Copies field. 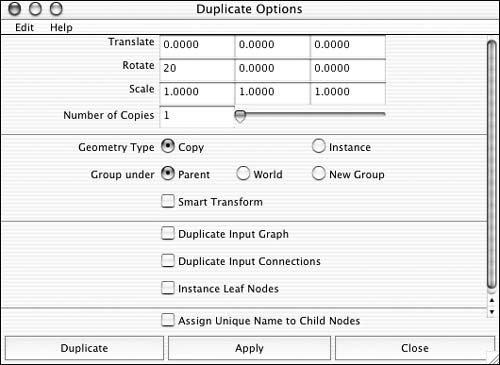
| 4. | Click Duplicate.
The specified number of copies are duplicated and placed on top of each other.
|
To duplicate an object with rotation: 1. | Select an object.
| 2. | From the Edit menu, select the box next to Duplicate.
The Duplicate Options dialog box opens.
| 3. | Select a rotation amount for each additional copy, and type that amount in the Rotate field of the axis you want to rotate around (Figure 4.42). The fields are, left to right, x axis, y axis, and z axis.
Figure 4.42. Enter the amount of rotation desired in the first field of the Rotate attribute. The first field is the rotate x field. 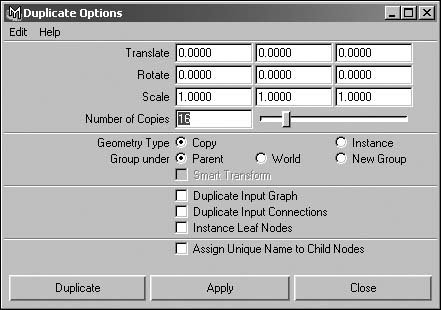
If you've used a sphere, you'll only notice a rotation in wireframe mode.
| 4. | Click the Duplicate button to duplicate the object.
|
 Tips Tips
The standard duplication tool can be cumbersome because there are so many options to adjust or reset for even a simple duplication. The Duplicate with Translation tool, on the other hand, comes in handy when all you want to do is make a copy and move it down an axis, or if you only want to produce one or two copies. To duplicate an object with simple translation: 1. | Create a primitive sphere.
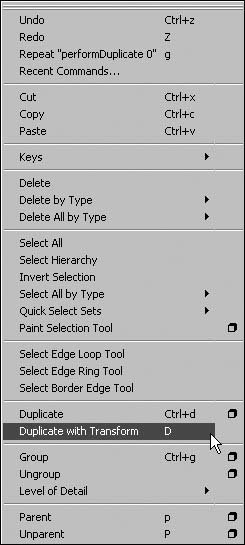
| 2. | Choose Edit > Duplicate with Transform (Figure 4.43).
Figure 4.43. Choose Edit > Duplicate with Transform. 
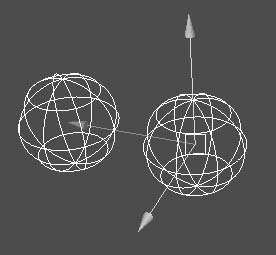
| 3. | Move the duplicated sphere a few units in the z direction (Figure 4.44).
Figure 4.44. Move the sphere the distance you would like your future duplications to copy. 
| 4. | Choose Edit > Duplicate with Transform.
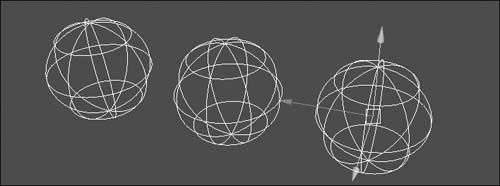
A new sphere is created. It's the same distance from the second sphere that the second sphere is from the original (Figure 4.45).
Figure 4.45. Duplicate the object again. 
| 5. | Press  + + . .
|
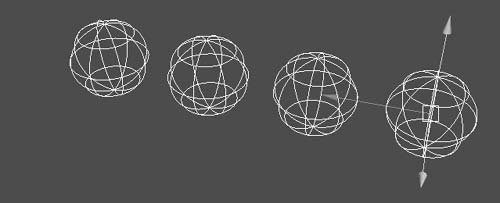
Another duplicate is made, an equal distance from the last (Figure 4.46). Figure 4.46. Each new copy moves down the axis the same amount as the original copy. 
 Tip Tip
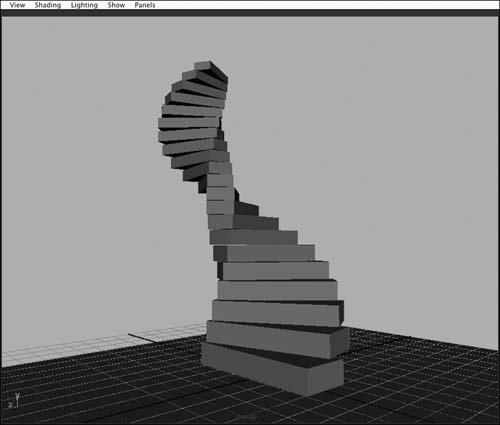
Constructing with duplication Now that you have a general idea of how to duplicate an object, let's put the options into action and create a simple staircase. You'll use the same technique you employed to create a copy with rotation, but now you'll use the Translate, Rotate, and Scale options together. The key to successfully creating a duplicate with translation is placing the pivot point in the correct position for the objects to rotate around (Figure 4.47). Figure 4.47. The pivot point's placement determines the placement of a duplicated surface. 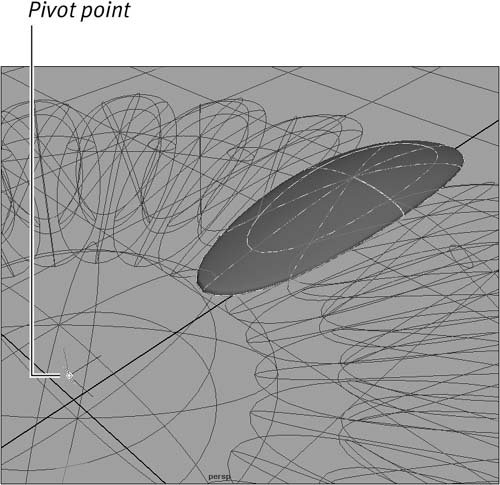
To create a simple staircase: 1. | Select Create > Poly Primitive > Cube.
A cube is created at the origin.
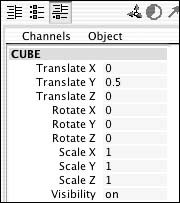
| 2. | Type 0.5 in the Translate Y field in the Channel Box, and press  (Figure 4.48). (Figure 4.48).
Figure 4.48. Type 0.5 in the Translate Y field to move the cube's bottom so that it sits on the grid. 
This setting moves the cube up so that its base sits on the grid.
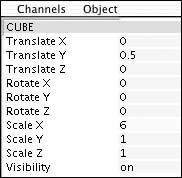
| 3. | Type 6 in the Scale X field in the Channel Box, and press  (Figure 4.49). (Figure 4.49).
Figure 4.49. Type 6 in the Scale X field to scale the x axis of the object by six units. 
This widens the cube.
| 4. | Press  or click the Move tool icon or click the Move tool icon  in the toolbar. in the toolbar.
| 5. | Press  on the keyboard to go into pivot-point edit mode. on the keyboard to go into pivot-point edit mode.
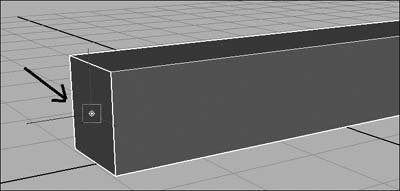
| 6. | Move the pivot point to the far-left edge of the cube, using the x-axis manipulator (Figure 4.50).
Figure 4.50. The pivot point determines the point in space around which the staircase rotates. 
| 7. | Press  again to turn off pivot-point edit mode. again to turn off pivot-point edit mode.
| 8. | From the Edit menu, select the box next to Duplicate to open the Duplicate Options window.
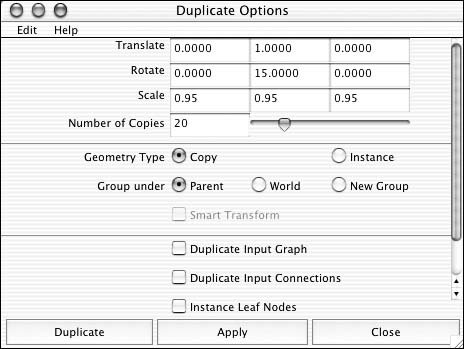
| | | 9. | Set the duplicate options as follows (Figure 4.51).
Figure 4.51. Set the duplicate options as shown to properly duplicate the cube. 
- Translate: 0, 1, 0 This setting moves each new duplicate up the y axis one unit. The cube is one unit high, so each copy sits on top of the previous one.
- Rotate: 0, 15, 0 This setting rotates each duplicate 15 degrees more than the previous one around the y axis.
- Scale: .95, .95, .95 This setting scales each duplicate proportionately to 95 percent the size of the last. The staircase gets smaller as it goes higher.
| 10. | Enter 20 in the Number of Copies field.
This setting will create 20 new steps.
| 11. | Click Duplicate.
The specified number of copies are made and placed on top of each other after being rotated and scaled (Figure 4.52).
Figure 4.52. You can use the Duplicate tool to quickly construct geometric or repetitive shapes like this staircase. 
|
 Tips Tips
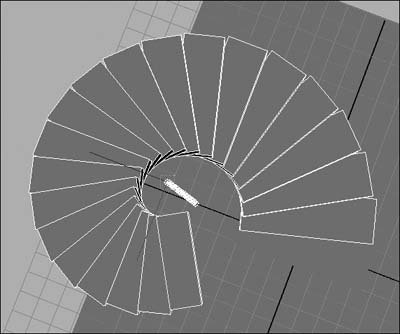
It's a good idea to check your options before duplicating. The previous settings are retained unless you reset them. To return the options to their default settings, with the Duplicate Options window open, select Edit > Reset Settings. Move the pivot point farther down the x axis before duplicating to make room for a pole in the center of the staircase (Figure 4.53). Figure 4.53. The pivot points of the steps are shown here, revealing that they form a straight line up the center of the staircase. 
|


 Tips
Tips