| Now that you know how to read and manage your e-mail using .Mac's Webmail, it's time to set your .Mac e-mail preferences using a Web browser. By doing so, you ensure that your email account behaves the way you want it to. (Wouldn't it be nice if you could do this in other areas of your life . . .) Your .Mac e-mail preferences are divided into three realms: Viewing, Composing, and Accounts. To access these preferences, log in to your .Mac e-mail account using a Web browser and click the Preferences button. The Viewing and Composing preferences affect only how your .Mac account works when you access it using a Web browser your Accounts preferences affect how it behaves across the board. Setting Viewing Preferences The Viewing preferences let you set the time zone, the number of messages displayed in a folder at one time, and whether all e-mail headers are displayed. To Set the Time Zone 1. | Log in to your .Mac Webmail account. Your Web browser loads the .Mac e-mail window.
| | | 2. | At the top of the window, click the Preferences button (Figure 2.63).
Figure 2.63. The .Mac Mail preferences let you control how you see mail, how you write messages, and how your account behaves. 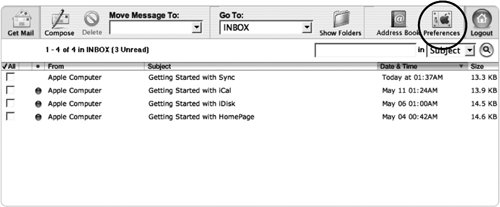
The .Mac e-mail preferences load with the Accounts tab selected as the default (Figure 2.64). Don't worry, we'll discuss those options later in the chapter.
Figure 2.64. Click the Viewing tab at the top of the page to access your Viewing preferences. 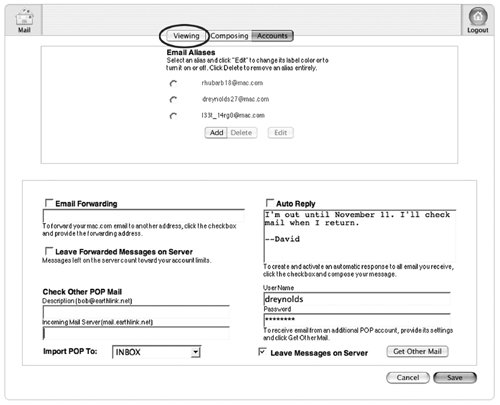
| 3. | Click the Viewing tab at the top of the page.
The Viewing preferences load (Figure 2.65).
Figure 2.65. The .Mac Webmail Viewing preferences let you set your time zone, the number of messages that appear on a given page, and whether all e-mail headers are displayed. 
| 4. | From the Time Zone pop-up menu, choose a location in the time zone you're working in.
| 5. | Click Save.
A message indicating that the change has been saved appears.
|
To Set the Number of Viewable Messages Per Page 1. | Log in to your .Mac Webmail account and open Viewing preferences.
The Viewing preferences load.
| 2. | From the Messages Per Page pop-up menu, choose the number of messages you'd like to see on a given page.
| 3. | Click Save.
Mail shows only the number of messages per page that you've selected.
|
 Tips Tips
Ten or 15 messages per page is usually a manageable number for viewing, unless you go through a lot of e-mail in a day in which case it might be worth listing more. The more messages you list, the longer the scroll. If you want to show all the e-mail headers when you read a message, check the Show "All Headers" Option box on the right side of this page and click Save. Headers let you see where an e-mail has come from, helping you to determine if it's genuine.
Setting .Mac Address Book Preferences You can control how .Mac Webmail works with your contact information by setting your .Mac Address Book preferences. These preferences govern how contacts are handled and whether syncing is turned on. See Chapter 9 for full details on using Address Book with .Mac. To get to your .Mac Address Book information, log in to your .Mac account and open your Address Book. Click the Preferences button in the toolbar to load the preferences. Here's what all the settings mean: Contacts Per Page. This setting defaults to displaying 10 contacts per page, but you can set it to 10, 15, 20, 25, 30, or 50. How big is your monitor? Display Order. Sets how contacts are sorted (by first name, last name or last name, first name). Default Email. You can choose which e-mail addressHome or Workis used as the default address when sending messages. Default Phone #1. Allows you to select which phone is used as default phone number one: Home, Work, Mobile, or Fax. Default Phone #2. Allows you to select which phone is used as default phone number two: Home, Work, Mobile, or Fax. Default Sort Order. Lets you choose how contacts are sorted by default: by e-mail address, last name, or first name. Turn on .Mac Address Book Synchronization. You use this check box to turn on synchronization between your .Mac Address Book and the Address Book on any computer registered with your .Mac account (either via .Mac System Preferences for Mac OS X v10.4 users or via iSync for Mac OS X v10.3 users).
|
Setting Composing Preferences The Composing preferences control what happens when you compose and send an e-maileverything from whether your original message is included in your reply to how your spelling checker behaves. To Exclude Original Messages from Replies By default, whenever you use Webmail to Reply (or Reply All) to a message, the contents of the original message appear in the body of the reply message or as an attachment (if the original e-mail contains complex HTML) (Figure 2.66). If you don't like this, you aren't forever condemned to erase repeated content. Here's how to turn off that behavior: Figure 2.66. When you reply to an HTML e-mail message using a Web browser, the original message is included as an attached file, rather than as text within the message-composition text box. 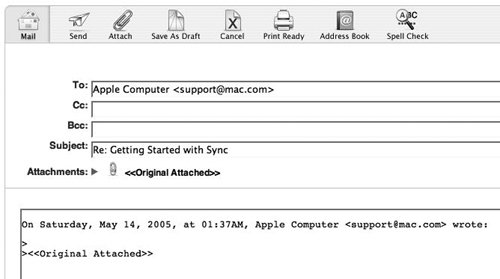
1. | Log in to your .Mac Webmail preferences. The .Mac e-mail preferences load.
| 2. | Click the Composing tab.
The Composing preferences load (Figure 2.67).
Figure 2.67. The .Mac Webmail Composing preferences let you set what's included in a reply, whether the Bcc header is shown, whether spelling is checked before you send a message, whether a photo or signature is included with a sent message, where sent and deleted messages go, and from whom the message appears to come. 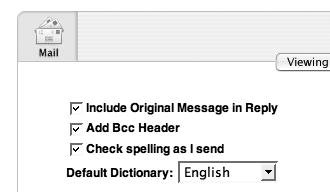
| 3. | In the upper left corner of the page, uncheck the Include Original Message in Reply box (Figure 2.68).
Figure 2.68. Uncheck the top box to prevent inclusion of original message text in your e-mail replies. 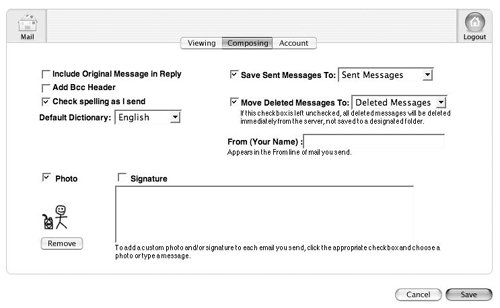
| 4. | Click Save.
|
To Add the Bcc Field to Mail Headers The blind-carbon-copy (Bcc) address field lets you send copies of a message to someone without letting other recipients know that person is receiving a copy. 1. | On the Composing tab of your .Mac e-mail preferences, check the Add Bcc Header box (Figure 2.69).
Figure 2.69. Check the Add Bcc Header box to have the Bcc header included in e-mail messages you write. 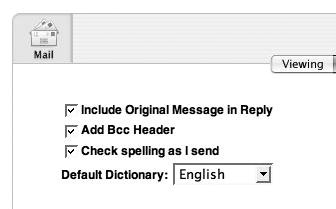
| 2. | Click Save.
The Bcc header appears in all .Mac Webmail messages (Figure 2.70).
Figure 2.70. The Bcc header appears in Webmail messages if the proper preference is set, allowing blind-carbon-copy recipients to be added to a message. 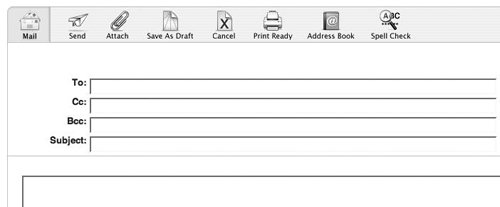
|
Tip Besides its many uses in the realm of office politics, the Bcc field is handy for forwarding the latest e-mail joke or cartoon to your friends: If you address the message to yourself in the To field and put all other addresses in the Bcc field, you'll spare your friends from seeing all the other recipients' addresses when they open the message.
To have Spelling Checked before Sending 1. | On the Composing tab of your .Mac e-mail preferences, check the "Check spelling as I send" box (Figure 2.71).
Figure 2.71. Check the last box to have your message's spelling checked when you send it. 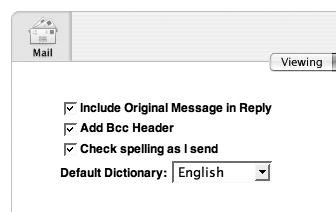
| 2. | From the Default Dictionary pop-up menu, choose a language (Figure 2.72).
Figure 2.72. From this menu, you can choose the language in which you'd like your e-mail's spelling checked. 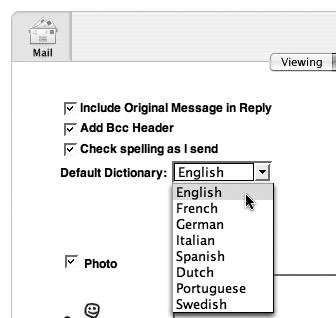
| 3. | Click Save.
Mail checks spelling before you send your message, using the language you've selected for your default dictionary (Figure 2.73).
Figure 2.73. .Mac's built-in spelling checker shows you words that it suspects are misspelled and provides alternatives. 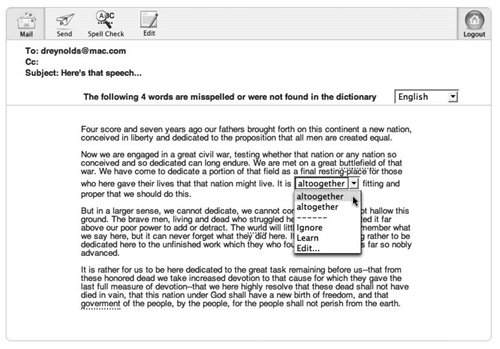
|
To Create an Automatic Signature A mail signature is a block of text that appears at the bottom of every e-mail message you compose. It typically contains the sender's name, address, and other contact information. Some folks also include a favorite quote, a link to their Homepage, or what have you. Here's how to make your own: 1. | On the Composing tab of your .Mac email preferences, check the Signature box (Figure 2.74).
Figure 2.74. Check the Signature box to have a text signature placed at the bottom of each message you send through .Mac's Webmail. 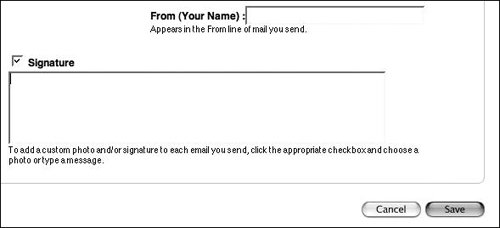
| 2. | In the text box below the Signature check box, type the text you'd like to use as your signature (Figure 2.75).
Figure 2.75. Enter the signature you'd like to have appear on e-mails that you send. 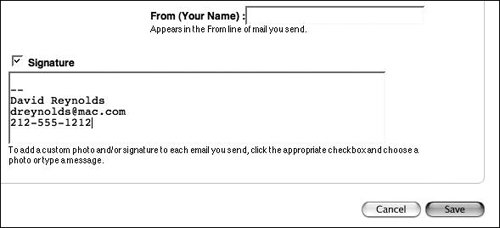
| 3. | Click Save.
Your new signature appears at the bottom of each .Mac Webmail message you send (Figure 2.76).
Figure 2.76. When composing a message using the signature option, the signature appears in the message-composition area automatically. 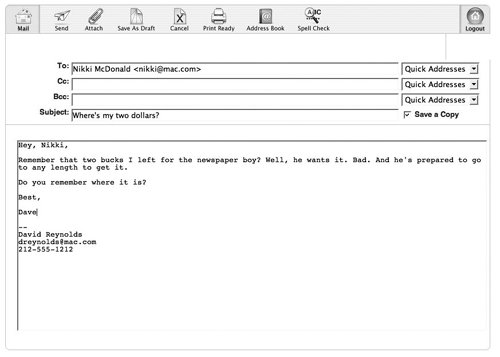
|
Tip If you're using your .Mac e-mail account for business purposes, include your name, address, phone number, and Website address in your signature to help customers contact you easily. And even though addressees can easily click Reply to respond to your message, include your e-mail address as well, in case a recipient prints your message and wants to reply later.
To Add an Image to Your Webmail Reply This task adds an image to messages that you send through .Mac Webmailit's not for sending an image as an attachment. 1. | On the Composing tab of your .Mac Mail preferences, check the Photo box (Figure 2.77).
Figure 2.77. Check the Photo box to have a photo included with each message you send through .Mac's Webmail. 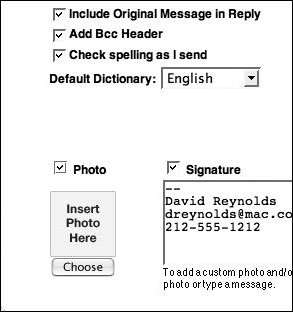
| 2. | Click Choose.
A page opens where you can choose an image (Figure 2.78).
Figure 2.78. On this page, you can choose an image using the Browse button. 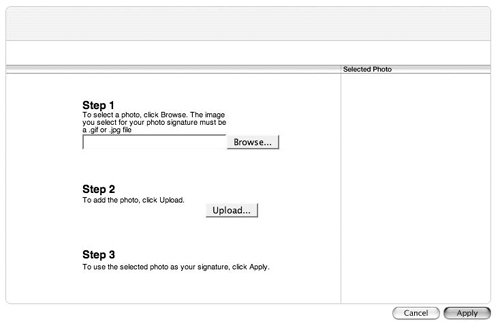
| 3. | Click the Browse button.
The File Upload sheet slides down (Figure 2.79).
Figure 2.79. In the File Upload window, you can find and select an image to upload. 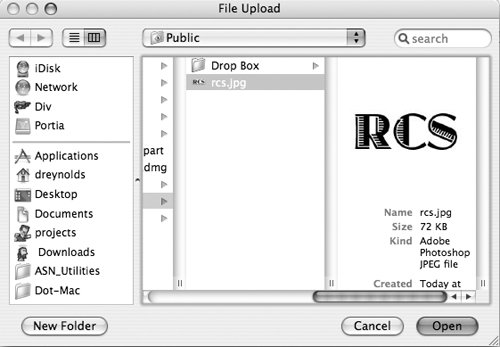
| 4. | Navigate to the image you want to use in your message and click Open.
The File Upload window closes, returning you to your preferences page.
| | | 5. | Back on the image-selection page, the name of the image you selected appears in the Step 1 field (Figure 2.80). Click the Upload button.
Figure 2.80. Click the Upload button to upload the selected item to the .Mac servers. 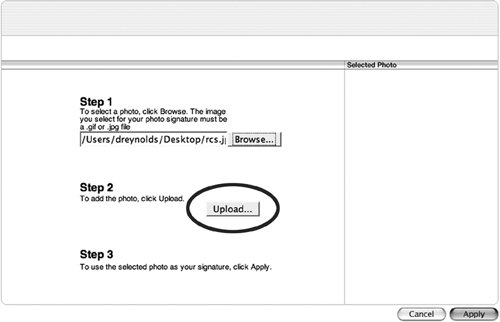
The image is uploaded to your .Mac account.
| 6. | Click the Apply button.
The preferences page opens with the Composing tab selected.
| 7. | Click Save.
When you send a .Mac Webmail message, the image you selected automatically appears in the upper right corner of your message (Figure 2.81).
Figure 2.81. Your image appears in the upper right corner of all .Mac e-mails sent using Webmail. 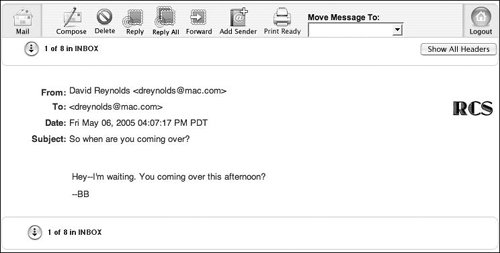
|
Other Composing Preferences Additional settings options found in the upper-right portion of the Composing preferences page allow you to do any of the following (see Figure 2.68): - Check the Save Sent Messages To box to have messages that you send saved. Choose the folder in which you want to have these messages saved from the pop-up menu.
- Check the Move Deleted Messages To box to have messages that you delete moved to the folder you select in the pop-up menu.
- To set the name that appears in the From line of the messages you send, type a new one in the field titled From (Your Name).
Tips To remove a custom image or icon, click the Remove button on the Composing preferences page, and click Save. If you're using your .Mac e-mail for business, you can use the photo feature to add a company logo to your Webmail messages.
Setting Accounts Preferences Although you must log in to your .Mac account on the Web to access the Accounts preferences, they affect how your .Mac account works both online and on your Desktop. The Accounts preferences enable you to create e-mail aliases, edit existing aliaseswhich essentially means that you can make them inactive or change the color of the messages that come in to the aliases forward your mail, set up an auto reply, and set .Mac to check other e-mail accounts you might have. Aliases, if you've never used them before, are e-mail addresses that don't have accounts associated with them. Mail sent to an alias is redirected to another addressone with an associated account. If your account was me@mac.com, for example, you could create an alias called myalias@mac.com, and all email to myalias@mac.com would be automatically delivered to me@mac.com. Why do this? You can give out aliased e-mail addresses without fearif an alias is abused (with, say, a forklift full of spam), simply delete it and create a new alias. Your original e-mail address remains uncompromised. Using Accounts preferences, you can also set up your .Mac e-mail account so that all messages that come to it are forwarded to another e-mail account. This is useful if, for example, you won't be checking your .Mac email account, and you want someone else to be able to read the messages while you're away. Simply forward the messages to that person's e-mail address, and every message sent to your .Mac account will be redirected to that person's account. Printing a Message If you're reading a message you simply must have in paper form, you can print it in a format that your printer is more likely to appreciateor at least one that doesn't require so much paper and ink. Open the message that you want to print, and click the Print Ready button. A new window will open that contains the e-mail headers and textwith no extraneous graphics. From the File menu, choose Print to open the Print dialog, where you'll choose Print again. |
To Create an E-mail Alias 1. | Log in to your .Mac Webmail preferences. The .Mac e-mail preferences load.
| 2. | Click the Accounts tab.
The Accounts preferences load (Figure 2.82).
Figure 2.82. The .Mac Mail Accounts preferences let you create and manage e-mail aliases, forward e-mail, check other e-mail accounts, and set an automatic reply. 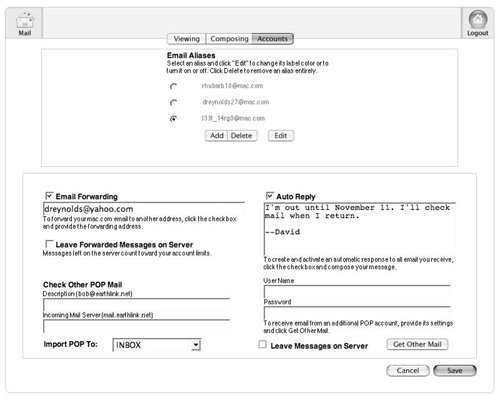
| 3. | In the Email Aliases section at the top of the page, click the Create Alias button. The page for creating a new e-mail alias opens (Figure 2.83).
Figure 2.83. The e-mail alias page allows you to create an e-mail alias and choose a color for mail sent to that alias. 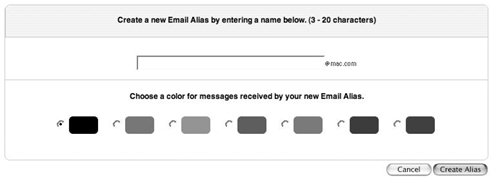
| 4. | In the text field, type an e-mail alias (it can't have any spaces or other nonalphanumeric characters, or it won't work) (Figure 2.84).
Figure 2.84. Type a word or phrase that you'd like to use for an aliasbut remember, you can't use spaces or other non-alphanumeric characters. 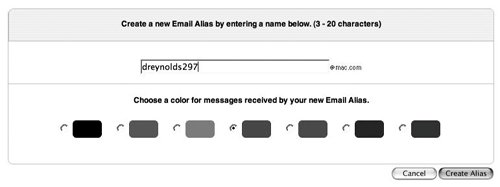
| 5. | Click the radio button next to the color you'd like to assign to messages sent to that alias (Figure 2.84). The color you choose affects only the listing in your inbox (the From and Subject text for example); it doesn't affect the way mail you send appears to the recipient(s).
| 6. | Click the Create Alias button.
The new e-mail alias is now ready. You can send e-mail to that alias (with @mac.com at the end, as in myname54@mac.com), and it will arrive in your main .Mac Inbox.
|
Tip
To Edit an Existing Alias 1. | On the Accounts tab of your .Mac Webmail preferences, click the radio button next to the alias that you want to edit (Figure 2.85).
Figure 2.85. To edit or delete an e-mail alias, click the radio button to the left of the alias, and then click the Edit or Delete button. 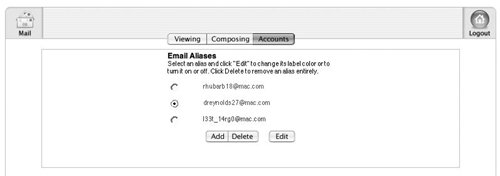
The Edit button becomes active.
| 2. | Click the Edit button.
The alias-editing page opens (Figure 2.86).
Figure 2.86. On the alias-editing page, you can choose a color for an alias or set whether or not an alias is active. 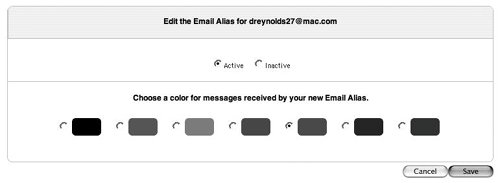
| 3. | Do one of the following:
- To turn on an alias, click the Active radio button.
- To turn off an alias, click the Inactive radio button.
- To change the color of messages arriving at that alias, click the radio button next to your preferred color.
| 4. | Click Save.
The changes to your alias take effect immediately.
|
To Delete an Existing Alias 1. | On the Accounts tab of your .Mac Webmail preferences, click the radio button next to the alias that you want to delete (Figure 2.87).
Figure 2.87. Click the radio button next to the e-mail alias you want to delete. 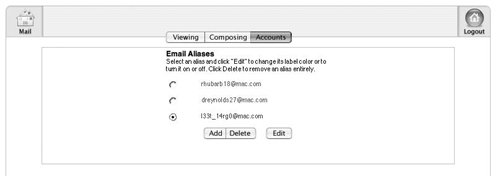
The Delete button becomes active.
| 2. | Click the Delete button.
A new page opens asking if you're sure you want to delete the alias (Figure 2.88).
Figure 2.88. Click the Delete button to delete the alias. 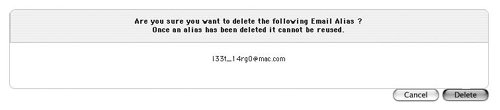
| 3. | Click Delete.
The alias is deleted from your account and cannot be reused.
|
Tip
To Forward all of Your .Mac Mail There may be times (when you're on vacation, for instance) when it's useful to route mail from your .Mac account to another mail account (that of a co-worker, perhaps). Here's how to do that: 1. | On the Accounts tab of your .Mac Webmail preferences, check the Email Forwarding box (Figure 2.89).
Figure 2.89. Check the Email Forwarding box and provide an e-mail address as the destination for forwarded mail, if you want your .Mac e-mail to arrive in another e-mail inbox. 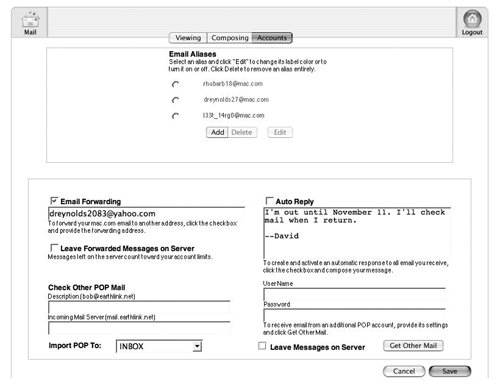
| 2. | In the text box below the Email Forwarding check box, type the e-mail address to which you want the messages forwarded.
| 3. | Click Save.
Your messages are forwarded to the account you specified until you turn off mail forwarding.
|
Tip If you want to leave the forwarded messages in your .Mac e-mail account, be sure to check the Leave Forwarded Messages on Server box. To retrieve these messages later, simply connect to your .Mac account with your e-mail client and check your mail as you normally would.
To Set Up an Auto Reply If you'll be unable to answer mail from your .Mac account for a while, here's how you can set up an automatic response message, letting people who send you mail know you're away, and when you'll be back in action: 1. | On the Accounts tab of your .Mac Webmail preferences, check the Auto Reply box (Figure 2.90).
Figure 2.90. Anyone who sends a message to your .Mac e-mail address will receive the text you type into the Auto Reply text box as a reply. 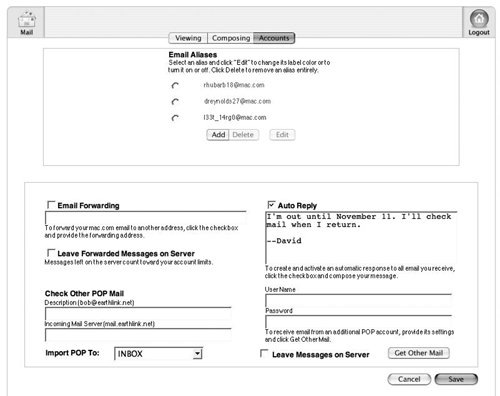
| 2. | In the text box below the Auto Reply check box, type the message that you want to have sent as your auto reply.
| 3. | Click Save.
Your automatic reply is sent to everyone who sends you an e-mail message.
|
To Check other E-mail Accounts Here's how you can use .Mac Webmail to check e-mail from other (non-.Mac) mail accounts. (Note that this works only with POP mail accounts; IMAP accounts typically require you to use their own Webmail-style interfaces to get messages.) 1. | On the Accounts tab of your .Mac Webmail preferences, scroll down to the Check Other POP Mail section (Figure 2.91).
Figure 2.91. Filling in the relevant fields enables you to check other e-mail accounts and import that mail into your .Mac e-mail Inbox. 
| 2. | In the Description field, type the e-mail address of the account you want to check.
| 3. | In the Incoming Mail Server field, enter the name of the incoming mail server for the account you want to check (Figure 2.92).
Figure 2.92. Your incoming-mail-server address (with a short description of the account) is key to checking another e-mail account. 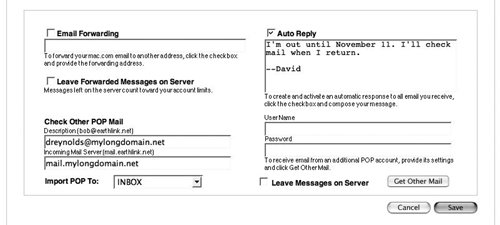
| 4. | In the UserName field, enter the member name of your account (Figure 2.93). Typically, the user name is the first part of the e-mail address, before the @ symbol. Check with the service provider that handles that particular e-mail address to be sure.
Figure 2.93. Provide the user name and password to check e-mail from another account. 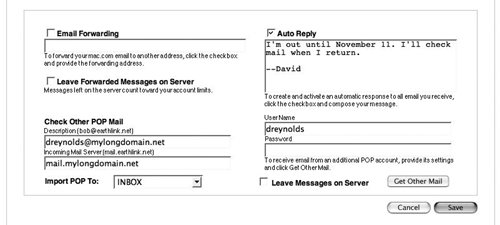
| | | 5. | In the Password field, enter the password of the account you want to check. All e-mail accounts have associated passwords (or they should). This is what you typed when you first set up your e-mail account; if you're not sure what this is, check with the service provider that handles that particular e-mail address.
| 6. | Check the Leave Messages on Server box if you want the messages to remain on the other mail server for later pickup (Figure 2.94).
Figure 2.94. Check this box to ensure that messages are left on the original mail server. 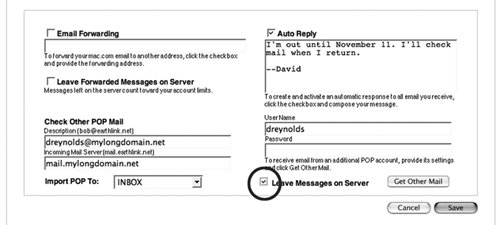
| 7. | Click the Get Other Mail button.
After a short delay, any mail waiting in the other account is imported into the Inbox of .Mac's Webmail.
|
Tip Once you're done working with your email, you'll want to log out of your .Mac account. To do so, simply click your user name in the Log Out area on the right side of the toolbar or click the Logout button in the Mail toolbar (either of which logs you out of your .Mac account).
|