Installing ARD
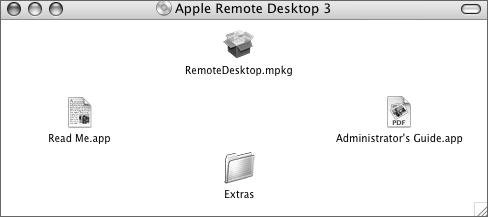
| ARD is composed of two pieces of software: the administrator utility and the client, or agent, software. The administrator utility is installed on one machine and controls all the clients. The client runs on every computer that will be controlled with ARD. The administrator utility, called Remote Desktop, must be purchased separately for each computer on which it will be installed. The client software is included with every Mac OS X installation since Mac OS X v10.3, but is disabled by default for security reasons. Additionally, you can install the ARD client software separately, as discussed later in this lesson. As an option, you can also create a central task server. This computer must have a copy of the unlimited licensed administrator utility installed, and can act as a go-between for both installations and report gathering. Installing the Administrator UtilityInstallation of the administrator utility is a simple package installation. Find the RemoteDesktop.mpkg file and double-click it to install the program. After it's installed, look in your Applications folder for the Remote Desktop application and double-click it to open the administrator utility. Since the administrator utility is a licensed product, you will be asked to enter the serial number that came in the package. Each copy of the administrator utility will require a unique serial number. Certain features of ARD interact between installations on different systems and require that each system have a unique serial number to function. The main situation that requires this is using a central ARD task server, discussed later in this lesson. 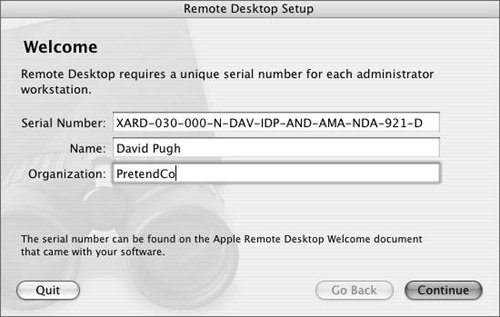 Next, you will be prompted for the password used to encrypt your client database. To perform actions on each of the clients, the administrator utility needs to know the username and password that will be used to access each of your clients.  These usernames and passwords are stored locally on the Mac that is running the administrator utility. Since this list includes every one of your computers and its associated username and password, you'll want to keep it secured with a strong password. Although you can add this password to your keychain, you may not want to do so unless you're adding it to a secure keychain that locks itself quickly. The next window asks if you wish to use a remote task server. If you already have a task server set up, enter its information now, otherwise just leave it blank and click Continue. If you set up a task server later, you can change this setting in the Remote Desktop preferences. You can leave the Use remote Task Server field blank and enter the information later.  The final screen you'll see during initial setup of the administrator utility allows you to choose what information should be gathered on your clients. 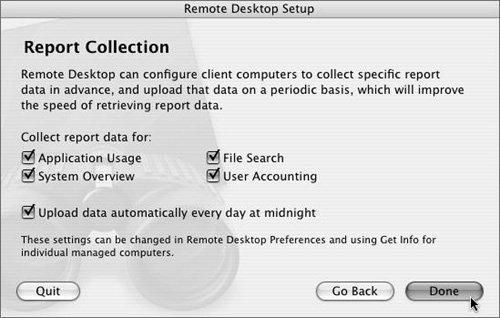 These settings will be sent to each ARD client when you configure it. This will speed up report generation by having the data already collected on the client and, if selected, will have already uploaded the data to your administrator client (or your task server) every night. This last option carries the added benefit of giving you access to reporting data whether the ARD client is turned on or off on your network. These settings are just the defaults assigned to new clients. You can change these settings for each individual computer later if you'd like. Enabling the ClientThe ARD client is pre-installed on every Mac OS X system since v10.3. In most cases, all you need to do is turn it on. This is can be done in the Sharing preferences, or by using the command line.
Note You can configure multiple ARD-specific user accounts, each with its own access privileges, so that different ARD administrators can have different levels of access. Enabling all the options for a user who will be remotely managing this Mac. 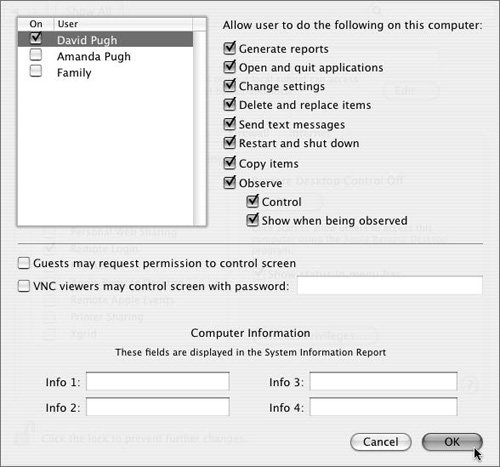 Tip If a user will have all ARD privileges enabled, you can save time by pressing the Option key while enabling that user. This will automatically check all privileges. Virtual Network Computing (VNC) is a widely used remote screen control protocol. ARD includes support for this open standard. When configuring the ARD client through System Preferences, you have the option to indicate that VNC viewers may control your screen. You should only do this if you have non-ARD computers controlling this computer. VNC is less secure than native ARD because only one password controls access for everyone. If you have Windows or other UNIX machines, VNC might be a good option for your screen control needs. There are also Mac OS X versions of VNC available if you wish to use VNC from another Macintosh. This is a free option for those Mac users who want screen control capabilities but don't need any of the other features of ARD. If you aren't sitting in front of the client and you have remote login (SSH) access to that client, you can also enable ARD from the command-line using the kickstart command. A typical usage is:
This command configures the ARD client to allow the user, whose shortname is "dave", to connect via ARD with full privileges, and restarts the ARD agent and Menu Extra. More information on the kickstart command can be found in Apple Knowledge Base article #108030, or by typing:
An account is enabled for ARD access through the presence of the "naprivs" key in their account record. The numeric value associated with it determines what types of ARD access that user has. One last method for configuring the ARD client is to use a Client Installer package. This is particularly useful as a quick alternative to guiding users through the configuration procedures over the phone. This option creates a normal Apple installation package that the user can double-click to install and configure the ARD client. Creating this package is a simple task accomplished by going through an Installer-like process. 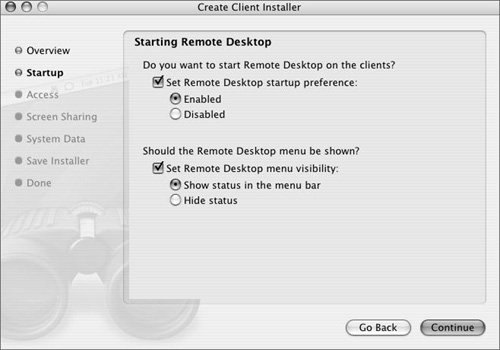
A new package called Custom Remote Desktop Installer.mpkg will be saved on your Desktop. You can send this to your users via email, by burning it on a CD, or by using any other package distribution method. If sending the metapackage over email or iChat, you will probably want to compress the package first by Control-clicking it and choosing Create Archive of "Custom Remote Desktop Installer.mpkg". This will compress the entire meta-package into a single zip file. If SSH is enabled on your clients, you can copy the entire package to a remote machine with the command: scp -r ~/Desktop/Custom\ Remote\ Desktop\ Installer.mpkg remote.hostname:/tmp You can then SSH to the other machine and install it using the command: sudo installer -pkg /tmp/Custom\ Remote\ Desktop\ Installer.mpkg -target / Note ARD must match major version numbers between the administrator utility and the client. For example, ARD 3 can only be used to manage ARD 3 clients. If you have older clients on your network, you can choose Manage > Upgrade Client Software on all your older clients to upgrade them at once. Giving Network Users ARD AccessIf your computers are all bound to the same Open Directory system, you have another option for configuring access to your ARD clients. Simply add the users to these specially named groups in your directory:
These groups roughly correspond to the features given in the Interact, Manage, and Report menus available in the Remote Desktop Admin utility. You'll then need to tell each of your ARD clients to use these groups for their access control. If you already have ARD access to these machines through an existing local account, you can choose Manage > Change Client Settings, which will guide you through the same process used to create custom client installers. On the Incoming Access screen, select Set authorized groups. If you haven't yet installed or configured ARD on any of the machines, you can set the same option in your client installer package as discussed earlier in the lesson. Just choose File > Create Client Installer from the menus, but choose the option to Enable directory-based administration. 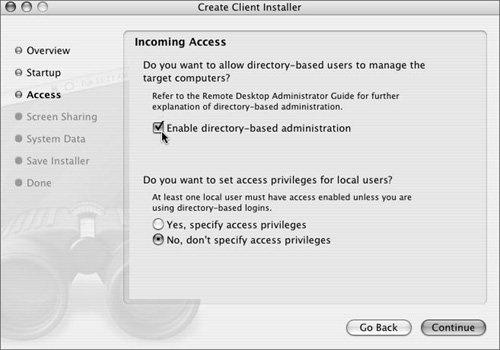 You can also use the kickstart command via SSH to enable ARD group access:
ARD 3 introduces another option for using groups to control access to ARD. If you're using managed computers in Workgroup Manager, you can specify which groups of users have various levels of ARD access. Just as you can create computer lists and use them to manage preferences on a computer, you can use the same MCX settings to manage ARD, but you'll have to edit some XML code to do it. Currently there is no user interface to automate this task.
<?xml version="1.0" encoding="UTF-8"?> <!DOCTYPE plist PUBLIC "-//Apple Computer//DTD PLIST 1.0//EN" "http://www.apple.com/DTDs/PropertyList- 1.0.dtd"> <plist version="1.0"> <dict> <key>mcx_application_data</key> <dict> <key>com.apple.remotedesktop</key> <dict> <key>Forced</key> <array> <dict> <key>mcx_preference_settings</key> <dict> <key>ard_interact</key> <array> <string>some_group</string> <string>staff</string> </array> <key>ard_manage</key> <array> <string>staff</string> </array> <key>ard_admin</key> <array> <string>my_admin_group</string> </array> <key>ard_reports</key> <array> </array> </dict> </dict> </array> </dict> </dict> </dict> </plist> |

EAN: 2147483647
Pages: 128