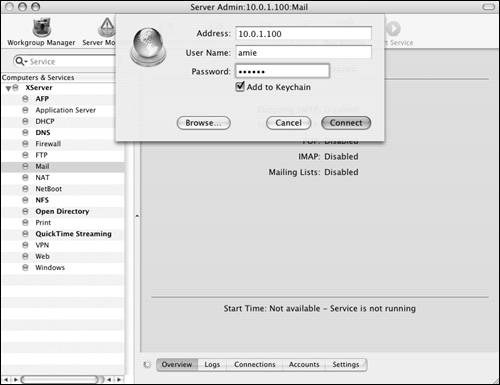
| Mac OS X Server includes Mailman as its mailing list service. Mail lists are used to provide automated mail distribution to a group of electronic mail addresses. Subscribers to the list don't have to have mail accounts on your server; most mail lists allow users to subscribe or unsubscribe themselves via mail messages sent to your server. All an administrator has to do is create the mail lists and select list administrator accounts that are based on any email address. You can use the Server Admin tool to enable the Mailman service initially. Once enabled, Mailman sports a variety of advanced mail-list organization and management features beyond those available in Server Admin. Typically, mail lists are managed via a Web browser interface or through an exchange of mail messages with the mail list server. Because Mailman relies on Web and SMTP relay services, you must configure Apache and Postfix on your server before enabling mailing lists. See Chapter 9 for detailed instructions on how to enable a Web site. You can also refer to "Configuring Mail Services," earlier in this chapter, to learn how to enable the SMTP service. To enable mail lists: 1. | Launch the Server Admin tool located in /Applications/Server, and authenticate as the administrator (Figure 8.50).
| 2. | Select the Mail service for your server in the Computers & Services list.
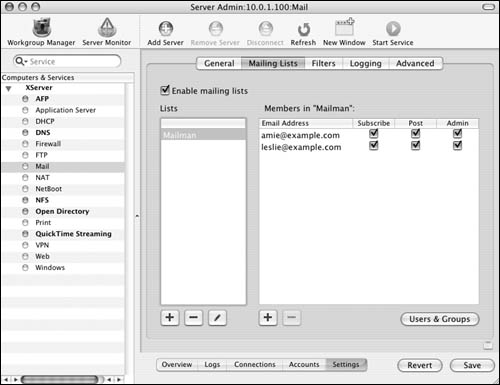
Click the Settings button and then the Mailing Lists tab (Figure 8.51). You can see that initially, the Mailman service isn't configured or enabled.
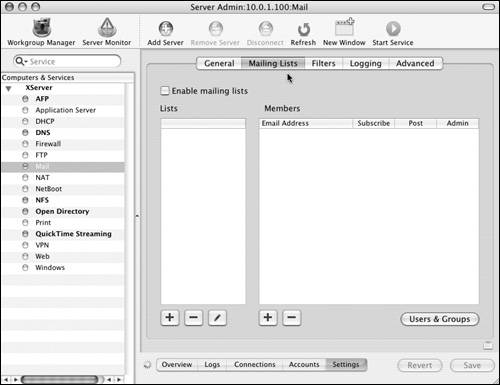
| 3. | Select the "Enable mailing lists" check box.
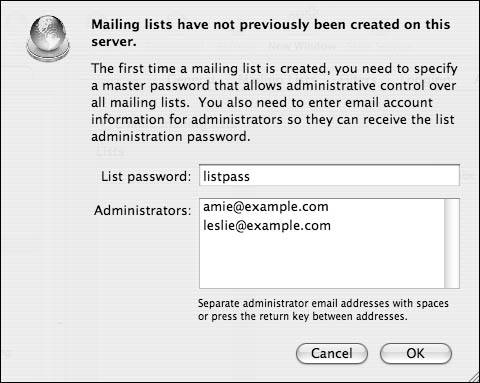
A dialog appears in which you can configure the first, and required, Mailman list (Figure 8.52). Enter an administrator password and as many administrator email accounts as you want, separated by carriage returns.
| 4. | Click the OK button  , and verify that the mail list Mailman has been created (Figure 8.53). , and verify that the mail list Mailman has been created (Figure 8.53).
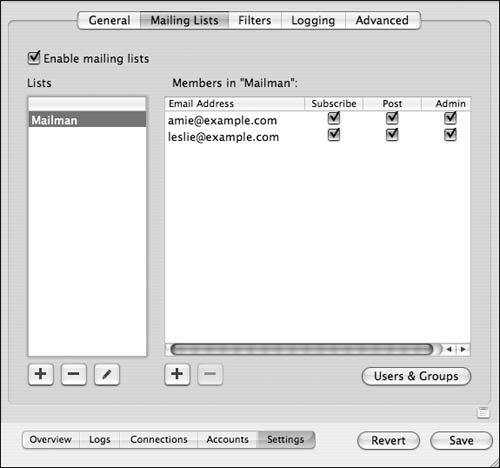
You've now created the initial list. You can't delete this list, but you can remove all but one administrative account and ignore the list by not posting anything to it.
|
To create additional mailing lists: 1. | Complete the previous task, "To enable Mail lists," and keep the Server Admin tool open to the Mail service, Settings tab, Mailing Lists tab (Figure 8.54).
| 2. | Click the Add button  below the Lists list. below the Lists list.
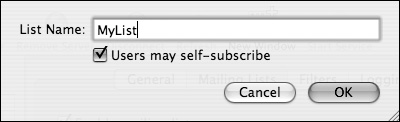
A dialog appears in which you can give the new list a name (Figure 8.55). Select the "Users may self-subscribe" check box if you want users to be able to subscribe or unsubscribe from this list without administrator intervention.
| 3. | To add accounts to a list, select the list name, and do one of the following:
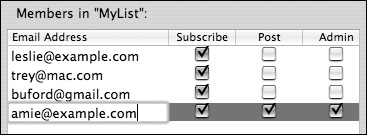
To add any email account, click the Add button below the Members list. A dialog appears in which you can enter as many email accounts as you want, separated by carriage returns (Figure 8.56). You can specify the accounts' mail list settings by selecting the appropriate check boxes (see step 4). 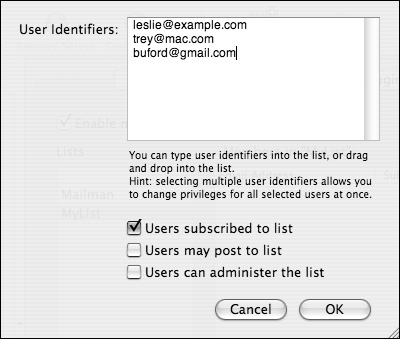
To add a locally hosted email account, click the Users button  to reveal the Users & Groups drawer (Figure 8.57). Click and drag any user account from the drawer to the Members list (Figure 8.58). to reveal the Users & Groups drawer (Figure 8.57). Click and drag any user account from the drawer to the Members list (Figure 8.58). 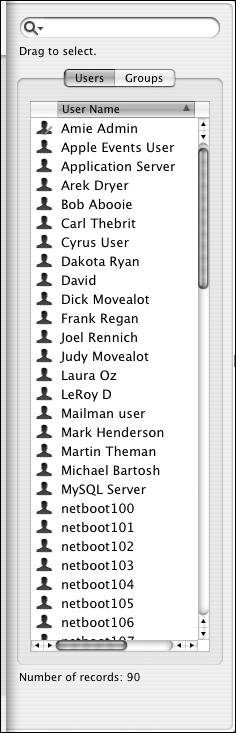
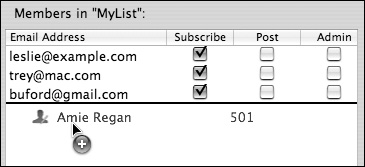
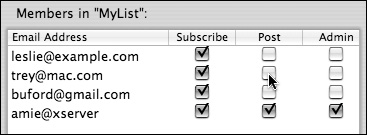
| 4. | To modify an account's mail-list settings, select or deselect any of the following options next to the account name in the Members list (Figure 8.59):
Subscribe Mail messages distributed by the list will be sent to this account.
Post This account is allowed to send new messages to the list to be distributed to the other members.
Admin This account can modify the advanced settings for the list.
| 5. | To modify an account or list name, double-click its entry in the list (Figure 8.60).
You can also delete an account or list by selecting it in the list and clicking the Delete button  at the bottom of the list. at the bottom of the list.
| 6. | When you've finished making changes, click the Save button  . .
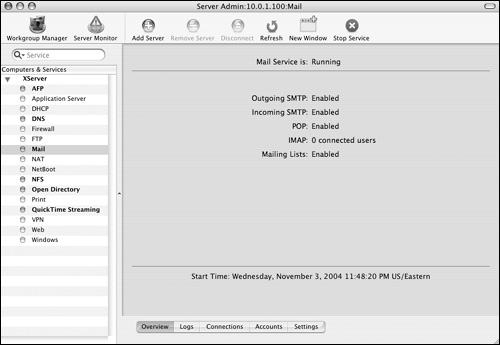
| 7. | Click the Overview button  , and verify that the mailing-list service is running (Figure 8.61). , and verify that the mailing-list service is running (Figure 8.61).
|
As with any service change, you should thoroughly test the configuration before going live.  Tips Tips
Considerably more detailed options for your mail lists are available at http://serverhostname/mailman/listinfo/ (Figure 8.62). 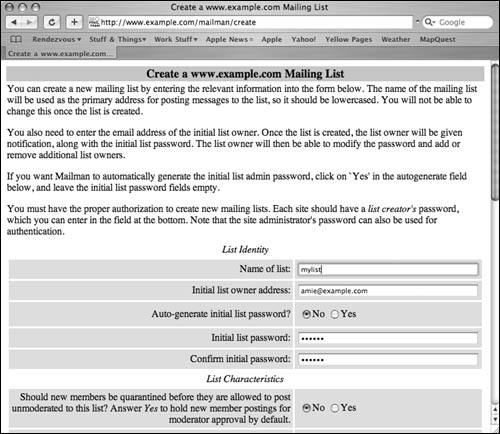
You should always stop the Mail service prior to making changes and restart it only after saving your changes.
| Mailman has been around for a while, and many Unix administrators are familiar with its associated command-line utilities and configuration files. Although the Server Admin interface is fine, some options are still available only from the command line. The /usr/share/mailman/bin/ directory holds all the advanced Mailman configuration utilities. Most of the utilities in this directory display their help pages when you enter the command's name with no options. It may also help you to know that Mailman stores all of its configuration data in the /var/mailman/data/ directory. |
|