| The .NET Passport service is one of many .NET services that Microsoft provides. As with any service that you want to add to your existing infrastructure, you will want to thoroughly test .NET Passports in a lab environment prior to implementing the service in a live production environment. Because .NET Passports contain information about users, the information must be protected to ensure privacy and confidentiality. As a result, before you use the .NET Passport service, you must meet various Microsoft prerequisites to keep .NET Passport legitimate throughout the Internet. The following process is required before you implement .NET Passports on your site: Create a passport account on Microsoft's .NET Passport Web site (http://www.passport.com). Review and adhere to the .NET Passport Privacy Policy located at http://www.passport.net/Consumer/PrivacyPolicy.asp and the Microsoft Statement of Policy at http://www.microsoft.com/info/privacy.htm. If you are planning to use .NET Passport for Kids, it is important to also review and adhere to the .NET Passport Kids Privacy Statement (http://www.passport.net/Consumer/KidsPrivacyPolicy.asp?lc=1033). Obtain a Preproduction (PREP) ID to begin testing .NET Passport on your site. As mentioned earlier, you should always test this functionality before putting it into production. When you're developing a Web site with .NET Passport in the PREP environment (and in a live production environment), you must display your privacy policy. This policy should conform to Microsoft's policies. Prior to your site going live with .NET Passport, you must sign a contract.
After a site is issued a Site ID, an encryption key is sent to the site. The key is a shared secret between the site and the .NET Passport system (that is, the login server). This allows users to be authenticated and, equally important, it allows the site to obtain user authentication information. Caution Although rare, in some cases, upgrading from Microsoft .NET Passport Software Development Kit (SDK) version 2.1 to the Windows Server 2003 version of .NET Passport could potentially downgrade .NET Passport functionality. To minimize any possible effects from an upgrade, run IIS in 6.0 mode rather than IIS 5.0 compatibility mode. Whenever possible, perform a clean install of the Windows Server 2003 version of .NET Passport.
Obtaining a PREP ID A PREP ID allows an organization to use .NET Passport on a test site before going live. Without the PREP ID, sites could not test the .NET Passport authentication. This PREP ID is for testing use only, so a live Site ID is required to be able to use the .NET Passport site in production. To obtain a PREP ID, go to the Microsoft .NET Services Manager Web site located at https://www.netservicesmanager.com, as shown in Figure 14.1. Figure 14.1. The .NET Services Manager Web site. 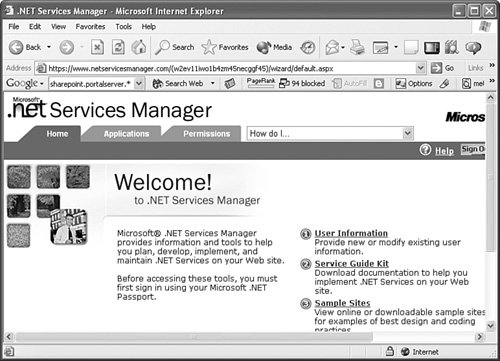
At this point, you're given the option to Create a .NET Passport application for the development/test environment Download information on how to implement various .NET Services View sample sites Obtain business-related information Create and manage an application
To begin the registration process for obtaining a .NET Passport PREP ID, do the following: 1. | Click the Create and Manage an Application link. If you haven't signed in with a .NET Passport account, you'll be directed to either log on or create a new .NET Passport account. Refer to "Working with .NET Passport Accounts" later in this chapter for information on creating a .NET Passport account.
| 2. | After reading the terms and agreement, click the Accept Terms button to continue. This brings you to the User Information page, which asks for your contact information. You'll also choose which notifications you want to receive.
| 3. | On the Create and Manage an Application page, click Create Application.
| 4. | On the Create Preproduction Application page, type in the name of the application and then click the Submit button.
| 5. | Click the Add Service button and select the type of passport service(s) for your development/test site. You can choose from .NET Passport, Kids Passport with SSI, or Microsoft Alerts. Click the Next button when done to advance to the registration pages.
| | | 6. | Depending on which selection you made, you have to fill out different registration information. In this example, the Web site features the .NET Passport option. On the General .NET Passport Information page, enter the appropriate information in the dialog boxes. The boldface areas such as Web Site Title, Domain Name, Default Return URL, and Privacy Policy Location are required information. When you're finished, click the Next button so you can begin providing co-branding information.
| 7. | Enter the appropriate co-branding information. The minimum required information is the co-branding image. Click Next to provide other .NET Passport-related information, such as registration return pages, and disable copyright, as shown in Figure 14.2.
Figure 14.2. .NET Passport registration. 
| 8. | On the next Web page, enter the .NET Passport SSI information. The Expire Cookie URL information is required. This is the location of the page that will delete all the cookies set by .NET Passport for the site.
| 9. | If you selected Kids Passport, as in this example, enter the account removal and data URLs as well as the type of consent needed (limited or full consent).
| 10. | Click the Submit button when done. The next screen provides the .NET Passport information for your site. The page displays the Site ID (for the preproduction environment), last modification date, status, and compliance rating.
|
Using the Passport Manager Administration Utility Administrators must use the Passport Manager Administration utility, shown in Figure 14.3, to install and configure .NET Passports. This utility should be run after receiving the PREP ID. Figure 14.3. The Passport Manager Administration utility. 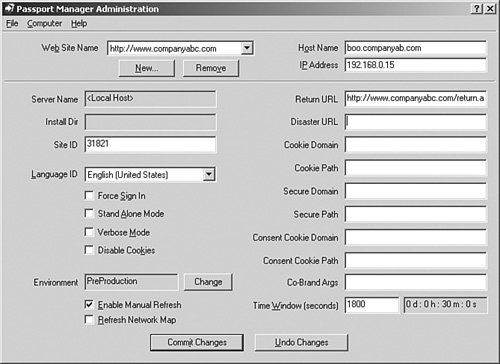
In previous versions of .NET Passport, the Passport Manager Administration utility was provided in the SDK, which also includes several tools and documentation to make implementing .NET Passports much easier. In Windows Server 2003, the Passport Manager Administration utility is bundled within the operating system. To begin using the Passport Manager Administration utility, do the following: 1. | Choose Start, Run, and then type MSPPCNFG.EXE in the Run dialog box to start the Passport Manager Administration utility.
| 2. | Enter the PREP ID that you received into the Site ID box.
| 3. | Enter the appropriate information about your site such as Return URL, Cookie Path, and so on.
|
For organizations with multiple servers, you can save the Passport Manager Administration utility configuration to a file that can be exported to another server. Select Save As from the File menu to save a Passport Configuration File (*.ppi). Obtaining an Encryption Key For your site to acquire user authentication information from the .NET Passport system for use on the participating site, you must first download an encryption key. The encryption key gives a site authorization to receive user authentication information from the .NET Passport system. To download an encryption key, do the following: 1. | Go to the Microsoft .NET Services Manager Web site and sign in using .NET Passport.
| | | 2. | Click the Applications tab and then click Manage Applications.
| 3. | Select the application that you created earlier and then click the Next button.
| 4. | Click the Download Key option, and then click the Request Key button. Microsoft then sends you an email containing the link to use to obtain the key.
| 5. | On the Create Your Security Key page, shown in Figure 14.4, type in a four-digit or character security key twice and provide answers to the three questions of your choosing. It is important to remember your answers for the second part of obtaining your key. Click Continue when done.
Figure 14.4. Obtaining an encryption key. 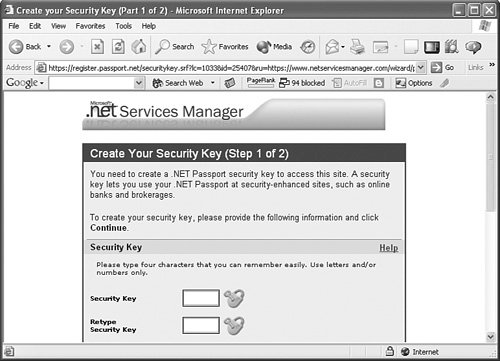
| 6. | Answer the three questions that you just provided answers for and then click Continue.
| 7. | On the Security Key Sign-in page, enter the four-digit or character security key and click the Sign In button.
| 8. | Scroll down the Download Key page and then select the operating system and Web server you plan to use.
| 9. | Click the Download Key button. When prompted for the file download, click Save.
|
Microsoft provides the step-by-step directions for installing the encryption key on the Download Key page. However, for convenience, the directions are described here. The following directions assume that you have already set the correct PREP or Site ID and have downloaded the encryption key to the Web server: 1. | Choose Start, Programs, Administrative Tools and open the Services snap-in. Then choose to stop the IISAdmin service. This will stop all other IIS-related services.
| 2. | Choose Start, Run, and open the command prompt by typing cmd.exe. Then go to the location where you downloaded the encryption key.
| 3. | Type partner####_#.exe /addkey, where # is the PREP or Site ID.
| 4. | Type partner####_#.exe /makecurrent /t 0.
| 5. | Restart the IISAdmin service and other IIS-related services that were stopped (for example, the World Wide Web Publishing service).
|
Building .NET Passport for Production After thoroughly testing .NET Passport in a lab environment, you need to submit a request to obtain a .NET Services agreement. This agreement should be signed before you introduce the .NET Passport service in a production environment. You can make the request by sending email to netservs@microsoft.com. It is better to request this agreement well in advance to prevent any possible interruption in service. The .NET Passport application that you created on Microsoft's .NET Services Manager Web site must also be submitted with compliance criteria before obtaining the production Site ID and encryption key. Note that you cannot use the PREP ID and encryption key from the development/testing environment. To submit compliance criteria, perform the following steps: 1. | Go to the Microsoft .NET Services Manager Web site and sign in using .NET Passport.
| 2. | Click the Applications tab and then click Manage Applications.
| 3. | Select the application you created earlier and then click the Next button.
| 4. | Click Submit Compliance to roll your application into production.
| 5. | Review the information on the Web page and then click Go to Manage Agreements.
| 6. | At this stage, you can either request a Microsoft Services Agreement or request an Agreement Association. The first option is for those organizations that do not already have a signed Microsoft Services Agreement. After you have a signed agreement, however, you can choose the Request Agreement Association option to then be able to submit your application for compliance review.
|
|