TIP 19 Moving, Renaming, and Deleting Files
TIP 19 Moving, Renaming, and Deleting FilesIf you move a file to a new place on your hard drive outside of GoLive, you'll end up with broken links, missing images, and heartburn. Instead, manage all the assets in your Web site from the Files tab of the Site window, and GoLive will handle all the dirty work for you. As long as you manage the files from the Site window, GoLive will update all the hyperlinks and references inside HTML, CSS, JavaScript Actions, PDF, QuickTime, and SWF for you. This even works with third-party actions and extensions!
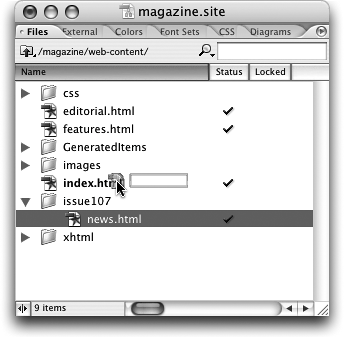
MovingTo move a file, drag it into the folder where you want to put it. To move a file up a level in the file structure, drag the file on top of another file at the same level you want to move to, as seen in Figure 19a. Figure 19a. Drag a file over another file to move it to that level.
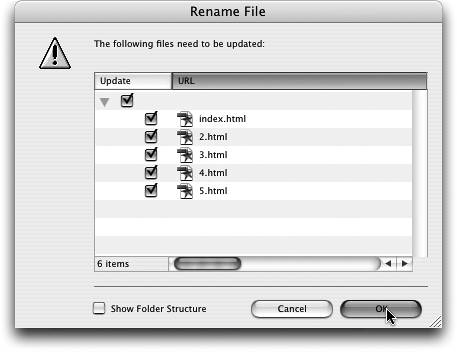
You can also use the Edit > Copy and the Edit > Paste commands to copy and paste files from one folder to another. RenamingTo rename a file in the Files tab of the Site window, click on the filename, wait a second, and then click again until the filename (but not the extension) is highlighted. Now type the new filename and press Return or Enter. Notice you can also rename files and folders in the Name field of the Inspector. When you move or rename a file or folder that is referenced by another file in the site, you'll see a confirmation dialog (Figure 19b). When you're ready to confirm the change, click OK and watch GoLive automagically update your entire site for you. Figure 19b. When you move or rename a file or folder, GoLive makes sure all your links are correct.
DeletingTo delete a file or folder in the Files tab, select it and click the trashcan icon in the toolbar (Figure 19c). You can also delete selected files with the keyboard by pressing Command-Delete on the Mac or Delete on Windows. When you delete files, you'll see a dialog asking you to confirm the change. Even after you delete the files, you can always retrieve them from the Site Trash over in the Extras tab of the Site window. Figure 19c. Click the trashcan icon in the toolbar to delete selected files.
|
EAN: N/A
Pages: 301