TIP 18: Adding Files to a Site
TIP 18: Adding Files to a SiteCreating a new site in GoLive is a great place to start, but soon you'll need to add other files, such as images, PDFs, and other documents to your Web site. GoLive offers several easy ways to add existing files to a Web site. Pick the method you like best.
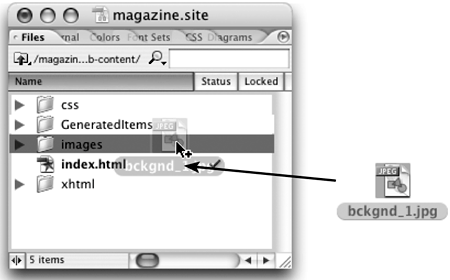
Drag and DropLazy people like us prefer the drag and drop method because it's definitely the easiest. Just select the files in the operating system (Finder on the Mac or My Computer on Windows) and drag them into the Files tab of the Site window (Figure 18). If you see a dialog asking you to confirm the copy, just click OK. Note that dragging and dropping copies the files into the site instead of moving them, which means you end up with two copies of the files. Figure 18. Drag and drop files to add them to your site.
Import FilesIf you prefer to work with the menus, make sure the Files tab of the Site window is active by clicking it and select File > Import > Files to Site…. Select the files you want to add (Shift-click to select multiple files at once) and click OK. The selected files are copied to the site, and the originals are still where you found them. |
EAN: N/A
Pages: 301
