| Now that you know how to export your GarageBand songs to iTunes and how to use your custom music with the other iLife applications, let's look at how to convert your AIFF files to MP3 in iTunes. To convert files from one audio format to another in iTunes, you need to set the conversion format in the iTunes preferences. Understanding the Different Audio Formats There are currently four different choices for importing or converting audio files in iTunes: MPEG-4 AAC, AIFF, MP3, and WAV. MPEG-4 AAC (often referred to just as AAC) is a new compression format that rivals the sound quality of CDs (AIFF 44.1 kHz). The WAV and AIFF encoders do not compress the songs, so the songs are higher quality, and the files are several times larger than AAC and MP3 compressed files. The WAV encoder is used with Windows computers. If you are using a Macintosh and QuickTime 6.2 or later or a Windows computer, the default encoding format is MPEG-4 AAC. If you are using an earlier version of QuickTime on your Mac, the default format is MP3 (or whatever you have set in the Importing Preferences). How do you know which format to use? If you plan to use your music for video projects or to burn high-quality audio CDs, you should use AIFF encoding for the best results. If you plan to store your music on a hard disk or iPod, the AAC setting creates files that are usually less than 1 MB for each minute of music and will sound as good as or better than MP3 files encoded at the same bit rate. If you are using an earlier version of QuickTime or MP3 player, you can use the MP3 setting. Let's change the preferences in iTunes to convert your songs to MP3 files. 1. | Click the iTunes icon in your Dock to launch iTunes (if it is not already open).
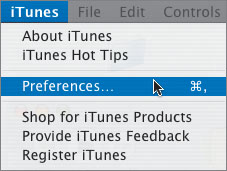
| 2. | Choose iTunes > Preferences to open the iTunes Preferences window.
 | 3. | Click the Importing button at the top of the iTunes Preferences window to view the Importing pane.
| 4. | Click the Importing Using pop-up menu and choose MP3 Encoder from the file format options.
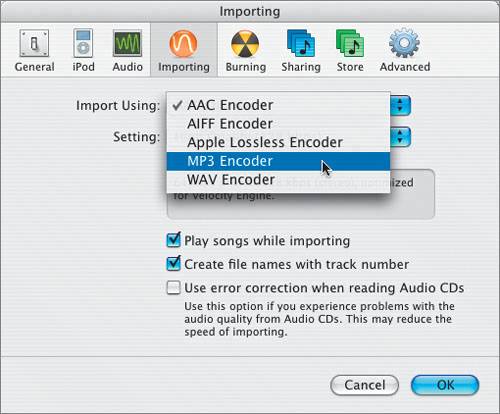 | 5. | Click OK.
Changing the import format in iTunes will convert any imported files to the current format setting.
You can also convert existing files to a different format. Now that you've changed the import format, let's convert your existing playlist songs from AIFF to MP3. When you convert files, iTunes creates duplicates of the selected songs and changes the format of the duplicates.
| 6. | Press Cmd-A to select all of the songs in your playlist (if they are not already selected).
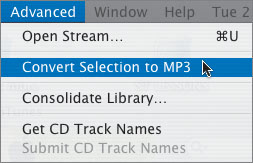
| 7. | Choose Advanced > Convert Selection to MP3 to begin the conversion process.
 A playlist named Converting Songs appears while iTunes converts your songs.
When iTunes finishes, all of the songs in your playlist are still linked to the original AIFF files, and the new MP3 converted files are in the iTunes Library.
Your playlist is now ready to download to your iPod and can be shared with Mac OS X or Windows 2000 and Windows XP computers.
|
Viewing the iTunes Library in the Finder The last stop on your iTunes file sharing and converting tour is to actually see the files in the iTunes Library in the Finder. 1. | Press Cmd-Q to quit iTunes.
| 2. | Double-click your hard drive icon to open your hard drive.
| 3. | Click the Music button, located on the left of the Finder window, to open your Music folder.
| 4. | Click the Column View button to view your Finder as columns.
| 5. | Click the iTunes folder to open the contents, and then check the iTunes Music folder.
| 6. | Click the folder with your name (or the user name), and then click the GarageBand Lessons Album folder to view the album contents.
 Notice that you have two versions of each song. The songs with .aif extensions are the AIFF format files that were exported from GarageBand. The songs with .mp3 extensions are the files that were converted in iTunes. Notice that you have two versions of each song. The songs with .aif extensions are the AIFF format files that were exported from GarageBand. The songs with .mp3 extensions are the files that were converted in iTunes.
You can preview (listen to) the song files in the Finder.
| 7. | Click any of the song files to open them in the Preview column of the Finder.
 The selected song file opens in the Preview column.
| 8. | Click the Play button in the Preview controls to preview the song.
| 9. | Click the MP3 version of the same song and listen to it in the Preview column.
Can you hear a difference in the sound quality? You may or may not hear a difference, depending on what type of speakers or headphones you are using. The .aif version is uncompressed and takes 16.1 MB of disk space, while the .mp3 version is compressed and takes only 1.8 MB of disk space. You can use the compressed version for your iPod to maximize space, and the .aif version for your video presentations for better quality audio.
|
There you have it! You now know how to export your songs from GarageBand to iTunes, and from there, how to share your songs with the other iLife applications. |