| You've already worked with muting tracks, so let's take a look at soloing a track. When you mute a track, it silences that track. If you solo a track, it silences (mutes) all of the other tracks. Our goal in this exercise is to use mute and solo to decide which percussion tracks to keep, and which to delete. When you build a song, it is common to have multiple versions of the same part. Then you can mix and match them, or pick the best one and delete the unwanted tracks. Right now, the active percussion tracks consist of the 70s Ballad Drums 01 regions and several Shaker regions.  To solo a track, click the Solo button in the track header. The Solo button looks like a pair of headphones. 1. | Click the Solo buttons for the active Drum Kit track and Shaker track (the second and third tracks from the top).
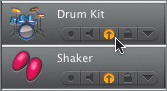 The regions in all of the other tracks will turn gray to show they have been muted.
| 2. | Move your playhead to the beginning of the 16th measure.
 | 3. | Press the spacebar to play the song up to the beginning of the 32nd measure.
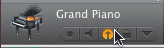
| 4. | While the song is playing, click the Solo button for the Grand Piano track to hear it with the percussion tracks.
 | 5. | Click the Solo buttons on all three tracks again to unsolo the top three tracks.
One thing to remember when you're muting or soloing is that mute overrides solo on all other tracks. What does that mean? If you solo a track, it will mute all other tracks. If you unsolo a track, it will unmute all the other tracks, except tracks that have the Mute buttons turned on.
The three lower percussion tracks were muted separately. When you clicked the Solo button, they remained mute, and when you turned off solo, they remained mute. In other words, if you turn on a Mute button, you can't turn it off using the Solo buttons from another track.
Let's create a cycle region to make it easier to experiment with solo and mute and try out the different percussion tracks with the rest of the song.
| 6. | Click the Cycle button in the transport controls.
| 7. | Create a cycle region that starts around the beginning of the 15th measure and goes until the beginning of the 40th measure. (The cycle region should include all of the percussion regions in the lower three percussion tracks.)
 | 8. | Press the spacebar to begin playback of the cycle region.
| 9. | Click the Mute buttons on the lower percussion tracks to turn mute off.
| 10. | Mute the upper Drum Kit track with the 70s Ballad Drums regions.
| 11. | Mute the Shaker track to hear the song with and without the shaker.
| 12. | Solo the Grand Piano track and the lower percussion tracks to hear them by themselves.
| 13. | Try different combinations of the lead instrument and the percussion tracks.
When you finish experimenting with solo and mute, press the spacebar to stop playback.
Well, what did you come up with? After much deliberation, I think the lower percussion tracks have much more personality, and they enhance the song, while the 70s Ballad Drums track seems a little too passivethis track keeps time but doesn't add anything to the song. I think it's time to delete the 70s Ballad Drums track. The Shaker track still works, so that track can stay with the others.
| 14. | Click the Drum Kit header on the second track from the top.
| 15. | Press Cmd-Delete to delete the track.
| 16. | Click the Cycle button to close the cycle region, then turn off all Mute and Solo buttons on the remaining tracks.
| 17. | Play the full song one more time to hear all the changes in the song.
|
Save and Close the Project Now that you have finished the track changes to the 2-3 Homecoming Starting song, you're ready to save and close the project. 1. | Press Cmd-S to save the project.
| 2. | Choose File > Close Window.
The GarageBand window closes along with the program.
|
|