| In the old days of recording an electric guitar, the particular sound the guitar made was determined by the amplifier, stage, and additional recording equipment used by engineers to alter the sound. Amplifiers were just big black speakers used to project the sound of an electric instrument. Now that digital recording has emerged, the new amplifiers have settings to alter the sound of the guitar itself. GarageBand builds this extraordinary technology into the software with an effect called amp simulator. Amp simulation lets you change the sound of the guitar as you play and record. All you have to do is play your guitar and then select the type of amplifier simulation sound and feel for your guitar. For those of you raised on a computer, this may not seem like a big deal, but for those of us who used to perform on stage with amplifiers and racks of equipment, it's huge. Using Amp Simulation At this time, there should be three tracks titled No Effects in the Timeline; two of them include your recorded Real Instrument regions. In this exercise, you'll apply amp simulation effects to the upper No Effects track containing the Guitar Recording region I provided. Later, you can try the different effects on your recordings. 1. | Unmute all of the tracks. In the upper No Effects track, click the Solo button (looks like headphones).
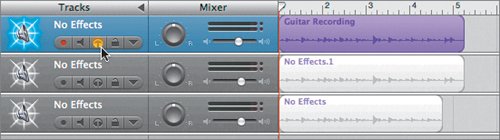 When a track is soloed, the sound is isolated, and other unsoloed tracks will be temporarily muted. When a track is soloed, the sound is isolated, and other unsoloed tracks will be temporarily muted.
| 2. | Press Cmd-U to turn off the metronome during playback.
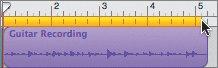
| 3. | In the Timeline, play the Guitar Recording region so you can hear the part with no effects.
Now let's listen to it with one of the different guitar amp simulators. To change the sound, all you have to do is change the track info.
| | | 4. | Double-click the upper No Effects track header to open the Track Info pane, if it is not already showing.
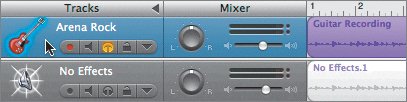
| 5. | In the Track Info pane, click Arena Rock to change the sound of the guitar amplifier.
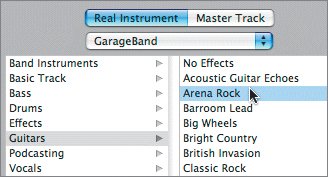 The icon and name of the track change as well as the sound.
 | 6. | Play the track from the beginning and listen to the guitar part using the Arena Rock amplifier sound.
| 7. | Press C to show the Cycle Region Ruler. Create a cycle region above the recorded guitar region in the Timeline.
 | | | 8. | Play the track again. This time, click through some of the different guitar amplifier sounds as the track plays to hear them one at a time.
Tip Once you've clicked a new amp simulator, you can use your up and down arrow keys to move through the other guitar amplifier sounds. If you press the up and down arrows before you click in the Track Info pane, you'll change which track is selected in the Timeline instead. Notice that each guitar amp simulator sounds different.
Note Additional amplifier sounds are available in the Jam Pack expansion packages. | 9. | In the Track Info pane, select No Effects.
The track icon changes back to a speaker.
|
The next step will be to add some effects to the No Effects track. Adding Custom Effects to a Track Even though your current track is called No Effects and has no effects doesn't mean that you can't add effects to it. This exercise will acquaint you with the effects included in GarageBand and how to add one to a track. You will work more with effects later in this book. For now, you will just add a simple effect like Reverb. 1. | Select the upper No Effects track, if it isn't already selected.
| | | 2. | In the Track Info pane, click the Details disclosure triangle to get more details about the effects used in the track.
 The Track Info pane expands to reveal additional detailed information about the track. Notice that all of the sliders to the right of the effects are dimmed (gray) because the track currently has no effects applied to it.
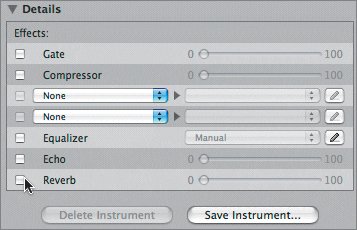 | 3. | Click the Reverb box to add reverb to the track.
You can now adjust the slider to the right of the Reverb effect. By default, the slider is set to 0 (no reverb). The highest setting is 100.
| 4. | Drag the Reverb slider about halfway (to approximately 50).
 | 5. | Play the selected track to hear it with the reverb. While the track plays, adjust the Reverb slider to hear the track with different levels of reverb. Repeat this process until you get the reverb just the way you like it. I'm going to stick with around 50 on mine. Don't close the Track Info pane.
You have successfully added the Reverb effect to your track.
|
Viewing Selected Instruments Before you save the instrument effect you created, let's take a look at the View Instrument pop-up menu at the top of the Track Info pane (below the Real Instrument and Master Track buttons). 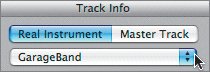 With this pop-up menu, you can choose which instruments to view in the Track Info pane. 1. | Click the View Instrument pop-up menu to see the different options.
The View Instrument pop-up includes three default settings: Show All, My Settings, and GarageBand. If you have any of the Jam Pack expansion packages installed on your computer, they will show up on the list, too.
Note Your pop-up menu may vary from mine depending on which custom loops, instruments, or Jam Packs you have installed on your computer. | 2. | Choose Show All from the View Instrument menu.
This setting will show all of your instruments in the instrument list, including customized settings you create and save.
|
Saving an Instrument Now that you've added an effect to your track, you can save the instrument with your custom effect to your list of instruments. Once you have saved an instrument sound, you can use it again on different tracks or projects. 1. | In the Track Info pane, click the Save Instrument button.
 The Save Instrument dialog appears.
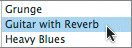
| 2. | Type Guitar with Reverb in the "Save as" field and click Save.
Guitar with Reverb appears in the Guitars instrument list.
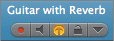
 | | | 3. | Click the Details disclosure triangle to hide the details portion of the window. Press Cmd-I to close the Track Info pane.
The track in your Timeline is now called Guitar with Reverb.
 | 4. | Save the project.
|
You can use this method to create and save different instruments you want to use later. Note To delete a saved instrument, select it in the instrument list and then click the Delete Instrument button. You can also revise an instrument anytime by selecting the instrument, changing the settings, and then saving the changes.
|