| Now that the title has the clip in place, you might notice that while the effect looks good, it has no "dimensionality" to it; that is, it looks a little flat. There isn't much differentiation between the background and the title. In fact, if you were to use, for example, a clip of the ocean inside your title and your title overlaid a scene of the beach, it could be difficult to tell what's title and what's background. This can be fixed easily using the ever popular "drop shadow." To apply a drop shadow we first create a copy of our Title 01 clip. Then, we add a shadow to it. Create a Copy of the Title 01 Clip  Click the Available Media button to switch to the Available Media view, if it's not already active. Click the Available Media button to switch to the Available Media view, if it's not already active.
 Right-click the Title 01 clip in the Available Media view to bring up the contextual menu. Right-click the Title 01 clip in the Available Media view to bring up the contextual menu.
 Select Duplicate from the contextual menu. Select Duplicate from the contextual menu.
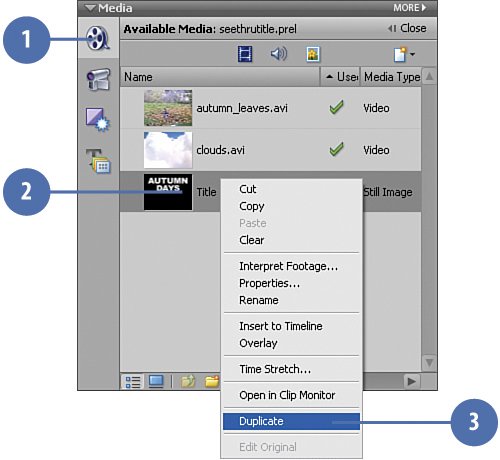
 Select the duplicate clip, Title 01 Copy, in the Available Media view and right-click on the clip. Select the duplicate clip, Title 01 Copy, in the Available Media view and right-click on the clip.
 From the contextual menu select Rename. From the contextual menu select Rename.
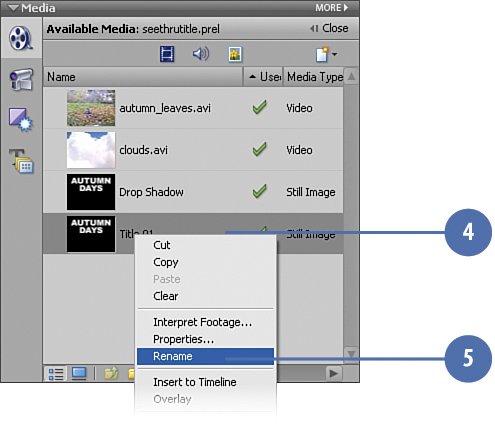
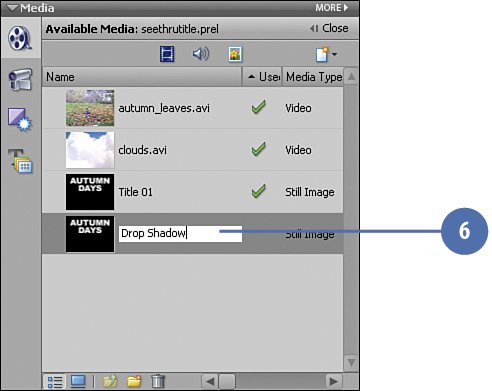
 Rename the copy Drop Shadow. Rename the copy Drop Shadow.
Place the Shadow Clip on the Timeline - Drag the Drop Shadow title clip from the Available Media view and drop it onto the Video 2 track on the Timeline.
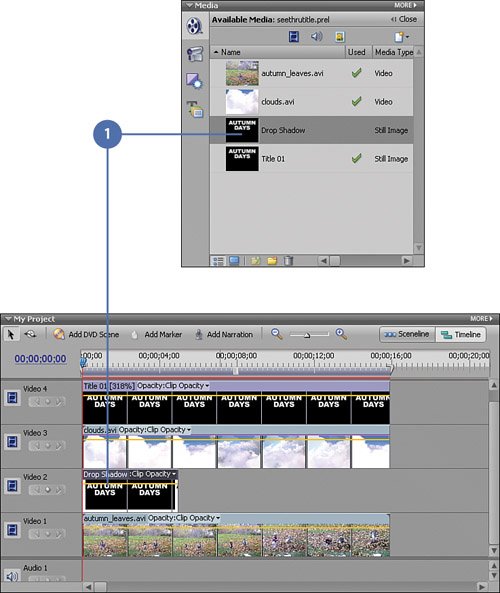 - Grab the tail end of the clip and trim it so that it is the same length/duration as the other clips on the Timeline.
 Did You Know? You need to create a separate clip for shadows. You may be saying to yourself, "Hey, why didn't we just add a drop shadow to the title we already have?" Consider this: Had we used the Titler's drop shadow capabilities for the Title 01 clip (the one with the sky now floating in it), the clouds.avi clip would show through the drop shadow as well. This is due to the fact that the Track Matte Key effect works by allowing the second clip to appear through the matte's white space. And since there's just a little white in the drop shadow, a bit of the clip shows through. By using a second clip (a copy of the first Title 01 clip), we get a nice, clean drop shadow and retain our crisp "see-through" title. For the shadow to work, it must be on the right track, and this would be behind (below) both the Title 01 track on the Video 4 track and the clouds.avi clip on the Video 3 track.
|
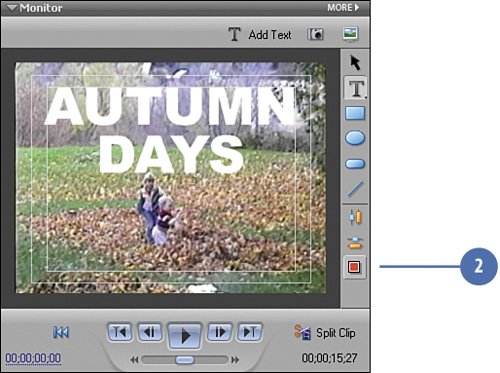
Create the Drop Shadow - Double-click on the Drop Shadow clip on the Video 2 track to access the Titler.
- Click the Color Properties button to access the Color Properties dialog box.
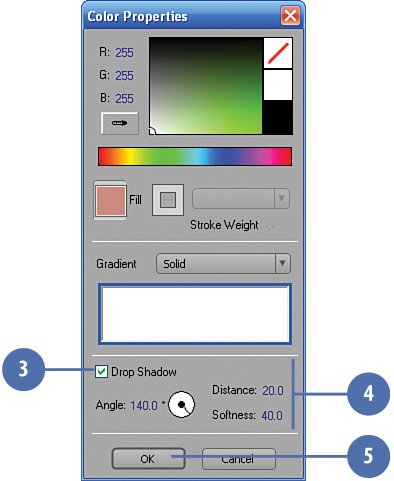
 - On the Color Properties dialog box, add a drop shadow to the text by clicking the Drop Shadow check box.
- Set the following drop shadow parameters:
Angle: 140 Distance: 20 Softness: 40
- Click OK.
 Tip For these settings, you can type the numbers in directly, or use your mouse to slide across and adjust them that way. For the Angle setting, you can use the knob control if you choose. Also, feel free to adjust these settings as you see fit. You can see the changes you make in the Titler in real time. (Move the Color Properties dialog box out of the way to see the Titler, if necessary.)
|