| Inserting Gallery objects into your drawings requires little more than displaying the Gallery, selecting a theme, selecting the item you want to insert, and then adjusting the inserted item's size and location once you place it onto your drawing. Before You Begin  120 About the Gallery 120 About the Gallery
See Also  122 Add New Items to Gallery 122 Add New Items to Gallery
When you insert Gallery objects, you have two choices to make: -
Insert a copy ” Creates a new copy of the Gallery item and inserts it into your drawing. -
Insert as a link ” If the original Gallery item changes, your drawing's linked object changes as well. If you change a Gallery object that's been linked to in a drawing, when you subsequently open that drawing for editing or printing, the Gallery object will take on its newest appearance. NOTE  | Unless you regularly change Gallery objects, you'll find it easiest to insert Gallery objects as copies. |
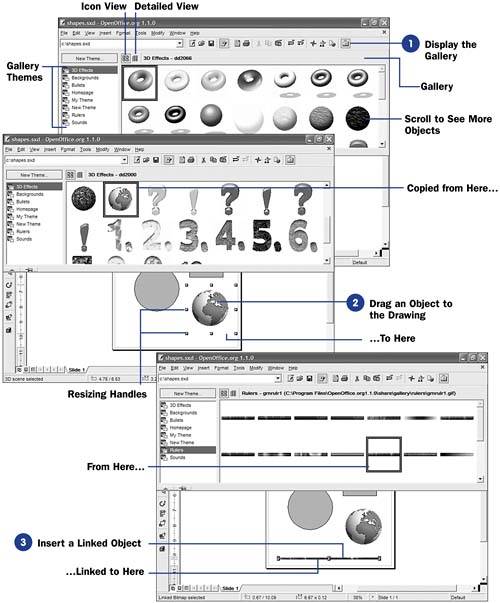  -
Display the Gallery Select Tools, Gallery or click the Function bar's Gallery icon to display the Gallery. Click to select the appropriate theme you wish to choose from. If you need to, scroll the Gallery window down to see more objects. TIP  | Click the Detailed View button to see the filenames and locations for most of the Gallery's objects. | -
Drag an Object to the Drawing Click and drag the object you want into your drawing area. When you drag an object, Draw places a copy, not a link, to that item, so a copy is saved with your drawing. Once the image is in your drawing, you can move and resize it. NOTE | | As you can see, linked objects behave just as copied objects when you insert them. Linked objects can change, however, if their original Gallery objects change. | -
Insert a Linked Object To insert a linked object instead of copying an object into your drawing, hold the Shift and Ctrl keys while you drag the object to your drawing. TIP | | You may need to close the Gallery to see your entire drawing and adjust the background. Click the Gallery button to close it. | -
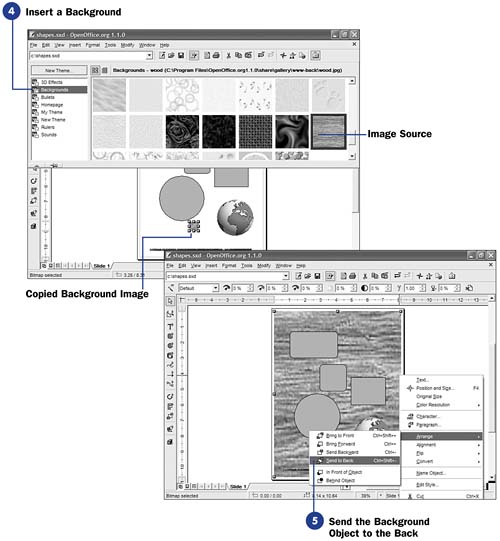
Insert a Background
To add one of the Gallery's background images to your drawing, click to select the Backgrounds theme. Actually, any Gallery graphic image can serve as the background, but the ones listed in the Backgrounds theme are designed to be background patterns and are not really suitable for standalone images.
Drag the image to your drawing. You must now expand the image to fill your entire drawing area so it consumes the entire background. Drag to resize the image's resizing handles until it fills your screen. Don't worry about overwriting other objects on your drawing.
-
Send the Background Object to the Back
Right-click the background image and select Arrange, Send to Back to move the background image to the very back of your drawing so that all the other images and text can be seen. Adjust the background if needed to completely fill your drawing area. Be careful that your background is not so busy that it detracts from your drawing's primary elements.
|