| The second step of creating a template is to define the areas of the page that should be editable in documents that are based on the template. (Editable areas are the portions of the document that can be modified in pages that are based on the template.) As a rule, all areas of a template are initially locked. If you want to change information on pages that use the template, you need to create the editable areas or regions. In many Websites, these regions are often content areas. Everything in the template that is not explicitly defined as editable is locked in pages that are based on the template. You can make changes to both the editable and locked areas while editing the original template, but on a page built from a template, you can make changes only in the editable regions. | | 1. | In teacher.dwt, click the Split view button on the Document toolbar to show both Code and Design views simultaneously. Select the text teacher's full name at the top of the area for teacher bios; look at the code to ensure that neither the opening <h2 > nor closing </h2> tag is included in the selection.
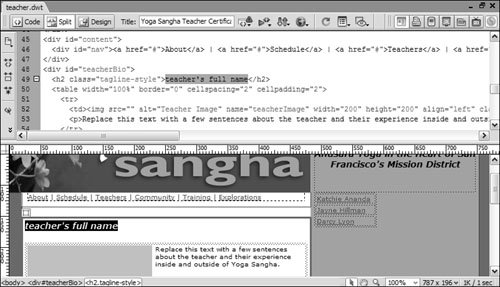 This section of the page needs to be editable so you can change the content in subsequent pages. In this instance you are selecting only the content within the <h2> block tag; therefore, any page created with this template will only allow changing of the textit will not allow the addition of any block tags within this editable region. This section of the page needs to be editable so you can change the content in subsequent pages. In this instance you are selecting only the content within the <h2> block tag; therefore, any page created with this template will only allow changing of the textit will not allow the addition of any block tags within this editable region.
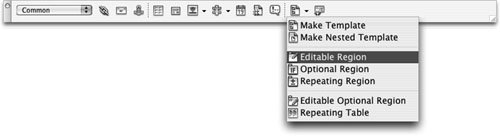
Note If the file <<Template> > (teacher.dwt) is not already open, you can open it from the Templates category of the Assets panel. The template you just created in the previous exerciseteacher.dwtappears in the list as teacher. In the Assets panel, double-click the name of the template to open it. Alternatively, you can select the name in the Assets panel list and click Edit at the bottom of the panel. | 2. | From the Templates menu in the Common category of the Insert bar, choose the Editable Region icon.
 The New Editable Region dialog box opens. The Name text field will initially contain a generic name that is generated by Dreamweaverthe number at the end of the name is automatically incremented and might vary from the one shown in the following example. The New Editable Region dialog box opens. The Name text field will initially contain a generic name that is generated by Dreamweaverthe number at the end of the name is automatically incremented and might vary from the one shown in the following example.
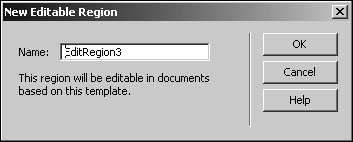 | | | 3. | Type teacherName in the Name text field and click OK. Click the Design button on the Document toolbar to switch back to Design view.
Don't use any special characters (quotation marks, brackets, and so on) for region names. Make each name uniqueyou can't use the same region name more than once in the same template.
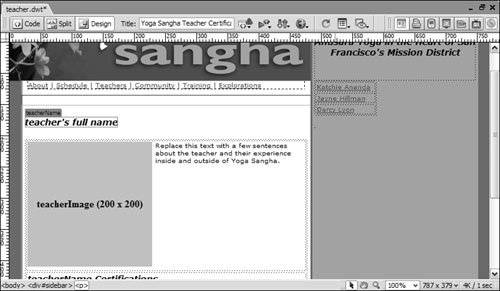
In the Document window the editable area appears outlined in blue with a tab at the top displaying the name of the region. The extra space that appears between the top border of the table and the placeholder image is due to the editable region tab. No extra space is actually inserted.
If you don't see the region names and outlines, choose View > Visual Aids > Invisible Elements.
 A new editable region is created inside the header. You'll see the same blue outline with a tab at the top displaying the name of the editable region, and the word description is placed inside the editable area. Later, when you apply this template to a document, you will select the text inside this area and replace it with text. A new editable region is created inside the header. You'll see the same blue outline with a tab at the top displaying the name of the editable region, and the word description is placed inside the editable area. Later, when you apply this template to a document, you will select the text inside this area and replace it with text.
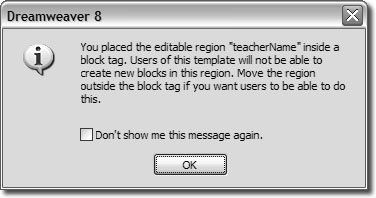
| | | 4. | Choose File > Save to save the template. Click OK to the warning message.
If you have any editable regions that are within a block tag you will receive a warning each time you save the template.
 | 5. | Use the tag selector to select the table cell that contains the teacherImage image placeholder and bio text. Click the Editable Region button in the Templates menu on the Insert bar, name the region teacherBio, and click OK.
Tip To select the table cell using the tag selector, click the teacherImage in the Document window and then select the <td> that immediately precedes it in the tag selector. The names of all editable regions that you create are listed at the bottom of the Modify > Templates menu. A checkmark appears next to an editable region in this list if it is selected, if the insertion point is in that region, or if an item in that region is selected.
| 6. | Select the table cell that contains the copyright text. Click the Editable Region button in the Templates menu on the Insert bar, name the region copyright, and click OK.
Anything that has to change in documents based on the template, including links, needs to be in an editable region.
| 7. | Save your file. Click OK at the warning message about the editable region inside a <h2> tag.
|
The region names appear on tabs above all the outlined areas to help you identify which areas you designated as editable. 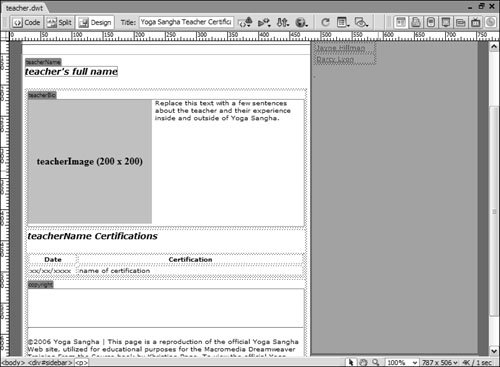 Note Many of the tools and features available for creating and editing your original templates will be available only in the Design view, in which you have been working. Some template controls are not available if you are in Code view, which you will work with in Lesson 16. If you are working in Code view and find yourself unable to perform certain template operations, switch to Design view.
Leave this file open to use in the next exercise. |