| In addition to a feature for combining your scenes, Studio gives you three options for dividing up scenes in the Album: splitting, subdividing, and scene detection. Splitting is the manual process of dividing one scene into two or multiple scenes, convenient when automatic scene detection doesn't yield useful results. Subdividing involves cutting your clips into regular intervals, useful when working with long continuous videos with no natural breaks. Finally, automatic scene detection breaks the video into intervals based on scene changes in the content or discontinuities in the shooting time and date of the video. These three options are available during capture and can be accessed in the Album for scenes captured with scene detection disabled, captured clips with scenes that were manually combined, or videos that were imported. Note that making scene changes based on discontinuities in the shooting date and time requires DV source video, since MPEG and non-DV source AVI files don't contain the necessary time code. To split scenes manually 1. | Select the video to split.
| 2. | Use the Player controls to move to the desired initial frame of the second scene (Figure 6.18).
Figure 6.18. Here I shot the nameplate and walk-bys of two jets in one scene. To separate the footage into multiple scenes, I move the Player controls to the desired initial frame of the second scene. 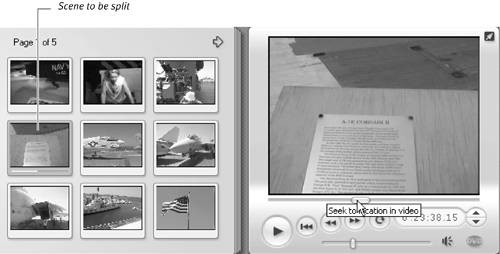
| 3. | Do one of the following:
- From the Studio menu, choose Album > Split Scene.
- Place the pointer over the video you want to adjust; then right-click and choose Split Scene (Figure 6.19).
Figure 6.19. Then right-click and select Split Scene. 
Studio splits the scene into two scenes, with the selected frame as the initial frame of the second scene (Figure 6.20).
Figure 6.20. Now we have separate scenes for the A7E Corsair (on the left) and F8K Crusader, two key jets in the post WWII era. 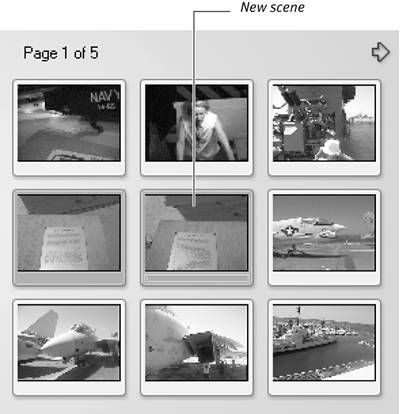
|
To subdivide scenes into intervals 1. | Select the video to subdivide.
| 2. | Do one of the following:
- From the Studio menu, choose Album > Subdivide Scenes.
- Right-click and choose Subdivide Scenes.
The Subdivide Selected Scenes dialog box appears.
| 3. | Type the desired interval in the dialog box, with the minimum interval being 1 second (Figure 6.21).
Figure 6.21. Select the desired interval (the minimum is 1 second, default is 5) and click OK. 
| 4. | Click OK.
Studio splits the video into scenes of the specified interval, with any remaining time placed in a separate scene. The new scenes are added to the Album.
|
To detect scenes in your clips 1. | Select the video to be adjusted.
| 2. | Do one of the following:
- In the Studio menu, choose Album > Detect Scenes by Video Content or Detect Scenes by Shooting Time and Date.
- Right-click and choose Detect Scenes by Video Content or Detect Scenes by Shooting Time and Date.
Studio implements the selected scene-detection option. First you see a dialog box with a bar tracking Studio's progress (Figure 6.22); then the new scenes appear in the Album.
Figure 6.22. When the progress bar appears, Studio is analyzing the clip using the selected scene-detection method. 
|
 Tips Tips
Studio has much more precise tools for trimming, or the process of cutting unwanted frames from the beginning and end of each video clip. Accordingly, use splitting for rough cuts and for making the scenes in the Album easier to manage, and use the tools in the Movie window for fine-tuning. If you customize comments for a scene and later split, subdivide, or use scene detection for that scene, Studio deletes the customized scene comments and uses the default naming convention. If you plan on customizing scene comments, do this after splitting or combining your scenes. Splitting also updates the order of all Album scenes, so if you split Scene 1 into two scenes, the former Scene 2 becomes Scene 3. Keep this in mind if you've been cataloging your scenes-based upon automatic names.
|