| Placing logos over videos is a nice professional touch, though in this situation Studio presents a minor catch-22. Simply stated, from the Title editor, you can place, move, and resize a logo over your video, but you can't make it transparent. Alternatively, you can drag an image to the Title track from the Still Images tab in the Album and make it transparent (assuming that you follow the rules discussed here), but you can't move or resize the image or it becomes a full-screen logo. These are the general rules; this section describes how to work within them. An exception to the rules is discussed in the sidebar "The Art of Being Transparent," later in this chapter. To overlay a logo on video 1. | Double-click the Title track at the desired location for the logo overlay.
The Title editor opens.
| 2. | In the Title editor, do one of the following:
- Click the Pictures icon at the left of the Title Editor Album (Figure 10.57).
Figure 10.57. Click the Pictures icon to open the Pictures Album. 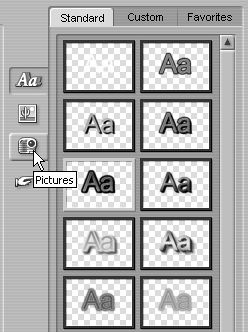
- From the Studio menu, choose Title > Album > Pictures.
The Pictures Album opens (Figure 10.58).
Figure 10.58. The Pictures Album. 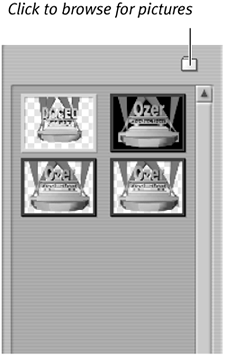
| 3. | If necessary, click the Folder icon to navigate to the directory containing your logos.
| 4. | Drag the image into the Design window (Figure 10.59).
Figure 10.59. Drag the image into the Design window. Unlike a background image, an image dragged from the Pictures Album can be scaled or moved. 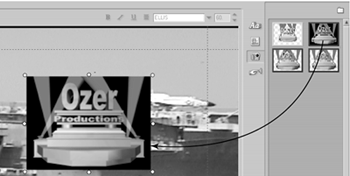
| 5. | Move and resize the image as described in "To resize text" earlier in this chapter.
Note that you can't skew or rotate the image, only resize and move it.
|
 Tips Tips
Although you can't argue with the sheer elegance of the logo shown in Figure 10.59 (pretty cheesy, eh?), you probably wish the black background would go away. The sidebar "The Art of Being Transparent," later in this chapter, describes how to accomplish this. The program of choice for creating titles and logos is Ulead Systems' Cool 3D Production Studio, available at www.ulead.com. Using one of Cool 3D's supplied templates, I created the logo shown in Figure 10.59 in about two minutes.
To make a logo transparent 1. | From the Still Images tab, drag the logo to the Title track (Figure 10.60).
Figure 10.60. To make an image transparent, you must load it from the Album. See how this logo is transparent now? 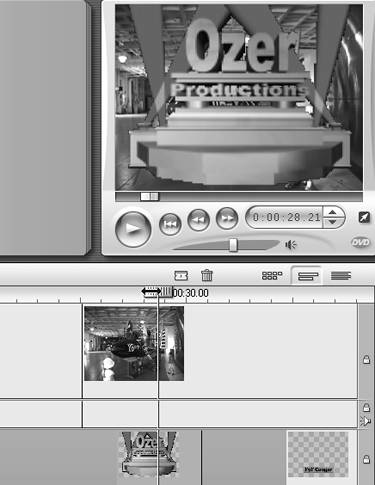
In the Player, Studio zooms the image to full screen and makes it transparent, so you can see segments of the video behind it.
| 2. | Double-click the logo to open the Title editor (Figure 10.61).
Figure 10.61. Notice how the same logo shows no transparency in the Title editor. 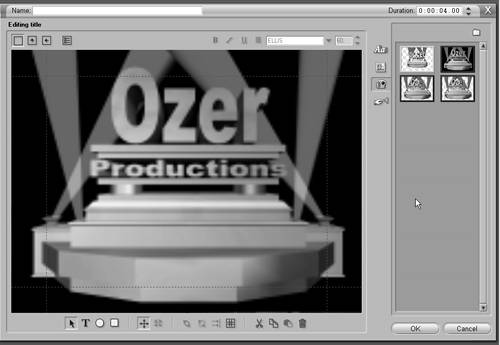
The logo is full screen and shows no transparency in the Title editor. In addition, selecting the logo raises no control points. The image looks fuzzy (though perhaps not in your small version of it) because the 160 x 120 resolution image was zoomed to full screen.
|
Tips Studio assumes that the top-left pixel is the transparent color and eliminates this color when displaying the logo. In the Ozer Productions logo, the top-left pixel is black, the same color as the background to be eliminated. When you want to make an image transparent, computer-generated images work best, or real-world images carefully edited to produce a single, consistent background image. Since you can't resize the logo when pulling it down from the Album, the best solution is to create a full-screen (640 x 480) image with the logo as a small component in the desired location (Figure 10.62). Remember to observe the title-safe zones when creating images in this fashion. Figure 10.63 shows the image overlaying the video. Figure 10.62. Since you can't resize images placed on the Title track from the Album, you have to pre-make your logo files like this. 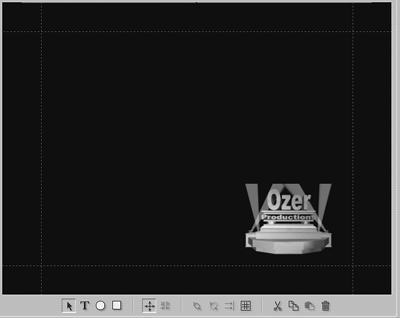
Figure 10.63. Here's how the logo looks in use. 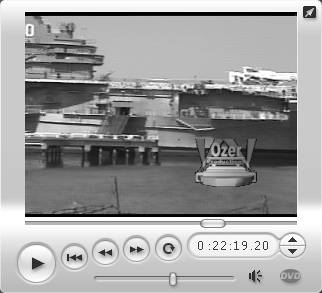
The Art of Being Transparent This section's introduction describes Studio's catch-22 when it comes to transparent logo overlay: if you drag in an image from the Title editor, you can move and resize it, but you cannot make it transparent; if you drag in an image from the Still Images tab of the Album, you can make it transparent, but you cannot move or resize it. Not to worry; there is one undocumented exception to this catch. If you create a 32-bit image with an alpha channel for the desired transparency region, Studio recognizes and eliminates this region from the Title editor, allowing full moving and resizing control. For example, of the three logos in Figure 10.64, two are transparent including the Ozer Productions spinning globe, which has active edit points, proving that the logo is both resizable and movable. These were produced as 32-bit video overlays in Targa (TGA) format in Ulead's Cool 3D Studio. The third logo was output as a simple 24-bit bitmap file, and as you can see, it's not transparent. Note that Studio displays the two images as transparent in the Looks browser (it also displays another transparent logo not used in this example), showing a checkered gray pattern behind them instead of the pure black backgrounds of the other images. Figure 10.64. The Title editor can recognize transparency masks on 32-bit images with an alpha channel, providing the best of both worlds. 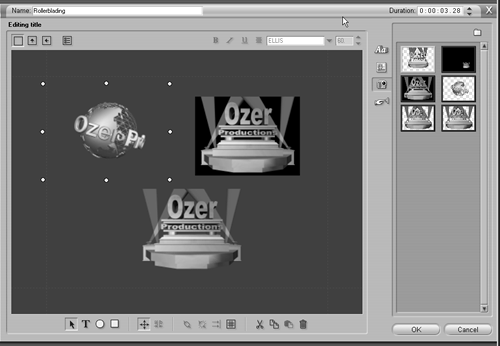
In retrospect, it's not surprising that Studio recognizes a transparent alpha channel in images, since the program uses this technique to recognize transparent areas in DVD buttons (see "Working with Buttons" later in this chapter). The bottom line is that if you understand how to produce 32-bit images with an alpha channel in programs like Cool 3D Studio and Adobe Photoshop, you can make your images transparent in Studio so that you can move and resize them at will in the Title editor. Check www.doceo.com/Studio9 for details on creating a transparent logo in Cool 3D Studio and Photoshop. |
|