| As you may recall, a full-screen title is any title that lives on the Video track, since it replaces the video completely, taking up the full screen. All full-screen titles initially have black backgrounds (Figure 10.50). You can go with that minimalist approach, or you can add a background, which can be a solid color, gradient, or full-screen image. Figure 10.50. Here's what a full-screen title looks like when you first create it. It has no background but we'll fix that in a hurry. 
You can choose from Studio's range of useful background images or use your own. Just remember: all images used as a background run full screen and can't be resized and used as foreground design elements such as logos. For information on using images as logos, see "Adding Logos to Video" later in this chapter. To create a single-color background 1. | In the Title editor, do one of the following:
- Click the Backgrounds icon at the left of the Title Editor Album (Figure 10.51).
Figure 10.51. Getting to the Backgrounds Album. 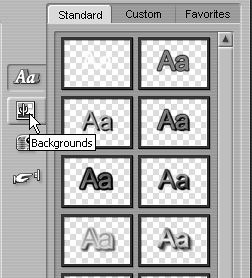
- From the Studio menu, choose Title > Album > Backgrounds.
The Backgrounds Album opens (Figure 10.52).
Figure 10.52. Your four choices for menu backgrounds: solid, gradient, transparent, and image. 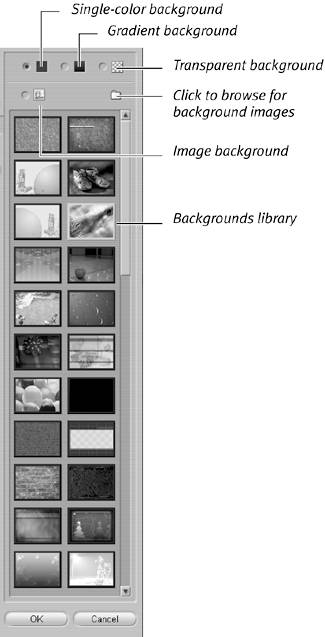
| 2. | Select the single-color background radio button (Figure 10.52).
| 3. | To change colors, click the colored box next to the radio button.
Studio's Color Selection dialog box opens (Figure 10.53).
Figure 10.53. The familiar Color Selection dialog box. 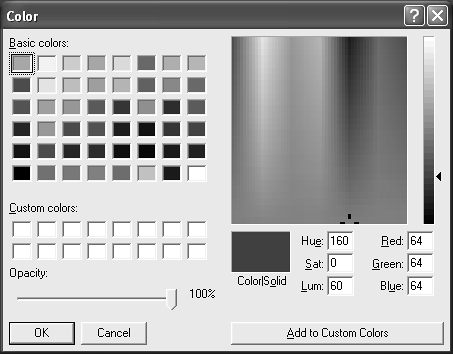
| 4. | Choose the desired color by selecting it from the Basic Colors or Custom Colors palette or by clicking a color on the spectrum.
| 5. | If you want, save your custom color by clicking the Add to Custom Colors button (Ctrl+A).
Saving the custom color helps you maintain uniformity as you work.
| 6. | Click OK to close the dialog box.
Studio replaces the background with the selected color.
|
To create a gradient background 1. | In the Title editor, click the Backgrounds icon at the left of the Title Editor Album (Figure 10.51).
The Backgrounds Album opens (Figure 10.52).
| 2. | Select the gradient background radio button.
| 3. | To change colors, click the colored box next to the gradient radio button.
Studio's Gradient Selection dialog box opens (Figure 10.54). The boxes at each corner of the Gradient preview box control the gradient blend.
Figure 10.54. This is where you choose your gradient colors. 
| 4. | Click any box to open its Color Selection dialog box (Figure 10.53). You can configure each of the four colors independently.
| 5. | Click the X in the upper-right corner to close the Gradient Selection dialog box.
Studio replaces the background with the selected gradient.
|
To create a transparent background 1. | In the Title editor, click the Backgrounds icon at the left of the Title Editor Album (Figure 10.51).
The Backgrounds Album opens (Figure 10.52).
| 2. | Select the transparent background radio button.
This is the default setting for the background, for which there are no options. The background simply appears as black behind the menu or title components.
|
To select an image background 1. | In the Title editor, click the Backgrounds icon at the left of the Title Editor Album (Figure 10.51).
The Backgrounds Album opens (Figure 10.52).
| 2. | Select the image background radio button.
| 3. | Do one of the following:
- To use an image from the Album, select the desired image.
Studio replaces the background with the selected image (Figure 10.55).
Figure 10.55. To change the background, just select the image you want. 
- To use an image from another location, click the Folder icon to browse for images elsewhere (Figure 10.52). In the standard Open dialog box that appears, navigate to and select the desired image file.
Studio replaces the background with the selected image and populates the Image browser on the right with the new files (Figure 10.56).
Figure 10.56. You can use the images supplied by Pinnacle, or insert your own. 
|
 Tips Tips
The original location of Studio's excellent background images is Program Files > Pinnacle > Studio 10 > Backgrounds, should you need to find these images again. If a selected image doesn't fill the screen in either height or width, Studio stretches the image proportionately (without distorting it) to fill either height or width, whichever is closer. For the most predictable results, prepare your background image files at your target output resolution, using 640 x 480 pixels for DVD, the resolution used for Pinnacle's background files. For a complete discussion of image preparation, see "Editing Still Images" in Chapter 5.
|