Creating Fancy Text Effects with WordArt
You want the cover of the brochure to have a title that grabs your readers attention, so we ll now introduce you to WordArt, a program that comes with the Office XP family of programs, including Publisher 2002. You can use this handy program to mold text into shapes that fit the mood of a publication.
Creating a WordArt Object
Follow the steps on the next page to jazz up the cover of the brochure with a WordArt object.
| |
Publisher enters the telephone number from your personal information set only in phone/ fax/e-mail frames . The frame containing the telephone number at the bottom of the right panel on page 1 is a plain text frame. To insert a phone/ fax/e-mail frame, click Personal Information and then Phone/ Fax/E-mail on the Insert menu.
| |
1. Select the Price List frame in the right panel of the first page, and click Delete Object on the Edit menu to delete the frame and its text.
You don t need this frame because you will use a WordArt frame instead.
2. Click the Insert WordArt button on the Objects toolbar.
The WordArt Gallery dialog box appears, as shown in this graphic:
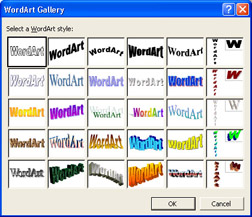
3. Click the fifth WordArt thumbnail in the fourth row (the wavy yellow one), and then click OK .
The Edit WordArt Text dialog box appears, as shown in this graphic:
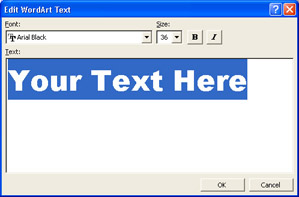
4. Replace the Your Text Here text in the Text box with Mojave Desert Jeep Tours . Click Eras Bold ITC in the Font dropdown list, and then click OK .
Publisher inserts the WordArt object into your brochure and displays the WordArt toolbar, as shown in this graphic:

Customizing a WordArt Object
Your new WordArt object could use some adjustment so that it fits under the right panel s bulleted dots. Also, you might want to experiment with the different styles that you can use to make your WordArt object more aptly fit your brochure s design. Let s customize the WordArt object:
1. Click Rulers on the View menu to display the rulers.
2. Double-click the WordArt toolbar s title bar to dock it out of the way.
3. Using the rulers as guides, drag the WordArt object s handles to reduce its size to about 1 inch tall by 2 inches wide.
4. Center the object under the row of dots in the brochure s right panel, and position it approximately halfway between the row of dots and the logo.
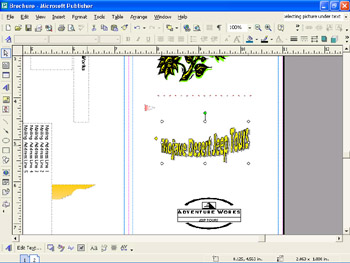
The results appear as shown in this graphic:
| |
The WordArt toolbar has a variety of buttons for customizing your WordArt objects. You can use the Format Word-Art features to add and modify borders, designate specific size settings, and perform other formatting tasks . Some of the text effects that you can apply by clicking the buttons on the WordArt toolbar include equalizing the height of the uppercase and lowercase letters ; changing the spacing between characters ; rotating, flipping, and stretching the text; and adjusting the text wrapping and alignment.
| |
5. Click the WordArt Shape button on the WordArt toolbar.
Publisher displays this palette of options:

6. Experiment with some of the different shapes you can apply. When you are finished experimenting, click Wave 1 (the fifth shape in the third row).
Publisher adjusts the text to display it in the wave shape.
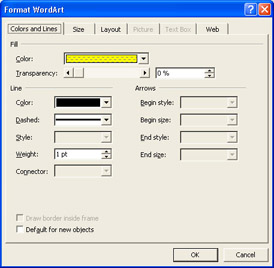
7. Next, click the Format WordArt button on the WordArt toolbar.
Publisher displays the Format WordArt dialog box shown in this graphic:
| |
If you want to make changes to a WordArt object s text after you have inserted it in a publication, double-click the object to open the Edit WordArt Text dialog box along with the WordArt toolbar.
You can then edit the text and click OK, and then use the toolbar buttons to make further adjustments. When you are finished, click anywhere outside the WordArt frame.
| |
8. With the Colors and Lines tab displayed, click the down arrow to the right of the Color box in the Fill area, and then click the red color box ( Accent 3 , or the fourth box in the colors row) to coordinate the WordArt text color with the publication s color scheme.
9. Click OK to close the dialog box and apply the new color.
The WordArt text looks a little squished .
10. Drag the middle-left handle .5 inch to the left and the middle-right handle .5 inch to the right.
Now the WordArt object is approximately 3 inches wide and still centered under the dots.
11. Click anywhere outside the WordArt frame to close the WordArt toolbar, and then save your work.
Mohave Desert Jeep Tours title should look similar to the one shown to this graphic:

EAN: N/A
Pages: 76