Creating a Logo
As you know, Publisher provides many design templates to help you create different types of publications . But the program also has a Design Gallery of elements that you might want to use in more than one publication.
In this topic, you take a look at the Design Gallery, insert a logo for the cover of the Adventure Works brochure, and then modify it using the Logo Options task pane.
Inserting a Design Gallery Object
Logos often include a graphic or design that helps establish a visual identity. Let s insert a graphic from the Design Gallery to use as the basis for the brochure s logo:
1. Move to page 1 of the brochure, and scroll the bottom half of the right panel into view.
2. Click the Design Gallery Object button on the Objects toolbar.
Publisher displays the Design Gallery dialog box, shown in this graphic:
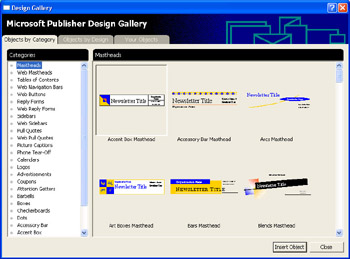
3. In the Categories list in the left pane of the Objects by Category tab, click various headings to see the available options in the right pane.
4. Click Logos in the left pane, and then double-click Open Oval Logo in the right pane.
Publisher inserts the object shown in this graphic on the page:

| |
It is worth taking the time to explore the objects available in the Design Gallery, including such useful publication elements as calendars, coupons , and attention getters like starbursts or flags. On the Objects by Design tab, you can display items grouped by design template. On the Your Objects tab, you can add your own objects to the Design Gallery and then insert them in your publications. To add an object to the Design Gallery, select it in your publication, click the Design Gallery button on the Objects toolbar, and click the Your Objects tab. Click the Options button in the lower-left corner and then click Add Selection to Design Gallery on the shortcut menu. In the Add Object dialog box, type a name for the object in the Object name text box, select a category in the Category drop-down list or type a name to create a new category, and click OK. To delete an object from the Your Objects tab, click the object s thumbnail in the right pane, click the Options button, click Delete This Object, and then click OK to confirm the deletion. If you want to add, delete, or rename categories in the Your Objects tab, click the Options button and then click Edit Categories to display the Edit Categories dialog box. When you finish making changes, click Close.
| |
Customizing a Design Gallery Object
Now that the new logo object is inserted in your publication, you can customize it so that it looks exactly the way you want. Follow these steps:
1. Click the Wizard button that is attached to the new logo, and when the Logo Designs task pane appears, click the Logo Options link at the top of the task pane.
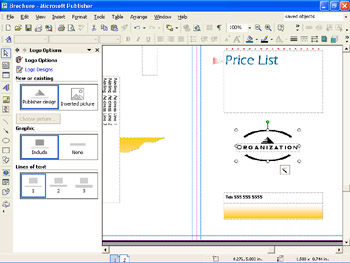
Publisher displays the Logo Options task pane, as shown in this graphic:
| |
To insert a special symbol, such as an accent mark or a pointing hand, click an insertion point and then click Symbol on the Insert menu. In the Symbol dialog box, click the symbol you want, and then click the Insert button. Different fonts include different symbols, so if you do not see the symbol you re looking for, click the down arrow next to the Font box and then click the font containing your symbol. (Wingdings is a good choice if you re looking for cute little pictures.) If you want to insert a special character, such as an em dash, ellipsis, or nonbreaking space, click the Special Characters tab of the Symbol dialog box to display the list of special characters .
| |
As you can see, the Logo Options task pane provides options for using an existing picture file as a logo, inserting or removing a graphic placeholder, or changing the number of lines reserved for text. (You can also change the logo s design from the Logo Designs task pane.)
2. In the Lines of text area, click 2 , and then click the task pane s Close button.
3. Click the logo s Organization placeholder frame to select it, and type Adventure Works to replace the existing text.
Because the placeholder text is formatted to appear as small capital letters, the words you typed appear in capital letters , even though you typed them with initial capitals only.
4. Increase the zoom setting to 200% for better visibility. Then select the Name placeholder, type Jeep Tours , and decrease the zoom percentage to 100% again.
5. Click the logo, and then click Object on the Format menu. On the Layout tab of the Format Object dialog box, type 8.5 in the Horizontal box, type 6 in the Vertical box, and then click OK .
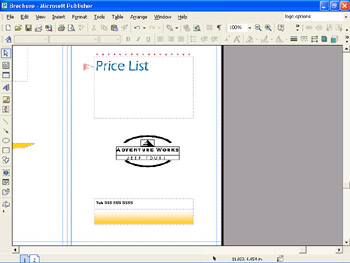
The logo is now centered over the telephone number frame below it, as shown in this graphic:
6. Select Tel: and the phone number in the frame below the logo, and type Phone: 800-555-4500.
7. To make the number more readable, click AutoFit Text and then Best Fit on the Format menu.
8. Finally, click the Center button on the Formatting toolbar to center the telephone number text in its frame.
EAN: N/A
Pages: 76