Managing Messages
If you start sending and receiving lots of e-mail messages, you will want to delete the ones you don t need and organize the ones you do need so that specific messages are easier to find. In addition to the Inbox, Outlook maintains three folders to help organize your messages: Sent Items, Outbox, and Deleted Items. In this topic, we will look at ways to keep the messages you send and receive in logical order.
Deleting a Message
You will probably want to delete most of your messages after you read them. In this exercise, you ll clean up your Sent Items folder to practice deleting messages, but bear in mind that the procedure is the same for any Outlook e-mail folder. Follow these steps:
-
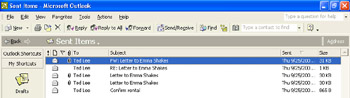
On the Outlook bar, click the My Shortcuts button, and then click the Sent Items icon in the My Shortcuts group .
In the workspace, you now see a list of all the messages you have sent, as shown in the following graphic.
-
On the Edit menu, click Select All , and then press the Delete key.
Instead of actually deleting the messages, Outlook transfers them to the Deleted Items folder, giving you another opportunity to change your mind about getting rid of them.
If you want to permanently delete messages without having to later deal with them in the Deleted Items folder, you can click Options on the Tools menu, click the Other tab, and in the General area, select the Empty the Deleted Items folder upon exiting check box, so that Outlook will erase the folder s contents every time you exit the program.
-
On the Outlook bar, click the Outlook Shortcuts button, click the arrow at the bottom of the group, and then click the Deleted Items icon to display that folder s contents.
-
You really do want to delete these files, so on the Tools menu, click Empty Deleted Items Folder . Click Yes when asked whether you want to permanently delete the items.
-
Display the contents of the Inbox, and use the Delete button on the toolbar to delete any messages you don t need. (Be sure to keep the messages you have sent to yourself while working through this chapter.)
| |
To keep your Outlook files from growing too big, you can turn off the option that automatically saves a copy of all your outgoing messages in the Sent Items folder. On the Tools menu, click Options, and click the E-mail Options but-ton on the Preferences tab. In the Message handling area, deselect the Save copies of messages in Sent Items folder check box, and click OK twice. If you later want to save a particular outgoing message in the Sent Items folder, click the Options button in the message window before you send the message, select the Save sent message to check box, designate a location, and click Close.
| |
Organizing Messages in Folders
To organize your mail, you can create folders for storing related messages, thereby categorizing them in a logical hierarchy.
As an example, let s create a folder for messages related to the Chamber of Commerce meeting:
With the Inbox active, on the File menu, click New and then Folder .
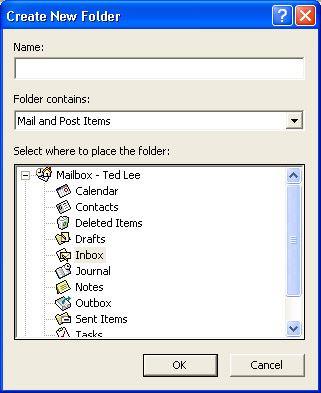
Outlook displays the dialog box shown in this graphic:
-
In the Name box, type Chamber of Commerce , and click OK .
-
When Outlook asks whether you want to add an icon for this folder to the Outlook bar, click Yes .
The My Shortcuts button flashes on the Outlook bar.
-
Now select the Confirm rental message you sent to yourself earlier, display the My Shortcuts group, and drag the message to the Chamber of Commerce icon in the My Shortcuts group.
-
You won t be sending and receiving messages for a while, so if necessary, disconnect from your e-mail server.
We ll leave you to experiment with folders as you receive mail from your colleagues and associates . While you re at work on your computer, you will probably want to minimize Outlook so that it continues to run in the background and you can receive messages as they are sent to you. Alternatively, you can quit the program, knowing that your messages will be stored by your e-mail server until you make your next connection.
| |
To see a complete list of Outlook folders, you can click the down arrow in the workspace title bar. If you decide to keep the folder list displayed, simply click the push pin in the upper-right corner of the list. Alternatively, you can click Folder List on the View menu.
| |
EAN: N/A
Pages: 116