Creating DVD Menus In general, DVD menus consist of a background and a series of buttons that lead to other parts of the DVDsuch as video clips, which you just learned to add. In iDVD, the first thing you do is choose your background from the list of available themes.  | As you learned earlier from importing video, every element you import will appear on the menu as either a button or text label. How they appear depends on the theme you've selected. |
Throughout this section, we take a look at some individual tasks that you end up doing as you work on your DVD menus. Themes iDVD makes it easy to choose a background theme for your DVD project. You could simply scroll through the list of options in the Themes tab. There are three basic categories of themes: -
Static background themes display a regular, non-video image. An example is Chalkboard. -
"Motion" themes display short video repeats. An example is Global. -
"Drop Zone" themes include areas where you can add your own slideshows, movies, or still images. An example of a Drop Zone theme is Theater, which you saw earlier, where the stage curtain opens and closes over a space in which you can add your own scene. Different types of themes suit different purposes, but switching between them isn't difficult. You can always click on a different theme when you're working on your projectiDVD enables you to play and experiment as much as you want. All of the elements in your DVD and the titles you've given them will carry over between themes. | | You will notice that some of the themes include music. We'll talk about setting background audio later in this chapter. |
Task: Choosing a Theme After you've started a new project: -
Click the Customize button in the lower-left corner of the main iDVD window to display the Themes list. If the Themes list doesn't appear, you might need to click the Themes tab. -
Click on a desired theme in the Themes list, and it automatically displays a theme in the main iDVD window. | | If you choose a theme that has background sound or motion (indicated by a small circular walking man symbol) or displays previews of the project clips as video buttons, you might want to temporarily disable the sound or motion if it becomes distracting or seems to slow your computer's reaction time. You can do so by clicking the Motion button, displaying an icon of a walking person, at the bottom of the main iDVD window. |
Working with Drop Zones Earlier, you learned that some themes include Drop Zones, or areas that you can customize by adding slideshows, movies, and still images. To add a movie or image to themes containing a Drop Zone, select the media file and drag in on top of the Drop Zone, as shown in Figure 19.7. Figure 19.7. The borders of the Drop Zone will change when you drag a file on top of it.  | | If you are using a Drop Zone theme and you want to add a movie as content to your project, drag it to an area of the screen that is not a Drop Zone. It will become a text button. If you'd like, you can change it to a picture button in the Settings pane of the Customize window. We'll talk more about customizing buttons shortly. |
When your file is added, it will fit inside the Drop Zone, as shown in Figure 19.8. Figure 19.8. The Drop Zone now displays the file you added. 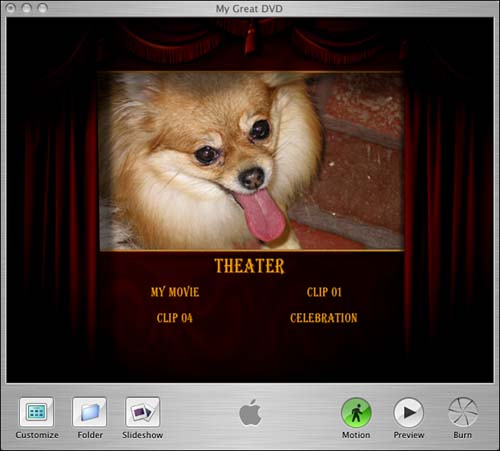 The aspect ratio of the image you insert will be preserved, with the image scaled to fit against either the top and bottom or left and right edges of the region. If the best part of the image doesn't fall in the center of the space, you can reposition it to choose which portion of the image is visible in the Drop Zone. | | When you drag a movie to a Drop Zone in a DVD menu, the movie you added plays over and over again when the menu is onscreen. You can set the duration of the movies using the Motion Duration slider in the Settings pane of the Customize tray window. You can choose the number of seconds you want the movies to loop, up to 30 seconds. |
To remove files from the Drop Zone, drag the image out of the Drop Zone and out of the iDVD window. Be sure you are dragging it outside the window, or else you will only move the image, not delete it! Customizing Titles The Title area of the Settings tab enables you to change various settings to customize the title text that appears on your DVD screens. iDVD automatically chooses a certain size for title text when you make your DVD, and the size is usually a good match for many DVD projectslarge enough to read on the TV, but small enough so that you can type a reasonable number of letters . You'll probably want to change text at some point; the list below corresponds to the options in the Title section of the Settings Tab, shown in Figure 19.9. Figure 19.9. Options for changing the Title text in iDVD. 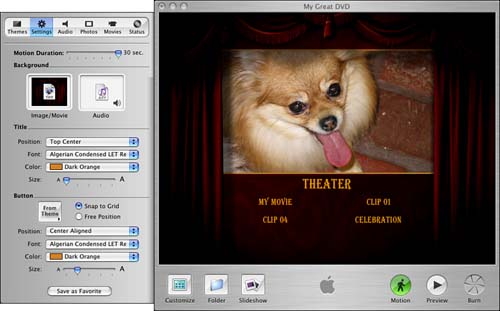 You can customize your title using the following settings: -
Position Enables you to choose a preset position or Free Position -
Font Enables you to choose a different style of text -
Color Enables you to choose a color for your title text -
Size Enables you to make the text bigger or smaller DVD ButtonsVideo and Text In iDVD, you can have two different kinds of buttons, depending on the theme that you choose. In some themes, there are text buttons, which contain only letters (see Figure 19.8 above). The process of making a text button is as simple as choosing a theme that supports text buttons, choosing a clip, and adding a video clip. The text button is automatically named according to the filename of the clip that's imported, but you can always click on the text in the button to change it if you want. In other themes there are video buttons, which include letters and a preview of the video clip or slideshow you're linking to (see Figure 19.10). Figure 19.10. A video button with a preview of the clip. 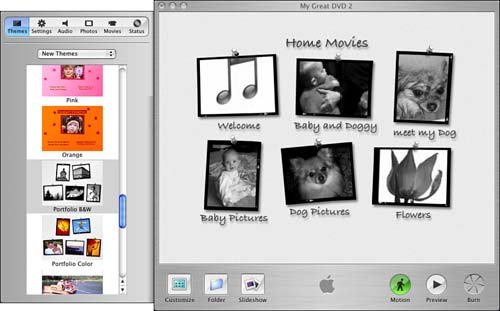 Making a video button is as easy as making a text button. In fact, a video button is basically a text button that also includes video, except you must choose a theme that supports video buttons. Task: Adjusting a Video Button iDVD gives you a number of ways to make simple adjustments to a video button right in the main iDVD window. The automatic setting is for the button to start playing the movie from the beginning, but you can change where the video displayed on the button starts or simply have a picture appear instead of the video. -
Click a video button to get the adjustment controls, as shown in Figure 19.11. Figure 19.11. Clicking a video button gives you the button controls. 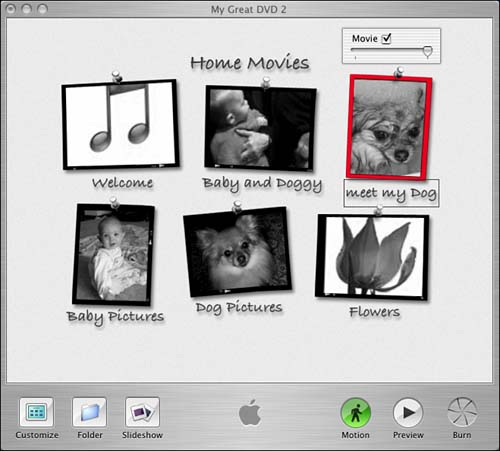 -
Click the slider and drag it to the desired position within the mini-movie to change where the mini-movie starts. -
If you don't want the video button to be in motion, uncheck the Movie option and use the slider to choose the nonmoving image from the mini-movie. -
When you're done adjusting, click on the video button again and you'll see the customized video button. | | When working with video buttons, remember that they are in motion as you're working on them only if you have motion in iDVD turned on. If the Motion button at the bottom of the main iDVD window is green, motion is activated. Similarly, unless you specifically uncheck the Movie option as described earlier, your video buttons will move. |
Customizing Buttons The Button area of the Settings tab gives you the ability to choose from a variety of different options to add a nice touch to the way that buttons look in your DVD project. It also enables you to adjust things if the automatic settings don't suit your taste. Refer to Figure 19.9. The adjustments you can make include the following: -
From Theme Enables you to choose a different button shape and enables you to choose between text-only and video buttons. -
Snap to Grid/Free Position Determines whether buttons on the screen start out being automatically aligned to each other (Snap to Grid) or not aligned (Free Position). | | If you choose to use Free Position for your buttons, be careful not to position them in ways that your viewers will find difficult to use! You may even want to turn on the TV Safe Area feature under the Advanced menu. This will put a border around the region of your menu that is most likely to be visible across different models of television. (In case you are wondering, the preset button positions that are used with Snap to Grid will already fall safely inside the TV Safe Area.) |
-
Position Affects the position of the Button text in relation to the button. -
Font Affects the style of text. -
Color The same colors are available here that were available in the Title area mentioned previously. -
Size Affects the size of the button text. Adding Submenus Earlier you learned that iDVD allows you to add up to 6 menu items per screen. But sooner or later, you'll probably want to add more than 6 items to your DVD. To do this, you'll need to add additional screens, or submenus, to your DVD project. Each submenu can contain an additional 6 items, up until you hit the limit of 99 movies or slideshows or 30 motion menus. iDVD represents submenus with the metaphor of folders. Think of DVD folders just like you have folders on your hard drive. You can put multiple items in a folder, and to get to the contents, you click on the folder. Similarly, in iDVD, the folder provides the audience with a way to get to another screen. When you add a DVD folder, you always add the first folder to the main menu, and then you can add additional folders to the main menu or within other folders. | | As you learned in Chapter 17, chapter markers can be set in iMovie for export to iDVD. When you import a movie with chapter markers, iDVD creates a button with the title of the movie, so the viewer can play the entire movie, and a Scene Selection button that links to a scene submenu, so the viewer can select which scenes to watch and in what order. If you'd like, however, you can set your iDVD preferences so that scene submenus are never created or so that iDVD asks what you'd like on each imported movie. |
Task: Adding a DVD Folder You can add a folder to a theme that includes text buttons or video buttons.  | You can change the type of buttons in any theme, so it doesn't matter whether the theme is preset to use text or video buttons. |
Follow these steps to get a sense of how things work: -
Import a video clip as you learned earlier in this chapter. -
Click the Folder button in the main iDVD window to add a folder. If you are using a theme that supports video buttons, iDVD adds a button that displays an icon that looks like a folder (see Figure 19.12). (If your theme supports text buttons, your folder will be added as a button labeled "My Folder.") Figure 19.12. When added, a new folder appears with a generic icon like the one at lower right. 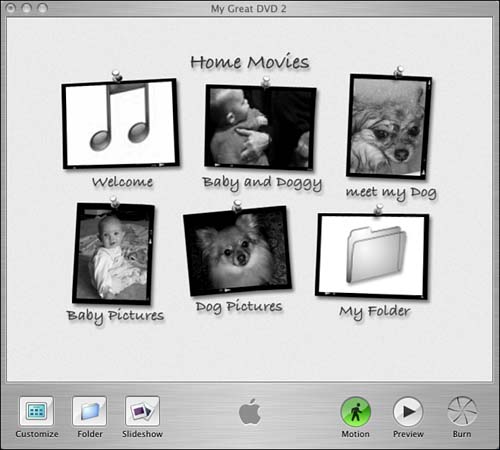 -
Double-click the new folder button in your menu to get to the new folder screen you have just added (see Figure 19.13). Figure 19.13. Double-clicking on the newly added button takes you to the new folder screen. 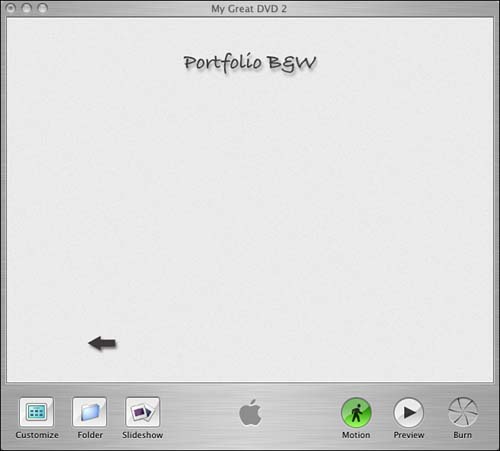 | | One thing that you might not realize is that if you want a different theme on different screens, you aren't limited to using one theme throughout your DVD. In other words, if you use the Portfolio B&W theme on one screen in a DVD, you could choose a different theme (such as Sky) for another screen on the DVD. |
-
Drag additional files into the new screen. If desired, customize the buttons using the techniques you learned earlier. Then click on the small arrow in the lower-left corner of your folder screen, as seen in Figure 19.13, to get back to the main screen. -
Single-click on the folder button in the main screen to active the button controls. -
Drag the slider to the far right side to have the button display the background of the main menu for the folder. Use the slider in the button controls to choose which button from your submenu you want to feature. (The changes that you made to the video buttons on your submenu are carried over to this preview.) When you're done, you will have a video button on your main menu that leads to a submenu. |