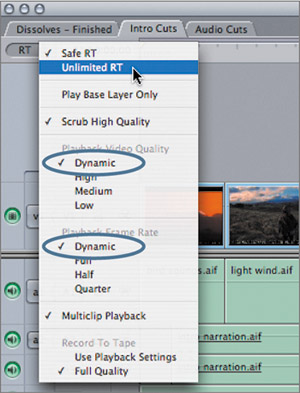
| Cross dissolves can have a smoothing effect on a sequence, but other transitions can jazz it up. The more complex a transition is, the more parameters you can adjust in the Transition Editor. Most of these transition effects can be played in real time; some may have to be rendered, which you will learn to do in the next exercise. TIP To make sure you see as many real-time effects as possible, click the RT pop-up in the Timeline and choose Unlimited RT from the shortcut menu. Click the RT pop-up again, and make sure Dynamic is checked in both places it appears. You will learn more about these options in the next exercise.
1. | Close all the sequences that are open in the Timeline. In the Browser, open both the Racing Cuts and the Racing Transitions sequences. Click between the two tabs, and play the Racing Transitions version.
NOTE Depending on your computer, you may see some of the transitions stutter a bit as they play in the sequence. You can render these in the next exercise. This sequence uses an assortment of transitions to create a fast-paced, promo-style piece that may be used to advertise a documentary series on motocross racing. There is a marker in the ruler area above each transition labeling its type, with the bin location in parentheses.
TIP If you want to preserve the Racing Cuts sequence to experiment with other transitions on your own, make a backup copy of it before you begin these steps. | 2. | Click the Racing Cuts sequence tab, make sure the playhead is at the head of the sequence.
| 3. | Choose Effects > Video Transitions > Wipe > Checkerboard Wipe. Play this transition.
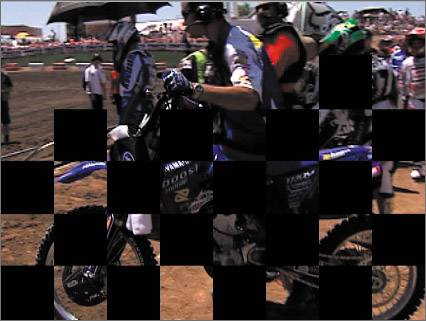
Each new square reveals another portion of the incoming image. You can preview other wipe transitions on this edit point by choosing a different transition from the Effects > Video Transitions options, or by dragging it from the Effects bin to the edit point. A new transition will replace whatever transition was there before it.
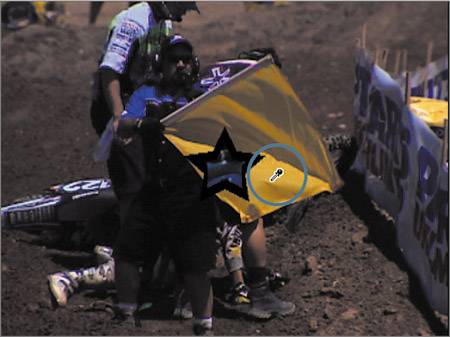
| 4. | Move the playhead to the marker labeled star (iris). Choose Effects > Video Transitions > Iris > Star Iris. Play the transition. Then move the playhead back to the center of the edit point.
This iris transition has a number of parameters that can be modified in the Transition Editor.
TIP Parking the playhead on the transition allows you to see the adjustments in the Canvas as you make them. Make sure you do this in the following steps before you make changes. | 5. | Double-click the Star Iris transition in the Timeline to open it in the Transition Editor.
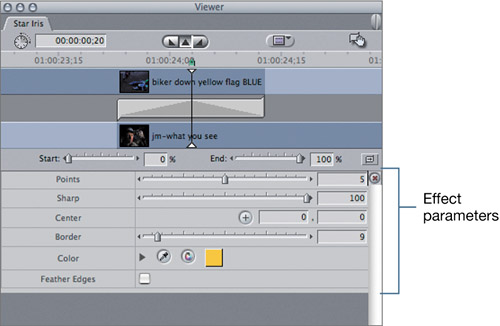 Under the transition graphic display, there are additional parameters that can be controlled or adjusted using a slider or numerical-entry box. Some parameters in other effects use pop-up menus. Most parameters are self-explanatory after you've changed the parameter values and looked at the effect in the Canvas. Under the transition graphic display, there are additional parameters that can be controlled or adjusted using a slider or numerical-entry box. Some parameters in other effects use pop-up menus. Most parameters are self-explanatory after you've changed the parameter values and looked at the effect in the Canvas.
NOTE Clicking the tiny triangle at the end of each slider will change the numerical value of that parameter by single increments. 
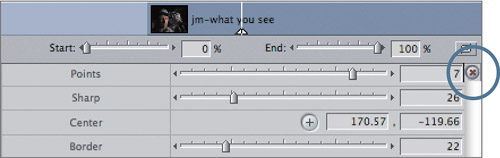
| 6. | Experiment with the different settings for this transition as you view the results in the Canvas window. When you are through making changes, click the red X reset button to return to the default settings for this effect.
You can add borders to many transitions, including the iris and wipe effects, and choose a color from the color tile as you did in a previous exercise. But you can also pick a color from an image for the border color.
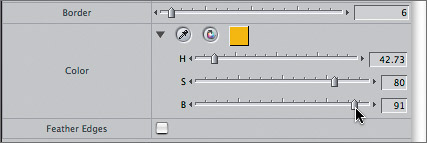
| 7. | In the Border field, enter 6 to create a thin border. To select a border color from the images involved in this transition, drag the playhead earlier in the transition to see the effect and the yellow-gold flag. Click the Select Color eyedropper in the Color parameters, and click once in a bright yellow area of the flag.
TIP To search or preview different border colors before selecting one, select the eyedropper, and click and drag around the Canvas image area without releasing the mouse. The border and color tile will reflect whatever color the eyedropper picks up. When you see the color you want, release the mouse. The color tile in the Color parameters has changed to the color you picked. Once you've selected a color, you can adjust it and save it to use for other borders in other effects.
| 8. | To make adjustments to this color, click the triangle next to the Select Color eyedropper. Drag the S (Saturation) and B (Brightness) sliders to create a rich gold color. Don't drag the H (Hue) slider, or you will change the original color you picked from the flag.
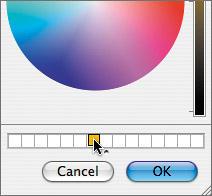
| 9. | To save this color to use on other transitions, click the color tile. Drag the yellow color from the top horizontal color bar (with the magnifying glass on the left) down to any color tile at the bottom of the window and release it. Click OK.
Many television shows use a favorite color repeatedly for borders, text, backgrounds, and so on, as part of the show style. This is how you save a favorite color.
NOTE This is the OS X Colors window, so the saved color swatch will be available for use on other projects or applications on the same computer. | 10. | Adjust the playhead so you can see the motorbike behind the man speaking. To reposition the center of the star iris, click the Center button in the Center parameter line. Move the pointer into the Canvas image area and, with the crosshair icon that appears, click somewhere over the numbers on the bike. Play the transition.

Now the origin or position of the star is centered over the bike. Try it again centered over the man's face.
| 11. | In the Timeline, move the playhead to the marker labeled cross zoom (3D simulation). From the 3D Simulation bin in the Effects tab, drag the Cross Zoom transition to this edit point, and play the transition.
In the Timeline ruler area, a colored line appears above the effect. This is discussed in the next exercise.
|
|