| Before you begin capturing your clips, you have to choose how you will control the playback device, what Easy Preset option you will use to capture the footage, and where you will place it on your hard drive or FireWire drive. NOTE HDV is a newer format that records video and sound as separate MPEG files. During capture, Final Cut Pro transcodes the MPEG files into a QuickTime movie with combined audio and video tracks. If you selected the HDV Easy Setup preset, you will see a slightly different capture window. The log and capture options that appear function the same as those in the default window.
1. | In the Log And Capture window, click the Capture Settings tab.
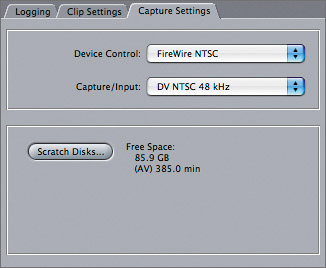
| 2. | From the Device Control pop-up menu, choose FireWire NTSC, FireWire PAL, or another appropriate option.
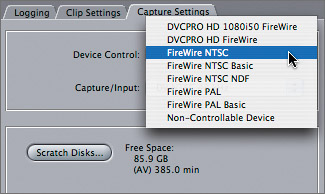
If you are capturing from a device that cannot be controlled through FireWire, choose the appropriate preset, or choose Non-Controllable Device. If you are using a third-party capture card, such as the AJA Io or Kona card or Blackmagic DeckLink card, those options will appear here as well.
| 3. | Click the Capture/Input pop-up menu.
This is where you select the way your footage will be captured. The current option reflects the Easy Setup preset you selected earlier in this lesson. You can capture a number of NTSC or PAL formats, including an assortment of options for DV, DVCPRO HD, and HDV.
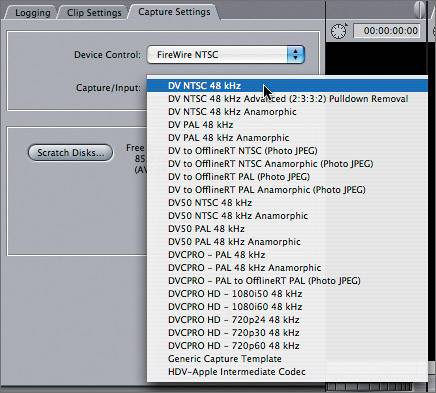
You can also capture at a lower quality resolution, such as DV To OfflineRT NTSC or PAL (Photo JPEG). The Offline RT option is good for large projects. You can edit your entire project using low-res files. Once the editing is complete, you can recapture just the footage you used in your sequence at a higher resolution. Read more about this process in the Final Cut Pro user's manual.
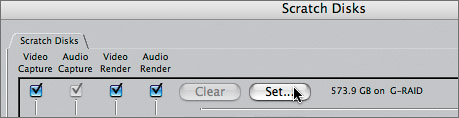
| 4. | To select the destination for your captured media, click the Scratch Disks button.
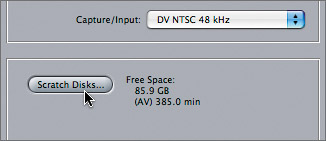
A window opens where you can set the path to the targeted scratch disk, or drive, to which you will be saving your media files. The current scratch disk is listed along with the amount of current available free space on that drive. You can choose a different scratch disk for audio and video, and for render files, which you will create in a later lesson. For now, capture them all to one destination.
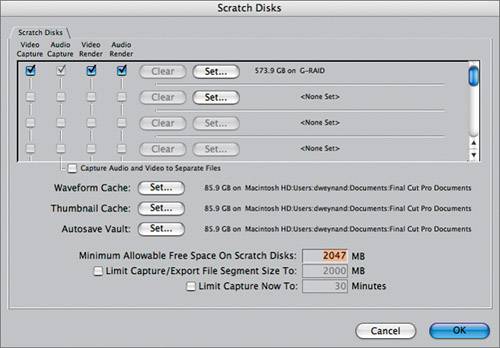 NOTE You have the option of saving other types of files, such as Waveform, Thumbnail, and Autosave Vault, to other locations as well. | 5. | To change the currently selected scratch disk, click Set.
A file browser appears, where you can select a different scratch disk.
| 6. | Navigate to where you want to save your captured files, and click Choose, then click OK in the Scratch Disks window.
| 7. | Choose Final Cut Pro > System Settings, or press Shift-Q.
 The first tab of this window shows the same Scratch Disk information that appears if you click the Scratch Disks button in the Capture Settings tab. You can set the scratch disk in either location. If the desired scratch disk is set in the System Settings window, and you are not changing it, you do not have to select it in the Capture Settings tab. The first tab of this window shows the same Scratch Disk information that appears if you click the Scratch Disks button in the Capture Settings tab. You can set the scratch disk in either location. If the desired scratch disk is set in the System Settings window, and you are not changing it, you do not have to select it in the Capture Settings tab.
| 8. | Choose Final Cut Pro > Audio/Video Settings, or press Cmd-Option-Q.
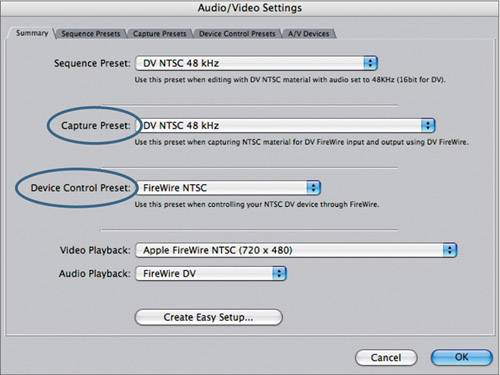 This is another place where you can select the device control and capture preset. If it is correctly selected here, the same setting will appear in the Device Control area of the Capture Settings tab. This is another place where you can select the device control and capture preset. If it is correctly selected here, the same setting will appear in the Device Control area of the Capture Settings tab.
|
|