| Creating a profile for a digital camera is easy; creating a good profile is another story. With input devices such as scanners, variability over time is low: the light source is fixed, and each scan uses the same source. The challenge with creating camera profiles is that there are a lot of variables most of which change with each photograph. Lighting poses the biggest challenge. In the studio, lights have qualities, such as color temperature and luminance, that change over time and with each photo shoot. Simply moving a studio light will change the lighting conditions. In the field, lighting changes by the minute as the sun moves across the sky. And like other devices, each camera has its own subtle characteristics. As a result, many experts contend that it's worth the effort to profile digital cameras only if you are a studio photographer with highly controlled lighting setups. They believe it's easier, faster, and cheaper to bring digital photographs into a color-managed workflow using generic and working-space profiles. The challenge is to photograph the target properly to create an accurate profile. The benefits of camera profiles will be realized only when a high-quality profile is both created and used in a color-managed workflow. Indeed, profiles cannot compensate for all variability and are not meant to eliminate the need for image editing. Even for digital cameras, however, profiles can reduce the amount of time needed to color edit an image by as much as 85 to 90 percent. If you choose to profile your camera, the trick is determining which solution works best for you. The following are the two most popular options: Use a working space instead of a camera profile. The simplest approach is to convert your image to a working-space profile when you edit it. If your display is calibrated and you are consistent with your workflow, you will be able to use soft proofing (camera workflow and soft proofing of images are covered in detail in Chapters 5 and 6) to predict how the image will look in print. Certain cameras, particularly digital single-lens reflex models, enable you to select the working-space profile for the camera. Once an image is taken, an in-camera process converts the image from the camera's native color space (usually a generic profile for that model of camera) to the selected working space and embeds that profile in the image. This option is typically limited to one or two working-space profiles, such as AdobeRGB or sRGB. Figure 4.32. The Nikon D100 digital single-lens reflex camera has three Color Mode options: AdobeRGB, which converts the image to the same working space used in Photoshop, and two sRGB profiles. 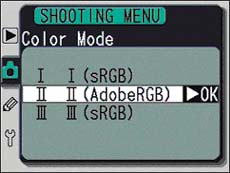
Note  | If you chose to create a custom profile for your camera, disable the use of a working space within the camera to avoid double color management (transforming the image twice), which will produce poor results. |
In conjunction with the working-space profiles, it's a good idea to create a custom white balance for each scene being photographed. In addition, working in RAW format enables greater flexibility during editing. Use the camera profiling feature of your profiling software. The process is simple: Shoot an image of the target in each lighting condition. Before you process the images, create a profile from each shot of the target and use it as the source profile for the image. The results may vary; some photographers find that the results are color accurate but are flat and lack contrast, while others find that the profile simply doesn't do the job and doesn't warrant the time required.
Note | Chapters 5 and 6 go into greater detail about the use of camera profiles and working spaces in Adobe Photoshop. |
Creating a Digital Camera Profile This exercise uses X-Rite's Pulse ColorElite to create a digital camera profile. Other profile-creation packages, such as GretagMacbeth's ProfileMaker Pro, also create camera profiles. 1. | Launch X-Rite's Pulse ColorElite and select the Input Profiles module.
Figure 4.33. 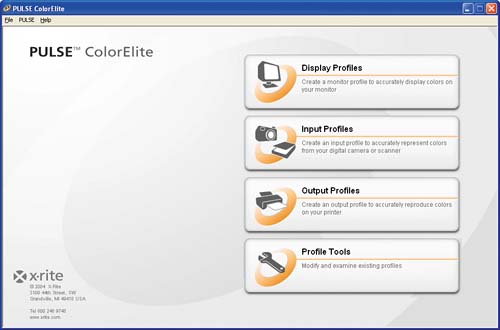
| 2. | Select the Digital Camera option.
Figure 4.34. 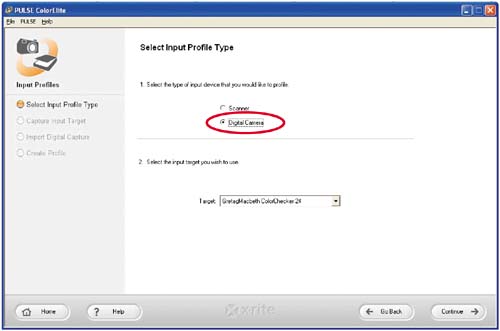
| 3. | Select the input target you want to use. For profiling digital cameras, the GretagMacbeth ColorChecker is the most common target. I have a Gretag-Macbeth ColorChecker DC, which is what I've selected from the list.
Figure 4.35. 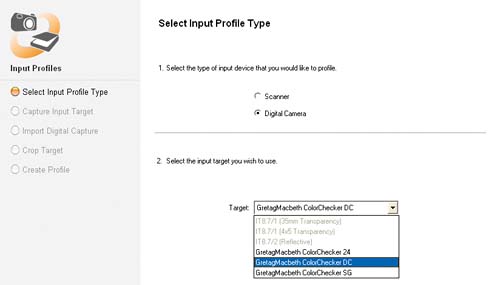
Tip  | GretagMacbeth ColorChecker targets are available on www.gretagmacbeth.com. |
| 4. | If you haven't already done so, photograph the target.
Figure 4.36. 
When photographing the target:
Set up your lighting to match that for the final shoot. Keep the camera parallel to the target. Fill the viewfinder with the target. Set the white balance manually.
| 5. | Next, you will select the target image the actual target data from your camera. Click the Load Image button and select the photograph of the target.
Figure 4.37. 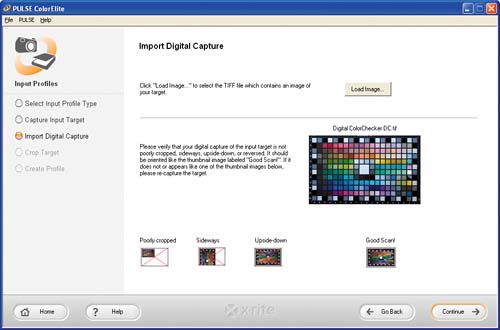
Depending on the resolution of your camera, you may need to resize the file so that it is about 4 MB.
| 6. | In the Open dialog box that appears, navigate to and select the file D100-Digital ColorChecker DC.tif from the book's sample files on the Web site (www.peachpit.com/xpcolor). If you have access to a ColorChecker DC or other target, use an actual image from your camera rather than the sample image.
When you select the image, it opens automatically in another window that allows you to adjust the crop of the image (Figure 4.39).
Figure 4.38. 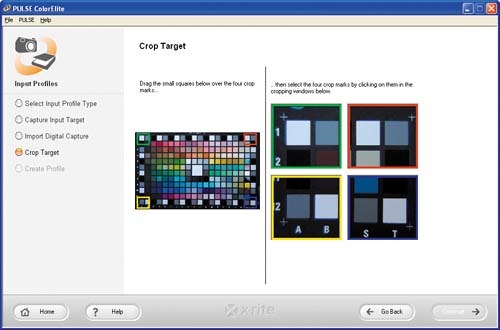
| 7. | Crop the target by adjusting the marquee so that the selection covers the crop mark on the target, as shown in the next illustration. Click Continue when you've finished cropping the target.
Figure 4.39. 
It's important to crop the image as described so that extraneous data does not affect the profile creation.
| 8. | Now you're ready to create the profile. Click Create Profile to continue.
Figure 4.40. 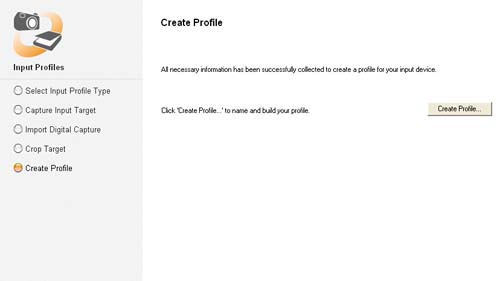
PULSE ColorElite displays a Save As dialog box and prompts you for a profile name.
| 9. | Give the profile a meaningful name.
Figure 4.41. 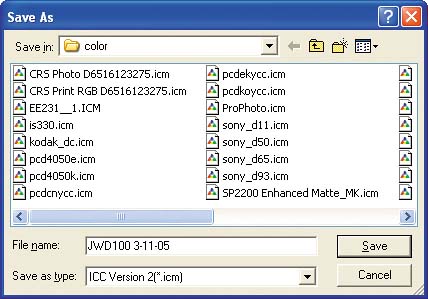
Note | PULSE ColorElite automatically selects the appropriate directory to save the profile. If you use a different camera profile utility, be sure to store your profile in this directory. |
In this example, the profile name is JW D100 3-11-05.
| 10. | Click Save. PULSE ColorElite generates the profile. Depending on the speed of your PC, it will take approximately one minute. When processing is finished, a summary of the results is displayed.
Figure 4.42. 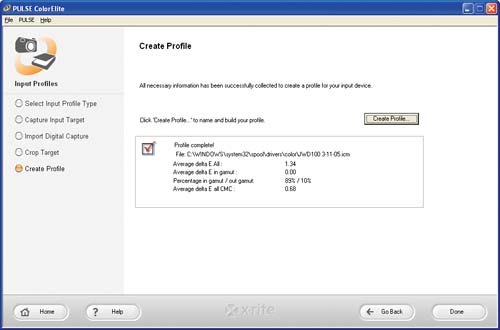
|
If you find that the color of your images do not match between the original scene and your monitor or printer, consider profiling your camera. However, remember that lighting variables should be kept consistent. |