3.5 Create the Web Site
| The best way to learn is by doing, so you'll build an example web site on your machine as we go along. After you're done, you'll have installed and configured the sections you're interested in, and you can use this as a model for your own system, then delete it when you're confident you understand what's going on. This way, you can practice cgi-bin, mod_perl, PHP, dynamic web content, etc., in the privacy of your own home before you unleash your server on the World (Wide Web). There are two approaches you can take to experiment with the examples in this book: Either download the entire web site, including all of the examples, or you can create the examples yourself using your favorite editor. [10]
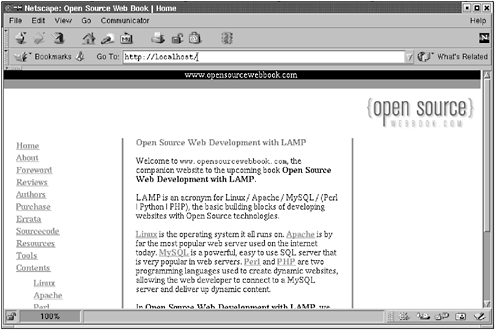
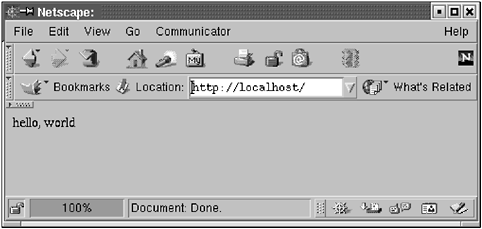
3.5.1 Downloading the ExamplesIf you follow the lazy approach to programming, you understand the importance of copy-paste. If you choose to download all the examples, go to www.opensourcewebbook.com/sourcecode/. Follow the instructions on how to obtain a username/password. You will need the password to download the source and view all the examples. Once you are ready, click the link for source.tar.gz and enter the username/password. Save the tarball in a convenient place, say in /tmp . Now, as root , execute the following commands: # mv /var/www /var/www.old # mkdir /var/www # chown jrl /var/www # cd /var/www # tar xzvf /tmp/source.tar.gz # find . -exec chown jrl { }\; First, the web site that came with Red Hat is moved to /var/www.old . Then, a new directory is made for the downloaded source, and this new directory is modified to be owned by jrl (select a user that you created on your machine in place of our favorite user , jrl ). Then, the source is untarred in the new directory. And finally, all files in the new directory are changed to be owned by jrl (again, select an appropriate user on your machine). Now, you are ready to rock with the new web site. To see whether everything worked, point your browser to http://localhost/ . It should resemble www.opensourcewebbook.com/, which is shown in Figure 3.3. Figure 3.3. Screen capture from www.opensourcewebbook.com Recall that when the location http://www.localhost/ is loaded in the browser, the server will locate a file named index.html in the document root (remember, that is the directory under which all the HTML files are found; in this case, /var/www/html ). This default name , index.html , is configurable in the Apache configuration file (see the DirectoryIndex directive in httpd.conf ). Therefore, the file requested is /var/www/html/index.html , and if you look at that file's contents, you will see the HTML that builds Figure 3.3. Look in the directory /var/www . You will see several files and many directories ”that is the source for all the examples in this book, and you will study them all in short order. 3.5.2 Creating Them YourselfIf you choose not to download all the examples as we have just shown (are you sure about that?) and would rather create each example as it is discussed, you can either type them all in or download them from the web site one at a time. The source for all the programs in this book is available from www.opensourcewebbook.com/contents. When it is time to experiment, you can download the example from there, save it into the appropriate directory, and experiment with it at that time. If you are going this route, let's start with a simple example. First, create an HTML file in /var/www/html/index.html . Place the following text in index.html : <!DOCTYPE HTML PUBLIC "-//W3C//DTD HTML 4.0 Transitional//EN" "http://www.w3.org/TR/REC-html40/loose.dtd"> <html> <head> </head> <body> hello, world </body> </html> Set the permissions so that you can write to the file and the rest of the world can read it; if the file and directory are not world readable, others won't have permission to view the page in their browser. It's a good idea to view your web pages from a different machine (and using different browsers) to catch this sort of error. $ chmod a+r /var/www/html/index.html
Reload your browser (Shift-Reload in Netscape and Mozilla to clear the cache and reload from scratch) with http://localhost/ . You should see Figure 3.4. Figure 3.4. Hello, world Now, we will do something that is more complicated. For this, go to www.opensourcewebbook.com/. As we saw, this page is shown in Figure 3.3. View the document source for this file by selecting View Page Source (or something similar) from one of the menus in your browser (some browsers allow you to do the same using the right mouse button). Copy all the source that you see to /var/www/html/index.html . Reloading http://localhost/ should display a page similar to Figure 3.3. However, you will notice that the logo is broken ”the image file for that logo does not (yet) exist on your machine. To copy this logo, go to www.opensourcewebbook.com, hover the mouse over the logo in the top right corner of the page, and, using the right mouse button, save the image to /var/www/icons/logo.gif (be sure the image file is world readable). Reloading http://localhost/ now shows the image displayed on the page. Creating web pages is as simple as creating directories and .html files. Creating good web pages is another matter ”for that, you need a good eye for design in addition to simple geek skills such as writing markup language. For instance, www.opensourcewebbook.com was designed by a graphic artist, [11] not a geek. [12]
|
EAN: 2147483647
Pages: 136