Configuring Authentication
| Authentication refers to the process of identifying who you are. The ASP.NET Framework supports three types of authentication:
A particular application can have only one type of authentication enabled. You can't, for example, enable both Windows and Forms authentication at the same time. Windows authentication is enabled by default. When Windows authentication is enabled, users are identified by their Microsoft Windows account names. Roles correspond to Microsoft Windows groups. Windows authentication delegates the responsibility of identifying users to Internet Information Server. Internet Information Server can be configured to use Basic, Integrated Windows, or Digest authentication. .NET Passport authentication is the same type of authentication used at Microsoft websites such as MSN and Hotmail. If you want to enable users to log in to your application by using their existing Hotmail usernames and passwords, then you can enable .NET Passport authentication. Note You must download and install the Microsoft .NET Passport SDK, register with Microsoft, and pay Microsoft a fee before you can use .NET Passport authentication. For more information, see the MSDN website (msdn.microsoft.com). The final type of authentication is Forms authentication. When Forms authentication is enabled, users are typically identified by a cookie (but see the next section). When a user is authenticated, an encrypted cookie is added to the user's browser. As the user moves from page to page, the user is identified by the cookie. When Forms authentication is enabled, user and role information is stored in a custom data store. You can store user information anywhere that you want. For example, you can store usernames and passwords in a database, an XML file, or even a plain text file. In the previous version of ASP.NET, after enabling Forms authentication, you had to write all the code for storing and retrieving user information. When building an ASP.NET 2.0 application, on the other hand, you can let ASP.NET Membership do all this work for you. ASP.NET Membership can handle all the details of storing and retrieving user and role information. You enable a particular type of authentication for an application in an application's root web configuration file. The file in Listing 21.1 enables Forms authentication. Listing 21.1. Web.Config
In Listing 21.1, the authentication element's mode attribute is set to the value Forms. The possible values for the mode attribute are None, Windows, Forms, and Passport. Note Windows, Forms, and Passport authentication are implemented with HTTP Modules. If you need to implement a custom authentication scheme, then you can create a custom HTTP Module. For more information on HTTP Module, see Chapter 25, "Working with the HTTP Runtime." Visual Web Developer Note If you prefer, you can enable a particular type of authentication by using the Web Site Administration Tool. This tool provides you with a form interface for modifying the web configuration file. You can open the Web Site Administration Tool by selecting the menu option Website, ASP.NET Configuration. Configuring Forms AuthenticationSeveral configuration options are specific to Forms authentication:
Several of these configuration settings are related to the authentication cookie. For example, you can use the web configuration file in Listing 21.2 to change the name of the authentication cookie. Listing 21.2. Web.Config
Several of these options require additional explanation. In the following sections, you learn how to enable cookieless authentication, modify the cookie expiration policy, and enable authentication across applications. Using Cookieless Forms AuthenticationNormally, Forms authentication uses a cookie to identify a user. However, Forms authentication also supports a feature named cookieless authentication. When cookieless authentication is enabled, a user can be identified without a browser cookie. By taking advantage of cookieless authentication, you can use Forms Authentication and ASP.NET Membership to authenticate users even when someone is using a browser that does not support cookies or a browser with cookies disabled. When cookieless authentication is enabled, a user can be identified by a unique token added to a page's URL. If a user uses relative URLs to link from one page to another, then the token is passed from page to page automatically and the user can be identified across multiple page requests. When you request a page that requires authentication and cookieless authentication is enabled, the URL in the browser address bar looks like this: http://localhost:2500/Original/(F(WfAnevWxFyuN4SpenRclAEh_lY6OKWVllOKdQkRk tOqV7cfcrgUJ2NKxNhH9dTA7fgzZ-cZwyr4ojyU6EnarC-bbf8g4sl6m4k5kk6Nmcsg1))/ SecretFiles/Secret2.aspx That long, ugly code in the URL is the user's encoded authentication ticket. You configure cookieless authentication by assigning a value to the cookieless attribute of the forms element in the web configuration file. The cookieless attribute accepts any of the following four values:
The default value is UseDeviceProfile. By default, the ASP.NET Framework issues a cookie only when a particular type of device supports cookies. The ASP.NET Framework maintains a database of device capabilities in a set of files contained in the following folder: \WINDOWS\Microsoft.NET\Framework\[version]\CONFIG\Browsers By default, the ASP.NET Framework never uses cookieless authentication with a browser such as Microsoft Internet Explorer. According to the device profile for Internet Explorer, Internet Explorer supports cookies, so cookieless authentication is not used. The Framework doesn't use cookieless authentication even when cookies are disabled in a browser. If you want the ASP.NET Framework to automatically detect whether or not a browser supports cookies, then you need to set the cookieless attribute to the value AutoDetect. When AutoDetect is enabled, the ASP.NET Framework checks whether a browser sends an HTTP COOKIE header. If the COOKIE header is present, then an authentication cookie is assigned to the browser. Otherwise, the ASP.NET Framework uses cookieless authentication. The web configuration file in Listing 21.3 enables AutoDetect. Listing 21.3. Web.Config
Using Sliding Expiration with Forms AuthenticationBy default, Forms authentication uses a sliding expiration policy. As long as a user lets no more than 30 minutes pass without requesting a page, the user continues to be authenticated. However, if the user does not request a page for 30 minutes, then the user is logged out automatically. If you have strict security requirements, you can use an absolute expiration policy rather than a sliding expiration policy. In other words, you can force a user to log in again after a particular interval of time. The web configuration file in Listing 21.4 forces a user to log in again every minute. Listing 21.4. Web.Config
Using Forms Authentication Across ApplicationsBy default, Forms authentication is application relative. In other words, if you log in to one application, you aren't logged in to any other applicationeven when the other application is located on the same web server. This creates problems in two situations. First, you don't want to require the employees of your company to log in multiple times as they move between different applications hosted by your company. An employee should be able to log in once and use any application provided by your company automatically. Second, if you are hosting a web farm, you don't want to force a user to log in whenever a request is served by a different web server. From the perspective of a user, a web farm should seem just like a single server. By default, the Forms authentication cookie is encrypted and signed. Furthermore, by default, each application generates a unique decryption and validation key. Therefore, by default, you can't share the same authentication cookie across applications. You specify encryption and validation options with the machineKey element in the web configuration file. Here are the default settings for this element: <machineKey decryption="Auto" validation="SHA1" decryptionKey="AutoGenerate,IsolateApps" validationKey="AutoGenerate,IsolateApps" /> The decryption attribute specifies the algorithm used to encrypt and decrypt the forms authentication cookie. Possible values are Auto, AES (the government standard encryption algorithm), and 3DES (Triple DES). By default, the decryption attribute is set to Auto, which causes the ASP.NET Framework to select the encryption algorithm based on the capabilities of the web server. The validation attribute specifies the hash or encryption algorithm used when an authentication cookie is signed. Possible values are AES, MD5, SHA1, and TripleDES. The decryptionKey attribute represents the key used to encrypt and decrypt the authentication cookie. The validationKey represents the key used when the authentication cookie is signed. By default, both attributes are set to the value AutoGenerate, which causes the ASP.NET Framework to generate a random key and store it in the LSA (your web server's Local Security Authority). Notice that both the decryptionKey and validationKey attributes include an IsolateApps modifier. When the IsolateApps modifier is present, a unique key is created for each application on the same web server. If you want to share the same authentication cookie across every application hosted on the same web server, then you can override the default machineKey element in the machine root web configuration file and remove the IsolateApps attribute from both the decryptionKey and validationKey attributes. You can add the following machineKey element anywhere within the system.web section in the web configuration file: <machineKey decryption="Auto" validation="SHA1" decryptionKey="AutoGenerate" validationKey="AutoGenerate" /> The root web configuration file is located at the following path: C:\WINDOWS\Microsoft.NET\Framework\[version]\CONFIG\Web.Config On the other hand, if you need to share the same authentication cookie across separate web servers, then you need to specify the decryptionKey and validationKey manually. You cannot allow the ASP.NET Framework to generate these keys automatically because you need to share the keys across the different web servers. For example, the following machineKey element contains explicit decryption and validation keys:
When using AES, you need to set the decryption key to a random sequence of 64 hex characters. When using SHA1, you need to set the decryption key to a random sequence of 128 hex characters. You can use the page in Listing 21.4 to generate these random character sequences for you (see Figure 21.1). Figure 21.1. Generating cryptographically strong keys.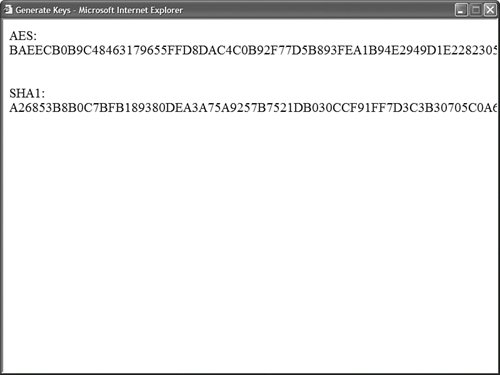 Listing 21.5. GenerateKeys.aspx
The page in Listing 21.4 uses the RNGCryptoServiceProvider to generate the random sequence of characters. The GetBytes() method returns a cryptographically strong sequence of random values. Note The GenerateKeys.aspx page is based on a code sample from an article entitled "How To: Configure MachineKey in ASP.NET 2.0," located at the Microsoft MSDN website (msdn.microsoft.com). You can add a machineKey element with explicit keys to either the machine root web configuration file or to particular application web configuration files. If you don't want to share the same keys across all the applications on a web server, then you should add the machineKey element only to the applications that you need to share. Using Forms Authentication Across DomainsIn the previous section, you learned how to share the same authentication cookie across applications located on the same server or a different server. But how do you share the same authentication cookie across domains? A browser cookie is always domain relative. For example, the Amazon website cannot read cookies set by the Barnes and Noble website, which is a good thing. However, you might discover that you need to share authentication information across websites with different domains. You can work around this problem by passing an authentication ticket in a query string parameter rather than in a cookie. There is nothing to prevent you from passing query strings between domains. To enable this scenario, you must configure your applications to accept authentication tickets passed in a query string. The web configuration file in Listing 21.6 includes an enableCrossAppRedirects attribute that enables sharing authentication tickets across domains. Listing 21.6. Web.config
If you add the web configuration file in Listing 21.6 to two applications located in different domains, the two applications can share the same authentication ticket. Warning Make sure that you change the validation and encryption keys in Listing 21.6. You can use the GenerateKeys.aspx page discussed in the previous section to generate new random keys. When you link or redirect from one application to another, you must pass the authentication ticket in a query string parameter. The page in Listing 21.7 adds the necessary query string parameter to a hyperlink. Listing 21.7. QueryStringAuthenticate.aspx
Using the FormsAuthentication ClassThe main application programming interface for interacting with Forms authentication is the FormsAuthentication class. This class supports the following properties:
These properties return the configuration settings for Forms authentication from the web configuration file. The FormsAuthentication class supports the following methods:
You can use the methods and properties of the FormsAuthentication class to build a user registration and authentication system without using ASP.NET Membership. For example, the web configuration file in Listing 21.8 contains a list of usernames and passwords. Listing 21.8. Web.Config
The web configuration file in Listing 21.8 contains a forms element that contains a credentials element. The credentials element includes a list of usernames and passwords. Notice that the credentials element includes a passwordFormat attribute that is set to the value Clear. If you prefer, rather than store passwords in clear text, you can store password hash values. That way, anyone working on the web server can't see everyone else's passwords. The other two possible values for the passwordFormat attribute are MD5 and SHA1. Note If you need to hash a password so you can store it in the web configuration file, you can use the (appropriately named) FormsAuthentication.HashPasswordForStoringInConfigFile() method. This method accepts a clear text password and the name of a hash algorithm, and it returns a hashed version of the password. The Login page in Listing 21.9 contains a User Name and a Password text box (see Figure 21.2). Figure 21.2. Authenticating against web configuration credientials.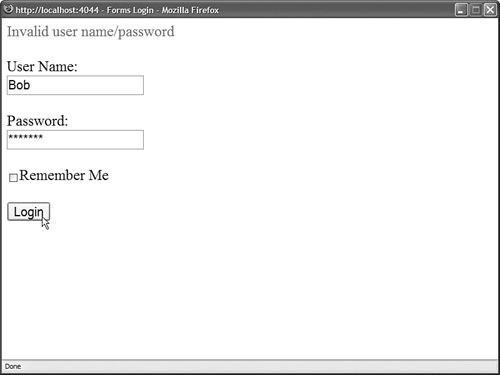 Listing 21.9. FormsLogin.aspx
When you click the Login button, the btnLogin_Click() handler executes and the FormsAuthentication.Authenticate() method is used to check whether the username and password entered into the TextBox controls match a username and password in the web configuration file. If the user successfully authenticates, the FormsAuthentication.RedirectFromLoginPage() method is called. The RedirectFromLoginPage() method does two things. The method adds an authentication cookie to the user's browser. The method also redirects the user back to whatever page the user originally requested. If the user requests the Login page directly, then the user is redirected to the Default.aspx page. The second parameter passed to the RedirectFromLoginPage() method indicates whether you want to create a session or persistent cookie. If you create a persistent cookie, then a user does not need to log in when the user returns to the website in the future. Using the User ClassYou can use the Page.User or the HttpContext.User property to retrieve information about the current user. The Page.User property exposes a Principal object that supports the following method:
For example, when Windows authentication is enabled, you can use the IsInRole() method to check whether a user is a member of a particular Microsoft Windows group such as the BUILTIN\Administrators group: If User.IsInRole("BUILTIN\Administrators") Then ' Do some Administrator only operation End If Note If the Role Manager is enabled, then you must configure the Role Manager to use the WindowsTokenRoleProvider before you can use the User.IsInRole() method with Windows groups. The Principal object also includes an Identity property that enables you to get information about the current user's identity. The Identity object supports the following three properties:
If you want to get the name of the current user, then you can use logic that looks like this: Dim name As String = User.Identity.Name If a user is not authenticated, the User.Identity.Name property returns an empty string. |