Commands
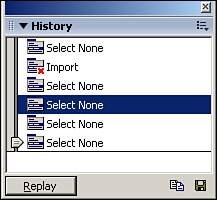
| JSFL commands are reusable pieces of JSFL code that control any aspect of the Flash's DOM (Document Object Model). This means that commands can be written to do almost anything that you do manually in the Flash authoring environment, plus a lot more. They can do just about anything ranging from drawing a simple line on the stage all the way to saving the document with custom settings. Not only can they be written manually in JSFL, but they can also be created directly from the History panel. The History PanelThe History panel was introduced with JSFL. It records each step taking place in the authoring environment. You can open the History panel by choosing Window, Other Panels, History (Ctrl+F10). Figure 27.1 shows the History panel. Figure 27.1. The History panel.
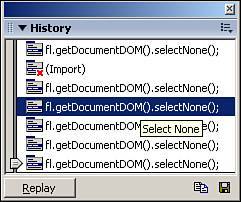
The History panel has several control features, including the slide bar, which enables you to go back to a certain point or record up to that point into a command. You can also replay a selected step by selecting the step and clicking the Replay button. The two options on the bottom right of the History panel are used in creating commands. The first copies a selected step or steps in JSFL to the Clipboard, and the second button saves those steps as a command. Before we go over how to create a command, you should learn about a few options for the History panel; one in particular is the view. The default view for the History panel shows the names of the steps being taken, as you can see in Figure 27.1. To get used to JSFL, you should switch the view to JavaScript in Panel by choosing View, JavaScript in Panel. This will show the JSFL commands being called, as shown in Figure 27.2. After this option is changed, you will be able to view the JSFL commands that are being run, as well as any parameters being passed to the commands. Figure 27.2. The names of the commands are replaced with the actual JSFL commands.
To see the process of replaying a command, follow these steps:
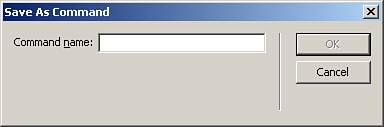
You will see the rectangle reappear. If you moved or deleted the rectangle and then selected the same command and clicked Replay again, it would still work. That example demonstrates how to replay a step in the History panel. Now we are going to see how to save a step or groups of steps as commands. Saving Commands from the History PanelCreating commands from the History panel is the quickest and simplest way to create commands. You highlight the steps that you want to become a command and click the Save Selected Steps as a Command button. Follow these steps to create your first command in the History panel:
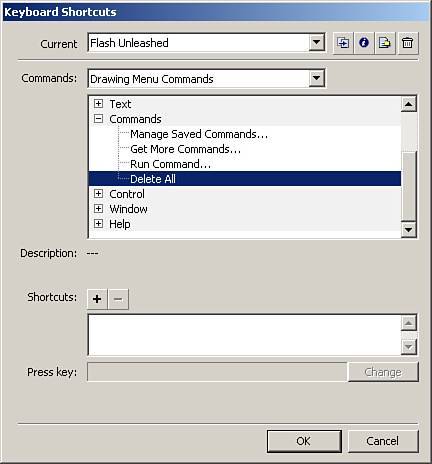
That was a good example of a useable command, but you have to go to Commands to get to it every time, which takes two clicks more than necessary. So now let's add a shortcut key combination to this new command.
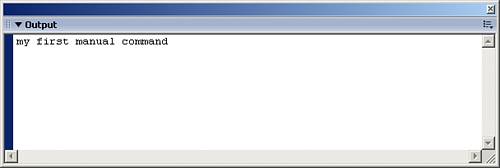
Now you will be able to use that keyboard combination as a shortcut for the command, and if you select Commands from the menu bar, you will see that the command you just created now has a shortcut associated with it. You just learned how to make a command with the History panel. It was quick and easy, but not all that powerful because we could not customize it to the exact way we want. In the next section, we will cover how to create commands in a more hands-on kind of way. Creating Commands Manually with JSFLBuilding commands from scratch is a little more difficult and requires correct coding of JSFL or errors will appear. However, it's more powerful than creating commands from the History panel because there are more commands available. To create a JSFL file, select File, New and choose Flash JavaScript File. This will change the entire authoring environment to look like Figure 27.5. The stage will disappear, an actions window will fill up most of the authoring environment, and the surrounding area will be grayed out for the most part. Figure 27.5. The authoring environment for creating JSFL files. This Actions window acts in much the same way the Actions panel does. You can type in code manually, or use the Add New Script button. Let's jump right in and create a very basic command that will send a string to the Output panel while still in the authoring environment.
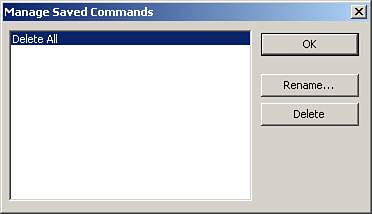
That was a pretty basic example, and we will return to it in a later section. In this situation, we use the Run Command option from the Commands menu, but if you wanted it to appear with the other commands, you would have to place the JSFL file into the Commands directory located at C:\Program Files\Macromedia\Flash 8\en\First Run\Commands for Windows and Applications\Macromedia\Flash 8\en\First Run\Commands for Macs. Then reboot Flash for the new command to be visible in the Commands menu. Now that you know how to create commands two ways, we can go over how to manage those commands. Managing CommandsManaging commands is pretty easy. Select Commands, Manage Saved Commands. The Manage Saved Commands window opens as shown in Figure 27.7. You can rename or delete each command from there. Figure 27.7. Use the Manage Saved Commands window to control all saved commands created manually or with the History panel.
The preceding example did in fact send a string of text to the Output panel in the authoring environment, but every time you run the command, it will keep sending the same message, which is not very useful. In the next section, you will learn one of the ways to add dynamic content and customization to commands, as well as other extensible objects. |
EAN: 2147483647
Pages: 319