Flow Modifiers
| So far, we have gone over ActionScript as a language that executes code, one line after the other, without stopping. Now we are going to go over some statements that redefine how ActionScript functions. Flow modifiers are statements that adjust the natural order the interpreter takes when reading ActionScript. When the interpreter hits a flow modifier, it doesn't just run the statement and move on. Instead, it runs the statement to see whether a condition has been met. If the condition hasn't been met, sometimes the interpreter will move on, but other times it will stay at that spot until the condition has been met. In most cases, this condition is user defined. The first category of the flow modifiers we'll cover is the conditional statement. Conditional StatementsConditional statements are statements that are executed only when their conditions have been met. These conditions are based on Boolean values (either true or false). Here's an example of how a conditional statement acts: if (true){ //do something; } You'll often use conditional statements in situations where you want to test whether to run certain code. Without these condition statements, every piece of ActionScript you place in the Actions panel would run without being checked for whether it is necessary or even correct. An example is a game where, after the user has finished, the ActionScript checks whether this user's score is higher than the present high score. If it is, the user's score becomes the new high score. However, if the user's score is not higher than the present high score, the new score will not replace the present one. The code for this might look something like the following: if (userScore > highScore) { highScore = userScore; } Everything between the parentheses is the condition, and the symbol between the two variables is the comparison operator. Before going on with more examples of conditional statements, we should go over each of the comparison operators and their uses. Comparison OperatorsIf everything between the parentheses in a conditional statement is the condition, the comparison operator is the type of condition. This operator tells the conditional statement how to evaluate the data in the condition. Here's a list of the comparison operators:
Equality Operator (==)This operator determines whether two pieces of data are equal to one another. Here are some examples: var title:String = "Unleashed"; //creates our variable if (title == "Unleashed"){ //evaluates to true if (title == "Not Unleashed"){ //evaluates to false Inequality Operator (!=)This operator determines whether two pieces of data are not equal (note the exclamation point before the equal sign). Here are three examples: var title:String = "Unleashed"; //creates our variable if (title != "Unleashed"){ //evaluates to false if (title != "Not Unleashed"){ //evaluates to true Less-Than Operator (<)This operator determines whether the variable on the left has a lower value than the variable on the right. Here are three examples: var myAge:Number = 25; var yourAge:Number = 26; var myName:String = "David"; var yourName:String = "Jeremy"; //create all the variables we need if (yourAge < myAge){ //evaluates to false if (myName < yourName){ //evaluates to true NOTE Keep in mind that strings are evaluated based on their ASCII code point, not the letter itself. Therefore the upper- and lowercase versions of the same letter will not be equal to each other. Less Than or Equal To Operator (<=)This operator evaluates whether the data on the left is less than the data on the right. If this is true, or if they are equal, the condition will evaluate to TRue. Here are a few more examples: var myAge:Number = 25; var yourAge:Number = 26; var myName:String = "David"; //create all the variables we need if (myAge <= yourAge){ //evaluates to true if ("David" <= myName){ //evaluates to true Greater-Than Operator (>)This operator determines whether the data on the left is greater than the data on the right. Following are three examples: var myAge:Number = 25; var yourAge = 24; var myName = "David"; var yourName = "Ben"; //create all the variables we need if (myAge > yourAge){ //evaluates to true if (yourName > myName){ //evaluates to false Greater Than or Equal To Operator (>=)This operator determines whether the data on the left is greater than or equal to the data on the right. Either would evaluate this condition to true. Following are three examples: var myAge:Number = 22; var yourAge:Number = 24; var myName:String = "David"; //create all the variables we need if (myAge >= yourAge){ //evaluates to false if ("David" >= myName){ //evaluates to true Strict Equality (===)This operator not only determines whether the values are equal, but also whether they are the same type of value. Notice the triple equal sign, in contrast to the double equal sign for the regular equality operator. Here are four examples: if (5 == 5){ //evaluates to true if (5 == "5"){ //evaluates to true if (5 === 5){ //evaluates to true if (5 === "5"){ //evaluates to false Notice how that with an equality sign, the string value "5" is evaluated as being equal to the number 5, but with strict equality, they are not equal. Strict Inequality (!==)This operator not only determines whether the values are not equal but also determines whether the values are not the same type (note the exclamation point in front of the double equal signs). Here are four examples: if (5 != 5){ //evaluates to false if (5 != "5"){ //evaluates to false if (5 !== 5){ //evaluates to false if (5 !== "5"){ //evaluates to true Strict equality and strict inequality are very useful, not only for determining whether two values are the same, but also whether they are being used the same. Now that we have gone over the comparison operators, let's get back into the conditional statements, starting with the if statement. The if StatementYou have been using the if statement for some time without a formal introduction, so let's start with the basics of how this statement works. The if statement works like a simple "yes or no" questionnaire: If true, then run the code in the curly brackets; if false, skip the code in the curly brackets and move on. The if statement starts out with the keyword if and is followed by a condition, which is any comparison expression held within parentheses. This is followed by an opening curly bracket, which is followed by all the ActionScript that is to run if the condition evaluates to true. Finally, a closing curly bracket finishes the statement. The simplest of if statements involves actually placing a Boolean value right into the condition, as shown here: if (true){ trace ("True"); } if(false){ trace ("False"); } //output: True In this case, only "true" will be traced because it is within the only condition that evaluates to TRue. The condition that was set to false is skipped after it is evaluated. You can also use the numeric equivalent to the Boolean representation to accomplish the same effect: if (1){ trace ("True"); } if(0){ trace ("False"); } //output: True Again, only "TRue" is traced because 0 is equal to the Boolean value false. This is a good tool for evaluating numbers, because any nonzero number will be considered true. Here's an example that checks to see whether there is any change between two test scores: var myScore:Number = 80; var previousScore:Number = 86; if (myScore-previousScore){ trace ("Something's changed"); } //output: Something's changed You can also use variables in if statements that hold values that translate to Boolean values or are Boolean values themselves: var myVariable:Number = 1; if (myVariable){ trace ("True"); } //output: True Another great feature of the if statement is that it can check whether a movie clip instance exists. Place the name of the instance in the condition, and if this instance exists, the if statement will evaluate to true; otherwise, it will evaluate to false. Let's look at an example. First, create a shape on the main stage and then convert it to a symbol by going to the toolbar and selecting Modify, Convert to Symbol (F8). Then name the instance myMovie_mc. Next, create a new layer and call the layer actions. Then place the following code in the first frame on the main timeline in the Actions layer: if (myMovie_mc){ trace ("myMovie_mc exists"); } //output: myMovie_mc exists This is great, but if you want to check for a certain movie on the go, set it to a function, as shown here: function findMovie (movie:MovieClip):Void{ if (movie){ trace (movie +" exists"); } } findMovie(myMovie_mc); //call the function //output: myMovie_mc exists Now, whenever the movie exists on the same timeline as the function when the function is invoked with the proper name, the phrase will be displayed in the output window. You can also test a single variable to see whether it is "not true" in a conditional statement using the logical NOT operator. The Logical NOT Operator (!)The logical NOT operator is used to show inequality or to test whether something is false. Place an exclamation point in front of the variable or expression you want to evaluate as "not true," as shown here: var myVariable:Boolean = false; if (!myVariable) { trace ("myVariable is false"); } //output: myVariable is false This, when used in conjunction with the function we just created, can determine whether there is no instance of a specific movie on the stage: function findMovie (movie:MovieClip):Void{ if (!movie){ trace ("the movie does not exist"); } } findMovie(myMovie_mc); //call the function The function we created determines whether the movie does not exist, and if it doesn't, the trace function is run. Now that you've seen the basic workings of the if statement, we'll cover nested if statements. Nested if StatementsNested if statements are if statements held by other if statements to check more than one condition. You simply put the nested statement in as if it were a regular statement held within the original if statement. Here's an example: var bookTitle:String = "Unleashed"; var name:String = "David"; if (bookTitle == "Unleashed"){ if (name == "David"){ trace ("They both match"); } } //output: They both match If the nested if statement evaluates to false, even with the original if statement evaluating to true, the trace function will not be run. Here's an example: var bookTitle:String = "Unleashed"; var name:String = "David"; if (bookTitle == "Unleashed"){ if (name == "Kevin"){ trace ("They both match"); } } //output: (nothing) If the original if statement evaluates to false, the nested if statement will not even be evaluated. Again, the TRace function will not be run. Here's an example: var bookTitle:String = "Unleashed"; var name:String = "David"; if (bookTitle == "Flash"){ if (name == "David"){ trace ("They both match"); } } //output: (nothing) Now that you have seen how to evaluate multiple conditional statements using nested if statements, let's do the same thing the easy way, using a logical operator. The AND Operator (&&)In the condition part of an if statement, you can place multiple conditions using the short-circuit AND operator. After the first condition, place a space, followed by two ampersands (&&) and then the second condition. Let's look at our previous example using this operator: var bookTitle:String = "Unleashed"; var name:String = "David"; if (bookTitle == "Unleashed" && name == "David"){ trace ("They both match"); } //output: They both match As with nested if statements, both conditions must evaluate to TRue for the entire condition to evaluate to TRue. Here's an example: var bookTitle:String = "Unleashed"; var name:String = "David"; if (bookTitle == "Unleashed" && name == "Kevin"){ trace ("They both match"); } //output: (nothing) You can place many of these operators in a single conditional statement for checking multiple conditions, as shown here: var bookTitle:String = "Unleashed"; var name:String = "David"; if (bookTitle == "Unleashed" && name == "David" && true){ trace ("Everything is working"); } //output: Everything is working NOTE Although you can see the benefits of using the AND operator (&&) as far as readability versus using nested if statements, there is a benefit sometimes to using nested if statements. When using a nested if statement to check multiple conditionals at once, you can have code run from the first condition independent of the results of the second condition; however, with the AND operator, both conditions must be met. Now that you know how to check multiple conditions to see whether each is true, let's see whether any of the conditions are true using another logical operator. The OR Operator (||)Oftentimes you'll want to see whether any one of a set of conditions is correct. To do this without the logical OR operator requires multiple if statements with the same response over and over, if any of the conditional statements are met. Let's take a look at what this would look like: var name:String = "David"; var age:Number = 25; if (name == "David"){ trace ("One of them is correct"); } if (age == 35) { trace ("One of them is correct"); } //output: One of them is correct Because the first conditional statement evaluates to true, the TRace function is run. But what if both the if statements evaluate to true? var name:String = "David"; var age:Number = 25; if (name == "David"){ trace ("One of them is correct"); } if (age == 25) { trace ("One of them is correct"); } //output: One of them is correct // One of them is correct The problem we encounter using multiple if statements to determine whether one of them evaluates to true is that if they are both correct, both sections of code are executed, thus creating duplication. We could overcome this by using a test variable to hold a value if the first conditional statement is met. Instead, however, we are going to use the logical OR operator. The syntax of this operator is || (Shift+\). Place this operator between conditions in the condition statement, separating them with a space on both sides. Let's take a look at this using our previous example: var name:String = "David"; var age:Number = 25; if (name == "David" || age == 25){ trace ("One of them is correct"); } //output: One of them is correct Now the interpreter reads the statement and checks to see whether the first condition is met. If so, it skips the second condition because of the OR operator and runs the TRace function. If the first condition is not met, the interpreter evaluates the second condition, and if this condition is met, the TRace function is run. If neither condition is met, the interpreter simply moves on. With the OR operator, you can check to see whether any one of multiple conditions will be met. Here's an example: var name:String = "David"; var age:Number = 25; if (name == "Kevin" || age == 35 || true){ trace ("One of them is correct"); } //output: One of them is correct Because neither of the first two conditions evaluates to true, the third condition is evaluated to true and the trace function is run. Another type of conditional statement is known as the conditional. We'll cover this type of conditional statement before moving on because it acts very similar to an if statement. The Conditional (?:)The conditional is more of an expression than a conditional statement, although it does have a conditional statement in it. The syntax is a condition followed by a question mark, a value (which we'll call value 1), a colon, and then another value (which we'll call value 2). It looks like this: (condition) ? value 1 : value2; If the condition evaluates to true, the expression's value is equal to value 1. If the condition does not evaluate to true, the expression's value is equal to value 2. This is nice if you want to run a simple conditional statement without typing a lot. Here's an example: var myVariable:Number = 1; var myVariable2:Number = 2; //set myVariable3 to the smallest variable var myVariable3 = (myVariable < myVariable2) ? myVariable : myvariable2; trace (myVariable3); //output: 1 Let's look at another applied example: var myPassword:String = "flash"; var userPassword:String = "flash"; trace ((myPassword == userPassword) ? "Correct" : "Incorrect"); //output: Correct As you'll notice, the previous conditional statement not only does something if the condition evaluates to true but also if it does not evaluate to TRue. You can also create a statement that will run if the conditional in an if statement does not evaluate to true. These statements are called else statements. The else StatementAn else statement is used in conjunction with an if statement. If the if statement does not evaluate to true, the else statement runs its code. The syntax for else statements is like the syntax for other conditional statements, except it has no condition. It runs when the evaluator reaches it. Here's an example: var name:String = "David"; if (name == "Kevin"){ trace ("The name is Kevin"); }else{ trace ("The name is not Kevin"); } //output: The name is not Kevin Because the if statement does not evaluate to TRue, the else statement is run. If the if statement does evaluate to TRue, the else statement is not read by the interpreter. Here's another example: var name:String = "David"; if (name == "David"){ trace ("The name is David"); }else{ trace ("The name is not David"); } //output: The name is David Now let's take a look at a more practical example of using the else statement, this time as an age-verification check: //create a date object var date:Date = new Date(); //get the year var year:Number = date.getFullYear(); var inputYear:Number = 1984; //see the difference in inputYear and year var age:Number = year-inputYear; //evaluate if they are old enough if (age>=21) { gotoAndPlay("welcome"); } else { gotoAndPlay("tooYoung"); } Now that you have seen what the else statement can do when joined with an if statement, let's look at the else if statement to see how it works in conjunction with the other two. The else if StatementThe else if statement allows you to run through several conditional statements in your code, and each is read only if the preceding conditional statement does not evaluate to TRue. The syntax for the else if statement is nearly identical to the if statement, except that it has a preceding keyword of else, as demonstrated here: var bookTitle:String = "Unleashed"; if (bookTitle == "Flash") { trace ("The title is Flash"); }else if (bookTitle == "Unleashed") { trace ("The title is Unleashed"); }else { trace ("We don't know what the title is"); } //output: The title is Unleashed Now that you understand the significance of the else if statement, let's take a look at the same code but without the else if statement: var bookTitle:String = "Unleashed"; if (bookTitle == "Flash"){ trace ("The bookTitle is Flash"); }else{ if (bookTitle == "Unleashed") { trace ("The title is Unleashed"); }else{ trace ("We don't know what the title is"); } } //output: The title is Unleashed Besides fewer lines being required, the code is much easier to read in the first example than it is in the second one. So far we have covered the if statement, the else statement, and the else if statement. Now let's go over another type of conditional statement: switch. We'll also discuss some of its methods. switch, case, default, and breakA switch statement is used much like an if statement: It evaluates a condition and runs the code associated with that condition if the condition evaluates to true. The syntax is difficult to understand, so don't feel bad if you don't get it the first time around. The statement starts with the keyword switch, followed by a value in a set of parentheses and then an opening curly bracket. The value in the parentheses is usually a variable that you are looking for in strict equality (===) in your set of cases. After the opening curly bracket, you begin to use the keyword case, followed by a space and another value and a colon. After the colon, you can put in any code you want to execute if the case evaluates to true. The value before the colon is what the switch is searching on, and it can be any data type. After the code you want to execute, place the keyword break to stop the code from going on to the next case without evaluating it. Then, after all your cases, place the keyword default and a colon and then the code to be executed if none of the cases evaluates to true (like the else statement works). That's a lot to do, so before we look at an applied example, let's see what all this looks like: switch (mainValue) { case value1: //code to be executed; break; case value2: //code to be executed break; case value3: //code to be executed break; default: //default code to be executed } The preceding is fairly generic. Now let's see it using real information: var name:String = "David"; switch (name) { case "Jonathan": trace ("Jonathan is the name"); break; case "Linda": trace ("Linda is the name"); break; case "David": trace ("David is the name"); break; case "Shelley": trace ("Shelley is the name"); break; default: trace ("There isn't a name"); } //output: David is the name As previously stated, the break keyword plays a big part in executing this code smoothly. To prove this point, let's see what happens without it: var name:String = "David"; switch (name) { case "Jonathan": trace ("Jonathan is the name"); case "Linda": trace ("Linda is the name"); case "David": trace ("David is the name"); case "Shelley": trace ("Shelley is the name"); default: trace ("There isn't a name"); } //output: David is the name // Shelley is the name // There isn't a name And of course, if the variable is not found, the default keyword will execute its code: var name:String = "Jeremy"; switch (name) { case "Jonathan": trace ("Jonathan is the name"); break; case "Linda": trace ("Linda is the name"); break; case "David": trace ("David is the name"); break; case "Shelley": trace ("Shelley is the name"); break; default: trace ("There isn't a name"); } //output: There isn't a name You can also pass expressions as case values to see if they evaluate to true (similar to having a condition for each case). Here is an example that looks to see which letter is in a word: var name:String = "David"; switch (true) { case (name.indexOf("z") != -1): trace ("There is a 'z' in the name."); break; case (name.indexOf("x") != -1): trace ("There is an 'x' in the name."); break; case (name.indexOf("v") != -1): trace ("There is a 'v' in the name."); break; default: trace("I don't know what letters are in name."); } //output: There is a 'v' in the name. The preceding example goes through a few letters to determine if they are present in the word. And because the value you are looking for is the Boolean true, you can set several expressions that evaluate to TRue or false for each case. We have covered the basics of conditional statements. Now it's time to move to the next group of flow modifiers: loop statements. Loop StatementsMuch like conditional statements, loop statements use conditions to modify the flow of ActionScript. Unlike conditional statements, loop statements run continuously until the condition has been met (evaluates to false). We have already seen one loop statementthe for in loop statement used with objects. This statement is specific to objects; the other loop statements we'll cover have a different syntax from the for in loop statement. Let's jump right in with our first loop statement: the while loop. The while LoopThe while loop runs similarly to an if statement: If the condition is true, the statement runs its code. Unlike an if statement, however, a while loop will start over and run again until the condition is no longer true. The while loop's syntax is very similar to that of the if statement as well, except it uses the keyword while, followed by the condition and an opening curly bracket that encloses the ActionScript to be run while the condition is true, along with a closing curly bracket that ends the statement. Because the statement will run until the condition is not true, you must make sure the loop will eventually end. Otherwise, processor power can be affected and errors can occur. Let's take a look at an example: var i:Number = 0; while (i < 4) { trace (i); i++; } //output: 0 // 1 // 2 // 3 Notice that we put an incremental variable in the code to be run while the condition is true. This incremental variable is what shuts down the loop. Let's see what would happen if we didn't have that incremental variable: var i:Number = 0; while (i < 4) { trace (i); } //output: (an error message that says that a script in the movie is causing //the flash player to run slowly, and then it asks do you want to abort) This is why ending a loop statement at some point is very important. Another way to cause the loop statement to end is to use a break script. We covered the keyword break in the earlier section on switch statements. Now we're going to use it to end loops. The break KeywordThe break keyword is often used to end long-running loop statements. The syntax is simple: Place the keyword break at the end of the code you would like run while the condition is true and follow it with a semicolon to end the line. Let's take another look at our previous unstopping loop statement, but this time with the break keyword added: var i:Number = 0; while (i < 4) { trace (i); break; } //output: 0 Because the condition is true, the loop statement is run until the point where the interpreter hits the break keyword. After reaching break, the interpreter moves as if the condition is no longer true. The while loop can also be used to duplicate movie clips much easier than manually duplicating them, as you will see in the following example.
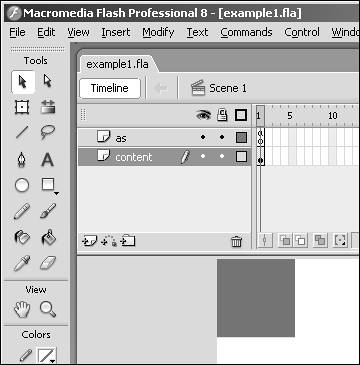
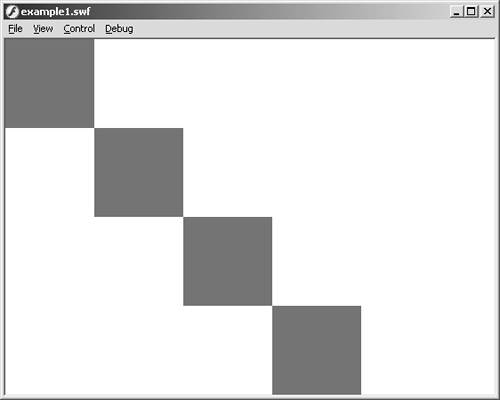
Now test the movie by going to the toolbar and selecting Control, Test Movie (Ctrl+Enter). Now you have steps (see Figure 11.2). Even if you want to duplicate each instance of the movie clip manually, you would have a line for each single time you create a new instance. Figure 11.2. After the movie is tested, it should look similar to a staircase effect.
You can also set the condition to something a little more dynamic, such as the length property of a string or array. Let's take a look: var date:Date = new Date(); var fullDate:Array = new Array(); fullDate.push(date.getDate()); fullDate.push(date.getMonth()+1); fullDate.push(date.getFullYear()); var i:Number = 0; var myDate:String = ""; while (i < fullDate.length){ myDate +=fullDate[i]; if (i < fullDate.length-1){ myDate += "-"; } i++; } trace (myDate); //output: (the date from your system clock formatted like 25-6-2005) Now you have a nice-looking full date that's dynamic! These are just a few of the hundreds of ways the while loop can be used. Other examples might include creating "bad guys" in a game while your character has enough energy, or while your screen still has room, fill it with text from an RSS feed. Next, we'll take a look at another type of loop statement: the do while loop. The do while LoopThe do while loop works identically to the while loop in that it runs its code while the set condition evaluates to true. The syntax, however, is completely different. The syntax for the do while loop starts with the keyword do, followed by an opening curly bracket. Then comes the code to be executed while the condition evaluates to true. On the next line, following the last line of code to be executed, is a closing curly bracket followed by the keyword while, which is then followed by the condition inside a set of parentheses. Finally, a semicolon is used to end the line. Let's take a look at a generic template: do { //code to be executed while true }while (condition); That's the basic format of the do while loop. Now let's revisit a couple of previous examples to see how they can be used with do while. Here's the first example: var i:Number = 0; do{ trace (i); i++; }while (i<4); //output: 0 // 1 // 2 // 3 This is just a basic loop with an incremental variable. Now let's revisit the duplicate movie example and see how it would work with a do while loop: var i:Number = 0; var amount:Number = 7; do{ duplicateMovieClip("rec_mc", "rec_mc"+i, i) rec_mc._y =i * rec_mc._width; rec_mc._x =i * rec_mc._width; i++; } while (i<=amount); //this simply cleans the first duplicated movie rec_mc0._visible = false; Just like before, the staircase appears (see Figure 11.3). Figure 11.3. Here again is the staircase effect after you test the movie.
As you can see, the do while loop works identically to the while loop, just with different syntax. Let's move on to our next loop statement: the for loop. The for LoopThe for loop works like the other loop statements. It has a condition as well as code to be executed while the condition evaluates to true. The difference is that the condition and the incremental variable are both held in the same area. The syntax of the for loop begins with the keyword for, followed by an opening parenthesis. However, instead of placing the condition first, you create an incremental variable and set a value to it. This variable is followed by a semicolon. After the first semicolon, you create your condition, which again is followed by a semicolon. After the second semicolon, you adjust your incremental variable according to how you want it to work so that the loop will have an end. Then use a closing parenthesis and an opening curly bracket to end the line. The code to be executed begins on the following line, and the statement ends with a closing curly bracket. Here's the generic template of the for loop: for (incremental variable; condition; adjustment of our variable){ //code to be executed } You may find this difficult to understand without real information, so let's put some in: for (var i:Number = 0; i<4; i++){ trace (i); } //output: 0 // 1 // 2 // 3 In this case, you created your incremental variable, i, and put a condition in i<4. Then you increased your variable so that the loop will end eventually. This is all pretty basic, but you can put it to a function and make it more dynamic by attaching the function to whatever you want. Next, you'll create a basic function using your for loop, and you'll separate each character in a string, place each character in an array that you create (more on arrays in Chapter 10), and then reverse the array and place it back into a variable as a string. Here's the code: //create a function with just one variable function reverseString(string:String):Void{ //create a blank array var my_array:Array = new Array(); //get each character and put it in the array for (var i:Number=0;i<string.length;i++){ my_array[i] = string.charAt(i); } //reverse the array my_array.reverse(); //use an empty string to join each character //then set it equal to the original string var newString:String = my_array.join(""); trace (newString); } //create a variable holding a string literal var name:String = "David"; //call function reverseString(name) //output:divaD In this function, you use the for loop to make sure you retrieve each character in your string. You can also use nested for loops to pull even more information out of data types. This next example takes strings in an array and counts each one. Then it returns the string that appears most often (notice the use of nested for loops). Here's the code:
You can also place multiple variables and conditions in loop statements, but this tends to produce surprising results. Multiple Conditions in Loop StatementsUsing multiple conditions in loop statements can serve a variety of purposes when you are dealing with multiple objects. For instance, we'll create two variables, i and j, and set them to 0 and 3, respectively. Then we'll increase each by 1 and test them both with a "less than 5" condition. First, we'll use the logical OR operator and test it; then we will use the short-circuit AND operator and test it. Finally, we'll discuss the results. When placing multiple variables in for loops, separate them with commas, as shown here: for (var i = 0, j = 3; i<5 || j<5;i++,j++){ trace ("j="+j); trace ("i="+i); } //output j=3 // i=0 // j=4 // i=1 // j=5 // i=2 // j=6 // i=3 // j=7 // i=4 Now we will use the short-circuit AND operator: for (var i = 0, j = 3; i<5 && j<5;i++,j++){ trace ("j="+j); trace ("i="+i); } //output j=3 // i=0 // j=4 // i=1 This time, j counts up to 4 and i counts to 1. This seems almost backward to what you learned about these two operators as they relate to conditional statements, because in loop statements, as long as a condition is true, the code will run. Therefore, in the case of the OR operator, as long as either of the conditions evaluates to true, the statement will run. When you used the AND operator, on the other hand, they both had to evaluate to true for the statement to continue to run. That just about covers loop statements. However, you should know that using loop statements is not the only way to create loops in Flash. There are also event handler loops as well as timeline loops. Let's discuss them next. Event Handler LoopsIn Chapter 14, "Events," we will cover event handlers in more detail. For now, though, we're just going to cover one: the onEnterFrame event. This clip event is placed on the timeline of a movie clip instance (or the main timeline) and runs constantly. You can use conditional statements to create a mock loop, if you want. For example, suppose you want to wait a little bit before moving on to the next frame of a movie. You could place the following on the main timeline in frame actions: var i:Number = 0; this.onEnterFrame=function(){ if (i>=50){ trace ("go to next frame"); delete this.onEnterFrame; }else{ trace ("not yet"); } i++; } //output (a lot of "not yet"'s and "go to next frame") Now, because of the onEnterFrame event, the movie will not move on until i is equal to 50. Another type of loop is the timeline loop, which is covered next. The Timeline LoopA timeline loop uses a timeline and a set number of frames in that timeline to continuously play through a movie. Let's see one in action. First, go to the second frame of the main timeline and insert a blank frame by going to the toolbar and choosing Insert, Timeline, Blank Key Frame (F7). Now, in the first frame of the main timeline (on the same layer, because there should only be one layer), place the following code: trace ("This is a loop"); Now when you test this code, you will see "This is a loop" a bunch of times, until you stop the movie from running. You can also use goto functions to create a conditioned timeline loop. As an example, place three keyframes on the main timeline and use the following lines of code on the indicated frames. Here's the code for frame 1: var i:Number = 0; Here's the code for frame 2: i++; Finally, here's the code for frame 3: if (i<5){ trace (i); gotoAndPlay (2); }else { stop(); } The output is the numbers 14. |

EAN: 2147483647
Pages: 319