| If you're going to learn how to work with an operating system, there's no substitute for some hands-on time. Realistically, that's the only way to truly start to understand the operation and some of the nuances of the operating system. Hardware Requirements Before you can get started, you will need to install the operating system. Before you install any operating system, the first thing that you should do is to examine the hardware requirements to make sure that your server hardware is adequate for use. The hardware requirements for the various editions of Windows Server 2003 are listed in Table 1.1. Table 1.1. Minimum Hardware RequirementsRequirements | Standard Edition | Enterprise Edition |
|---|
Minimum CPU | 133MHz | 133MHz | Recommended Minimum CPU Speed | 550MHz | 733MHz | Minimum Memory | 128MB | 128MB | Recommended Minimum Memory | 256MB | 256MB | Disk Space | 1.5GB | 1.5GB |
Speaking Realistically The table shows the Microsoft values that you will need to know for the exam. Realistically speaking, in the real world, you wouldn't want to run a production Windows Server 2003 server on anything less than 512MB of memory, with a 1GHz processor and a disk of at least 8 or 9GB. |
As you can see, a server operating system requires far more advanced hardware than a typical desktop operating system such as Windows XP. However, remember our analogy from the beginning of this chapter? You wouldn't be able to ride around in your 18-wheeler on tires made for a Toyota, would you? Hardware Compatibility Now that we've determined what hardware is needed to run each version of Windows Server 2003, we need to determine what specific hardware is supported. Because you're running a server operating system, not just any hardware you might have lying around is supported. Because a server is targeted as a platform to run a business on, it is critical that the hardware that you are running on has been thoroughly tested for compatibility. For example, you wouldn't want to have problems with a device driver while running your payroll application, would you? Fortunately, Microsoft has made it very easy for you to check your hardware for compatibility with Windows Server 2003. Microsoft has assembled a list of compatible hardware at http://www.microsoft.com/whdc/hcl/default.mspx. Note that the list is not all-inclusive, because new hardware is being produced every day. For the most up-to-date information, you should contact your hardware vendor. Note: BIOS Is Important Remember to check your hardware BIOS versions. Some older hardware is not compatible with Windows Server 2003 without a BIOS update.
The Real World For the purposes of this book, and passing the exam, you won't require the mission-critical aspects of a quality server. For our purposes, a couple of workstations will allow you to make it through the hands on exercises, or better yet, a copy of virtualization software such as Virtual PC or VMWare will do just fine. All the software that you will need is available in trial versions. Here are the links: VMWare One of the oldest vendors of virtualization software. VMWare offers a 30-day evaluation version at http://www.vmware.com/download/ws/eval.html. Microsoft Virtual PC The new kid on the block, sort of, since they purchased the code from Connectix. A 45-day evaluation is available at http://www.microsoft.com/windows/virtualpc/default.mspx. Windows Server 2003 Microsoft offers 180-day evaluation versions of Windows Server 2003 at http://www.microsoft.com/windowsserver2003/evaluation/trial/default.mspx.
Whichever method you choose, whether hardware based or virtual, the exercises in this book will be most easily accomplished using two machines or virtual images running any version of Windows Server 2003, except for the web edition. Getting Started Now that you've obtained the necessary hardware and software, let's get started! Note: Windows Server 2003 R2 Windows Server 2003 R2 contains two product discs. Disc 1 contains Windows Server 2003 with the current Service Pack (SP1 or SP2). Disc 2 contains the installation files for the Windows Server 2003 R2 optional components.
To begin the installation procedure in Step by Step 1.1, boot directly from the Windows Server 2003 CD. Your CD-ROM must support bootable CDs. Note: Virtual CD-ROM If you're using a virtual solution, such as Virtual PC or VMWare, you will need to capture the CD-ROM drive. Because using these products is out of the scope of this book, we will assume that you have read the instructions supplied with the product.
Step by Step 1.1 Installing Windows Server 2003 1. | Insert the Windows Server 2003 CD in the CD-ROM drive.
| 2. | Restart the computer; when prompted, press any key to boot from the CD.
| 3. | If necessary press F6 to be prompted to install any special drivers.
| 4. | On the Welcome to Setup screen, press Enter.
| 5. | Review the licensing agreement; to agree to it, press F8.
| 6. | If you had a previous version of Windows installed on the drive, you will see a message asking if you want to repair the installation. Press Esc to continue.
| 7. | If present, delete all existing partitions until the only thing listed is unpartitioned space, as shown in Figure 1.1.
Figure 1.1. Set up a single partition for the operating system. 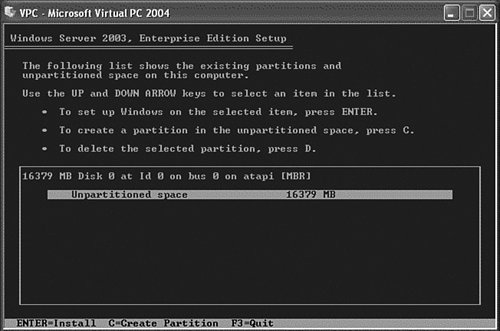
| 8. | Press C to create a partition in the unpartitioned space on the disk drive.
| 9. | After the New <Raw> partition is created, press Enter.
| 10. | Select Format the Partition Using the NTFS File System <Quick>, and then press Enter.
| 11. | Windows Server 2003 Setup formats the partition and then copies the files from the Windows Server 2003 Server CD to the hard drive. The computer restarts and the GUI portion of Windows Server 2003 Installation Program begins.
| 12. | After the GUI is started, the Windows Server 2003 Setup Wizard will detect and install your devices. This can take several minutes. During the process your screen may flicker.
| 13. | In the Regional and Language Options dialog box, make changes required for your locale (typically, none are required for the United States), and then click Next.
| | | 14. | In the Personalize Your Software dialog box, enter your name in the Name box and type 70-290 into the Organization box. Click Next.
| 15. | Type the Product Key (found on the back of your Windows Server 2003 CD case if you're installing a retail version) in the text boxes provided, and then click Next. If installing an evaluation or a Select or MSDN version, just click Next.
| 16. | In the Licensing Modes dialog box, select Per Device, and then click Next.
| 17. | In the Computer Name and Administrator Password dialog box shown in Figure 1.2, type the new computer name 70-290-DC into the computer name box, and then click Next.
Figure 1.2. Give the server a relevant name. 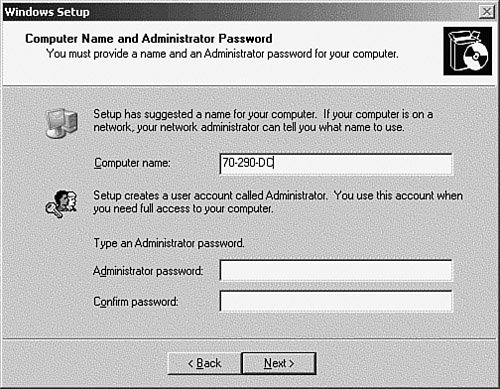
| 18. | When prompted by Windows Setup, click Yes to confirm a blank Administrator password.
| 19. | In the Date and Time Settings dialog box, correct the current date and time if necessary, and then click Next.
| 20. | In the Networking Settings dialog box, make sure Custom Settings is selected, and then click Next.
| 21. | In the Network Components dialog box, select Internet Protocol (TCP/IP), and then click the Properties button.
| | | 22. | On the General tab, select Use the Following Address, then key in an appropriate IP address and subnet mask. Example: 192.168.1.25 and 255.255.255.0. Enter the same IP address as the preferred DNS server. Enter 192.168.1.1 as the Default Gateway, as shown in Figure 1.3. Click OK when finished.
Figure 1.3. Enter the TCP/IP information. 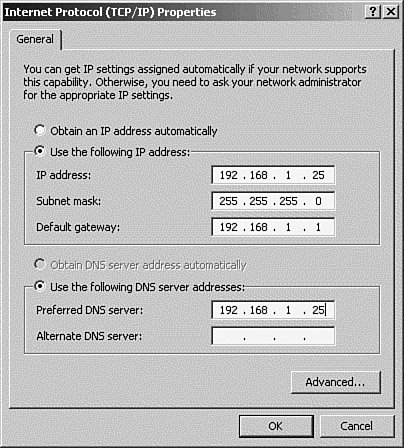
| 23. | When you are returned to the Networking Components dialog box, click Next to continue.
| 24. | In the Workgroups or Computer Domain dialog box (No is selected by default), click Next.
| 25. | The Windows Server 2003 Installation continues and configures the necessary components. This may take a few minutes.
| 26. | The server restarts and the operating system loads from the hard drive.
| 27. | When prompted, as shown in Figure 1.4, insert the Windows Server 2003 R2 Disk 2 CD-ROM.
Figure 1.4. Windows Server 2003 R2 requires a second setup disk. 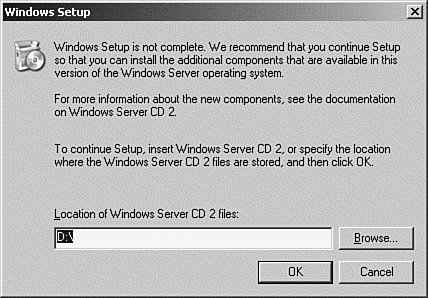
| | | 28. | When the Welcome to the Microsoft Windows 2003 R2 screen appears, as shown in Figure 1.5, select Continue Windows Server 2003 R2 Setup.
Figure 1.5. Select Continue Windows Server 2003 R2 Setup. 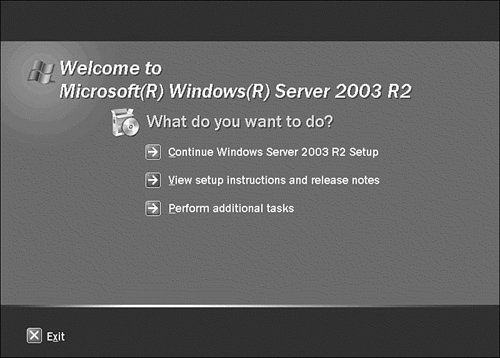
| 29. | When the Windows Server 2003 R2 Setup Wizard appears, click Next to continue.
| 30. | On the Setup Summary screen, click Next; the R2 files will be installed.
| 31. | When the Completing Windows Server 2003 R2 Setup screen appears, read the instructions for installing the R2 components, and then click the Finish Button. Your server will reboot.
|
|
Note: Best Practice To facilitate the steps in these guides, the Administrator password is left blank and there is no password. This is not an acceptable security practice. When installing a server for your production network, a password should always be set.
|