| Rulers and guides aid you in drawing objects with precise sizes, shapes , and positions on the Stage. To display rulers: -
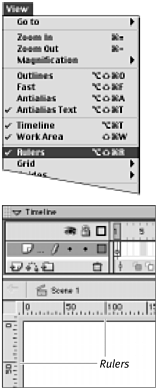
From the View menu, choose Rulers, or press Option-Shift-  -R (Mac) or Ctrl-Alt-Shift-R (Windows). -R (Mac) or Ctrl-Alt-Shift-R (Windows). Ruler bars appear on the left side and top of the Stage (Figure 1.24). To change ruler units, see "To set the units of measure" earlier in this chapter. Figure 1.24. Choosing View > Rulers (top) makes rulers visible on the Stage (bottom).  To hide rulers: To place a guide: -
With rulers visible, position the pointer over the vertical or horizontal ruler bar. If you are using a tool other than the arrow tool, the pointer changes to the arrow. -
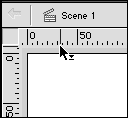
Click and drag the pointer onto the Stage. As you click, a small directional arrow appears next to the pointer, indicating which direction to drag (Figure 1.25). Figure 1.25. As you drag a guide line from the ruler bar, a direction indicator appears next to the arrow tool.  -
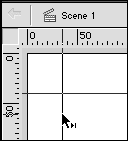
Release the mouse button. Flash places a vertical or horizontal line on the Stage (Figure 1.26). Figure 1.26. You can position individual vertical and horizontal guides anywhere you want on the Stage.  To reposition a guide: -
From the Toolbox, select the arrow tool. -
On the Stage, position the arrow tool over the guide you want to reposition. The direction arrow appears next to the arrow pointer, indicating that the guide can be dragged. -
Click and drag the guide to a new location. -
Release the mouse button.  Tips Tips -
To remove a guide, drag it completely off the Stage. -
To avoid repositioning guides accidentally , choose View > Guides > Lock Guides, or press Option-  -semicolon (;) (Mac) or Ctrl-Alt-semicolon (;) (Windows). The directional arrow no longer appears next to the arrow tool when you place it over a guide line, and the guides cannot be moved. To unlock the guides, choose View > Guides > Lock Guides or press the keyboard shortcut again. -semicolon (;) (Mac) or Ctrl-Alt-semicolon (;) (Windows). The directional arrow no longer appears next to the arrow tool when you place it over a guide line, and the guides cannot be moved. To unlock the guides, choose View > Guides > Lock Guides or press the keyboard shortcut again.
To set guide color : -
From the View menu, choose Guides > Edit Guides, or press Option-Shift-  -G (Mac) or Ctrl-Alt-Shift-G (Windows). The Guides dialog box appears. -G (Mac) or Ctrl-Alt-Shift-G (Windows). The Guides dialog box appears. -
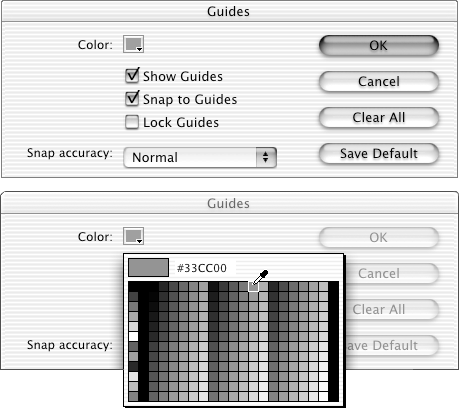
Click the Color box. The pointer changes to an eyedropper, and a pop-up box of swatches appears (Figure 1.27). Figure 1.27. To choose the color for guides, in the Guides dialog box, click the color box to access swatches for the currently loaded color set. With the eyedropper pointer, select one of the swatches, or click an element on the Stage to sample its color.  -
Using the eyedropper pointer, click a color swatch or an item on the Stage to select a new guide color. -
Click OK. Flash applies that color to any existing guides and uses it for creating new guides.  Tips Tips -
If you've placed numerous guides in your document, dragging them from the Stage may get tedious . To remove them all at once, access the Guides dialog box and click the Clear All button. -
You can also lock or unlock guides and set their visibility by selecting or deselecting checkboxes in the Guides dialog box.
|


