| The Stage is the area containing all the graphic elements that make up a Flash movie. Think of it as being the screen on which you will project your movie. At your local movie house, the screen is whatever size the management could afford to buy for the available space. In Flash, you control how big the screen is, and what color it is, through the Document Properties dialog box. You can also set some document properties in the Property Inspector. You'll learn more about using the Property Inspector later in this chapter. To access the Document Properties dialog box: Do one of the following: -
From the Modify menu, choose Document; or press  -J (Mac) or Ctrl-J (Windows). -J (Mac) or Ctrl-J (Windows). -
In the Timeline's status bar, double-click the frame-rate display (Figure 1.12). Figure 1.12. Double-clicking the frame-rate box in the status bar is a quick way to access the Document Properties dialog box. 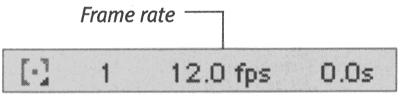 The Document Properties dialog box appears (Figure 1.13). Figure 1.13. The Document Properties dialog box is where you set all the parameters for viewing the Stage. Selecting a unit of measure for the rulers resets the unit measurement for all the Stage's parameters. Clicking the color box pops up the current set of colors and lets you choose one. Clicking Save Default sets the parameters for all new documents you create. 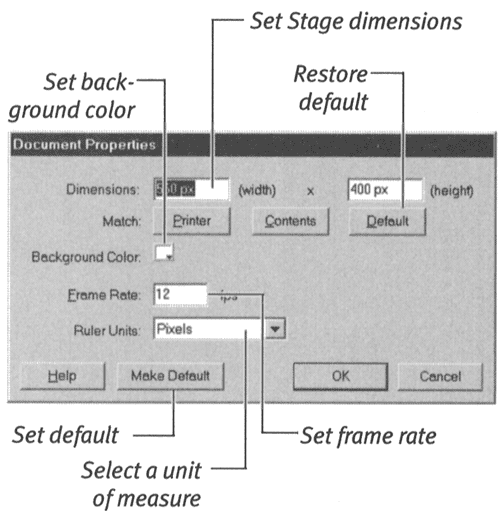  Tip Tip
To set the units of measure: -
In the Document Properties dialog box, click the Ruler Units pop-up menu. A list of units appears (Figure 1.14). Figure 1.14. Choose a unit measurement from the Ruler Units pop-up menu. 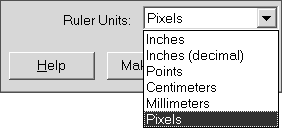 -
Select the units you prefer to work in. Flash uses these units to calculate all measured items on the Stage: rulers, grid spacing, and dimensions. -
Click OK. Tip -
If you want a banner that's 1 inch tall and 5 inches wide but don't know what that size is in pixels (the standard units of measure used for working on the Web), Document Properties can figure it out for you. First, set Ruler Units to inches. Enter 1 in the Width field and 5 in the Height field. Then return to Ruler Units and choose pixels. Flash does the math for you and sets the Stage dimensions. (Note that Flash uses screen pixels in its calculations, which means that an inch in your movie may differ from an inch in the real world, depending on the resolution of the monitor on which you view the Flash movie.)
You have three options for setting the size of your Stage. To set the size of your Stage: -
To set your own dimensions for the Stage, open the Document Properties dialog box, and enter values for Width and Height in the appropriate fields of the Dimensions section (Figure 1.15). Figure 1.15. To assign new proportions to your Stage, enter a width and height in the Dimensions section of the Document Properties dialog box.  -
Click OK. Flash automatically assigns the units of measure currently selected in Ruler Units (see "To set the units of measure" earlier in this chapter). or -
To create a Stage big enough to cover all the elements in your movie, in the Match section of the Document Properties dialog box, click the Contents button (Figure 1.16). Figure 1.16. To make your Stage just big enough to enclose the objects in your movie, click the Contents button in the Match section of the Document Properties dialog box.  -
Click OK. Flash calculates the minimum Stage size required to cover all the elements in the movie and enters those measurements in the Width and Height fields of the Dimensions section. or -
To set the Stage size to the maximum print area currently available, in the Match section of the Document Properties dialog box, click the Printer button. -
Click OK. Flash gets the paper size from the Page Setup dialog box, subtracts the current margins, and puts the resulting measurements in the Width and Height fields of the Dimensions section. Tip
To set the background color: -
In the Background Color section of the Document Properties dialog box, click the color box to pop up your choices (Figure 1.17). Figure 1.17. To assign your Stage a new color, choose one from the Background Color pop-up menu in the Document Properties dialog box. 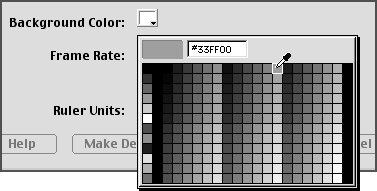 -
Select a color. The color you select appears in the color box. -
Click OK. The Stage now appears in this color in your current document. Frames are the lifeblood of your animation, and the frame rate is the heart that keeps that blood flowing at a certain speed. Flash's default setting is 12 frames per seconda good setting for work viewed over the Web. (By comparison, the standard frame rate for film movies is double that speed.) You'll learn more about frame rates in Chapter 8. Tip
To set the frame rate: -
In the Frame Rate section of the Document Properties dialog box, type a value (Figure 1.18). Figure 1.18. Enter a frame rate for your movie in the Frame Rate section of the Document Properties dialog box.  -
Click OK. To save your settings as the default: Tip
Touring the Info Bar At the top of the Stage, you'll find the info bar. The info bar lets you know what mode you are working in (editing your movie, or editing a symbol or group within the movie). The info bar's pop-up menus give you the power to switch scenes, to choose a symbol to edit and immediately switch to symbol-editing mode, and to change the magnification for viewing the Stage. When you are editing symbols or groups, the info bar displays information about the elements you are editing (Figure 1.19). To learn about working with groups, see Chapter 4; for symbols, see Chapter 6; for scenes, see Chapter 11. Figure 1.19. The info bar is located at the top of the Stage. You can use it to access symbols and scenes and to change magnification. In symbol-editing mode (bottom), the info bar displays the name of the symbol you are editing. Clicking the Back button returns you to movie-editing mode (top). 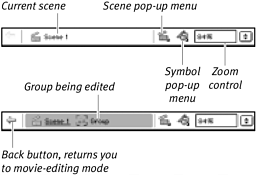 | |