| To make your movie available to the public, you must publish or export it. Flash's Publish function is geared toward presenting material on the Web and creating a range of formats for various viewers. The Export feature has similar settings but creates just one format at a time (see the sidebar "Exporting vs. Publishing"). The Publish command can create the Flash Player (SWF) file and an HTML document that puts your Flash Player file in a browser window. The Publish command can also create alternate file formatsGIF, JPEG, PNG, and QuickTimeand the HTML needed to display them in the browser window. Alternate formats let you make some of the animation and interactivity of your site available even to viewers who lack the Flash plug-in. Flash can also create stand-alone projector files. To set the publishing format 1. | Open the Flash document you want to publish.
| 2. | Choose File > Publish Settings, or press Option-Shift-F12 (Mac) or Ctrl-Shift-F12 (Windows) (Figure 16.9).
Figure 16.9. To access the settings for publishing a movie, choose File > Publish Settings. 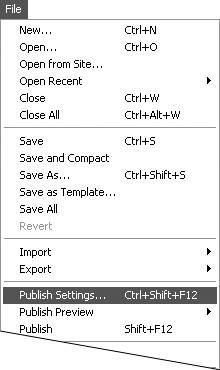
The Publish Settings dialog appears. The top of the dialog displays a Current Profile and buttons for working with profiles. If you're working in a new document and have never created a profile, Default is your only option. If you open a file made with a previous version of Flash, the profile name reflects that version. A profile is the compilation of settings for the various publishing options. You can save settings in new profiles (see "Creating Publishing Profiles," later in this chapter). Leave the current profile in place.
Exporting vs. Publishing Flash's Export Movie command translates a Flash document directly into a single format. In general, the options for exporting from FlashGIF, JPEG, PNG, and QuickTimeare the same as those for publishing to those formats. The arrangement of some options differs between the export and publish dialogs, and some formats have more options in the Publish Settings dialog. In the Publish Settings dialog, for example, you have the choice to remove gradients from GIFs (to keep the file size small), whereas in the Export GIF dialog, you don't have that option. Another difference between publishing and exporting is that Flash stores the publish settings with the movie file for reuse. |
| 3. | Click the Formats tab (Windows) or button (Mac) (Figure 16.10).
Figure 16.10. The Formats section of the Publish Settings dialog lets you publish your Flash content in as many as seven formats at the same time. An eighth format choice creates an HTML document for displaying the published files in a browser. 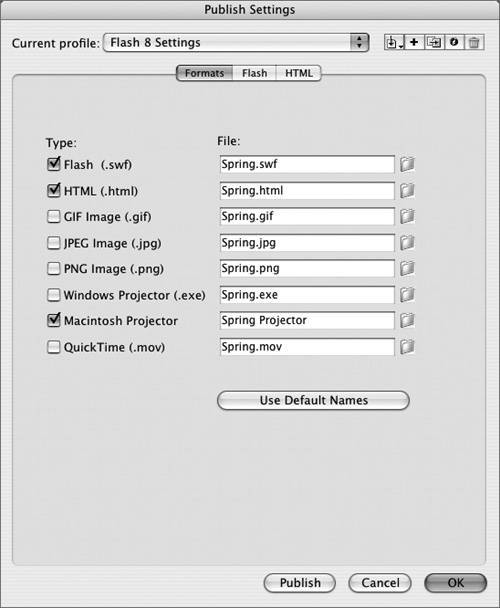
| 4. | Choose one of the eight format options.
The options are Flash (.swf), HTML (.html), GIF Image (.gif), JPEG Image (.jpg), PNG Image (.png), Windows Projector (.exe), Macintosh Projector, and QuickTime (.mov).
| 5. | To set the options for a selected format, choose the tab (Windows) or button (Mac) associated with that format (as outlined in separate tasks later in this chapter).
| 6. | To save these settings with the current file, click OK.
Flash uses these settings each time you choose the Publish or Publish Preview command for this document. Flash also uses a file's current publish settings when you enter test mode (by choosing Control > Test Movie or Control > Test Scene).
|
 Tip Tip
If you have the Properties tab of the Property inspector open as you work on your Flash document, you can open the Publish Settings dialog quickly. In the Publish section of the tab, click the Settings button.
To publish a movie 1. | Open the Flash file you want to publish.
| 2. | To issue the Publish command, do either of the following:
- Choose File > Publish Settings. The Publish Settings dialog appears. You can follow the steps in the preceding task to set new format options or accept the current settings. Then click the Publish button (Figure 16.11).
Figure 16.11. Click the Publish button in the Publish Settings dialog (left) or choose File > Publish (right) to publish your Flash files. 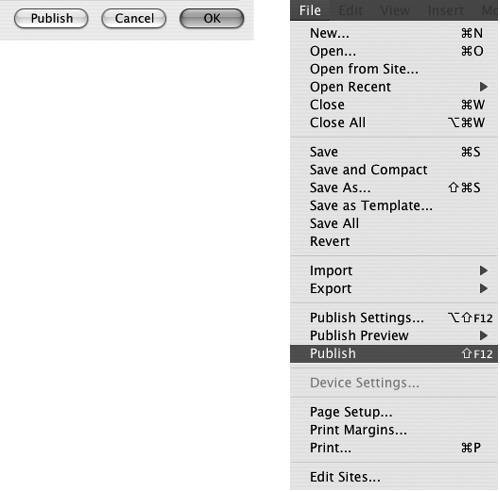
- Choose File > Publish, or press Shift-F12.
The Publishing dialog appears, displaying a progress bar and a button for canceling the procedure (Figure 16.12). Flash uses the publish settings stored with your Flash document, creating a new file for each format selected in the Publish Settings dialog.
Figure 16.12. To cancel the publishing process, click the Stop (Mac) or Cancel (Windows) button in the Publishing dialog. If you've published the file before, the dialog may appear only briefly, making it difficult to cancel the operation. 
|
Tips By default, Flash places the published files in the same location as the original Flash file. You can choose a new location. In the formats section of the Publish Settings dialog, click the folder icon to the right of the filename. The Select Publish Destination dialog appears, allowing you to select a new location for the file. You can open your browser and preview a movie in one step. Choose File > Publish Preview. Flash offers a menu that contains all the formats selected in the Publish Settings dialog (Figure 16.13). Choose a format. Flash publishes the file in that format, using the current settings, and opens the movie in a browser window. Figure 16.13. The File > Publish Preview submenu displays all the formats selected in the Publish Settings dialog. Flash publishes your movie in the selected format and opens it in your browser. 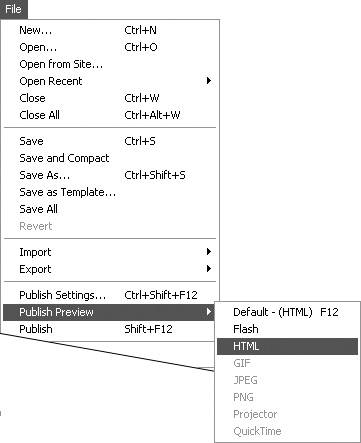 You can use Publish Preview to test your Flash creation in a browser window. If you're testing SWF files that reside on your local system, and your Flash movie links to a URL on the network, you can run into security issues. For testing purposes, you may need to change the security settings in the Flash section of the Publish Settings dialog (setting the Local Playback Security setting to Access Network Only) or you may need to give special permissions to the file you're testing (see the sidebar "A Note about Flash Player 8's Security Settings"). Flash makes one of the formats the default for Publish Preview. To publish in the default format, press Shift-F12. If you want to do lots of testing in a format other than SWF (to test your animated GIF versions, for example), set your publish settings in only that format. Then that format is the default, and you can choose it quickly by pressing Shift-F12. By default, Flash names the published files by adding the appropriate extension to the filenameadding .gif for a GIF file or .png for a PNG file, for example. Change the name by typing a different name in the File field in the Publish Settings dialog. To return to the default name, click the Use Default Names button (Figure 16.14). Figure 16.14. You can type your own filenames in the fields of the Publish Settings dialog box. Just be sure to end the name with the proper extension. To return to the default name, click the Use Default Names button. 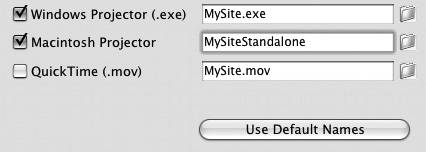 The Publish and Publish Preview commands don't give you a chance to name the published files; they take the names directly from the Publish Settings dialog. If you want to publish multiple versions of a movie, each with different settings, you must make sure that you don't overwrite the published file. Rename the published file, move that file to a new location, or type a different name in the Formats section of the Publish Settings dialog.
|