Debugging ActiveX Controls
|
| < Free Open Study > |
|
Before you begin, let me point out that the process of debugging an ActiveX control is very much like debugging a simple coclass. You may select an EXE to host your control during a debug session (using the Project | Setting selection). As well, Visual Studio supports a helpful tool called the ActiveX Control Test Container, which you can run from your Tools menu (you can also select this tool as the debugging host). When you launch this utility you are able to insert your control and change properties and methods, capture events, and so forth. This tool has a number of bells and whistles, which can help track down bugs and test the intended behavior of your object. Feel free to use this tool throughout the labs if you wish. Our initial test client will be VB; however, we will also host our control in a web page later in this chapter. Now, onto the lab!
Lab 14-1: Building a Full ActiveX Control with ATL
This lab will allow you to build a non-trivial ActiveX control with the ATL framework. You will be pulling together all of the materials presented thus far to build a control with support for connection points, COM properties and methods, windowing features (an About box), and so on. As well, this lab will introduce you to basic animation techniques, as our control will have the ability to cycle through a number of bitmap images based on the internal state of the object. This lab will also serve as the basis for the next lab in this chapter, where we extend its functionality with "bindable" properties, persistence, and a custom property page.
On the CD The solution for this lab can be found on your CD-ROM under:
Labs\Chapter 14\AXCarServer
Labs\Chapter 14\AXCarServer\VB Client
Step One: Prepare the Project Workspace and Resources
Create a new in-process server named AxCarServer with the ATL COM AppWizard, using the remaining defaults. Next, insert a Full Control using the ATL Object Wizard. From the Names tab, enter AxCar into the short name field, and leave all other names as is. From the Attributes tab, add support for connection points. This lab does not use COM's exception handling support, so you can leave that option unselected. Now, from the Miscellaneous tab, the only extra selections you need to make are to check the Insertable and Windowed Only features (Figure 14-21). These options set up our control to supply its own window, and be "insertable" into OLE document containers. We do not need any stock properties for this project, as the bitmap images will fill the entire space of the control. When you have made your selections, close the Object Wizard.
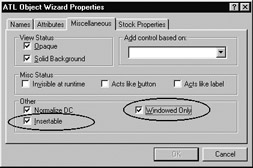
Figure 14-21: Our control is in charge of supplying the window, and may be inserted as an embedded object.
This control will illustrate simple animation by displaying a number of bitmaps based on the internal state of the automobile. For example, if the car is safely below the maximum speed, we will cycle through three bitmaps that show our car driving down the road. If the current speed is approaching the maximum speed, we will cycle through four images, with the fourth showing the car beginning to break down. Finally, if we have cracked the engine block (i.e., hit the max speed), we cycle over five images, with the final image showing a fatal explosion. Given these design requirements, your next task is to create five new bitmaps for display.
Using the Visual Studio resource editor, insert five new bitmaps (Insert | Resource) and show off your artistic abilities. You may be a great graphic artist, but I would not apply that title to myself. My images express my feelings about my first automobile (a lemon). Be sure to assign meaningful resource IDs to each bitmap. To do so, right-click on the bitmap resource from your Bitmap folder in ResourceView and select Properties.
The images used in this lab are shown in Figures 14-22 through 14-26. Notice that the clouds move towards the left as the images advance. Also notice the exhaust coming out of the automobile is a bit different on each frame to help further the animation. As well, the fourth image (IDB_ALMOSTBLOWNUP) shows some red smoke rising from the car, while the final image (IDB_BLOWNUP) displays a doomed automobile.
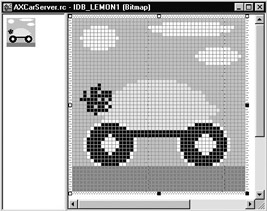
Figure 14-22: IDB_LEMON1
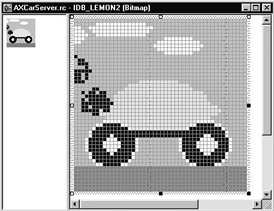
Figure 14-23: IDB_LEMON2
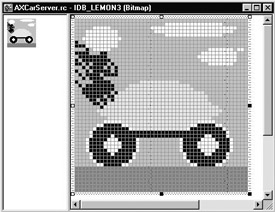
Figure 14-24: IDB_LEMON3
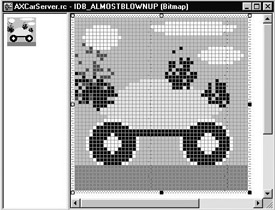
Figure 14-25: IDB_ALMOST-BLOWNUP
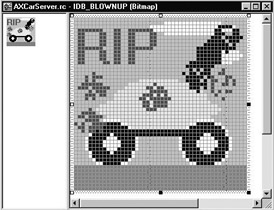
Figure 14-26: IDB_BLOWNUP
To finish up our resource editing, you may wish to change the default toolbar bitmap to personalize your control. Recall that IDEs will used this image to represent your control in the toolbox at design time. Once you have created your new bitmaps we are ready to get to the next step and populate our [default] interface.
Step Two: Design Our Custom Interface
Given that ActiveX controls can be used from "dispinterface only" clients, you know that your control should export all of its functionality from the single [default] interface (as dumb clients have no way to query for others). We will be adding the following methods to IAxCar: SpeedUp(), CreateCar(), and AboutBox() as well as the following properties: Animate, Speed, MaxSpeed, and PetName. The DISPIDs for the custom items can be left to their defaults; however, be sure to assign the predefined value DISPID_ABOUTBOX to AboutBox(). To integrate more fully into the container at design time, the Animate property will make use of a custom enumeration. Here is the IDL (feel free to use the ATL CASE tools, where appropriate, to populate the interface):
// A custom enum used to set the animation. [uuid(8FB31CF0-7490-11d3-B92E-0020781238D4), v1_enum] typedef enum AnimVal { [helpstring("Animate")] Yes = 1, [helpstring("Don't Animate")] No = 0 } AnimVal; // Our default dual interface. [object, uuid(65A0EEBF-745F-11D3-B92E-0020781238D4), dual, helpstring("IAxCar Interface"),pointer_default(unique) ] interface IAxCar : IDispatch { [id(1), helpstring("Add 10 to current speed")] HRESULT SpeedUp(); [id(2), helpstring("Set the name and max speed of the car")] HRESULT CreateCar([in] BSTR petName, [in] short maxSp); [propget, id(3), helpstring("Should I animate?")] HRESULT Animate([out, retval] AnimVal *newVal); [propput, id(3), helpstring("Should I animate?")] HRESULT Animate([in] AnimVal newVal); [propget, id(4), helpstring("The max speed")] HRESULT MaxSpeed([out, retval] short *pVal); [propput, id(4), helpstring("The max speed")] HRESULT MaxSpeed([in] short newVal); [propget, id(5), helpstring("Car's pet name")] HRESULT PetName([out, retval] BSTR *pVal); [propput, id(5), helpstring("Car's pet name")] HRESULT PetName([in] BSTR newVal); [propget, id(6), helpstring("Current speed")] HRESULT Speed([out, retval] short *pVal); [propput, id(6), helpstring("Current speed")] HRESULT Speed([in] short newVal); [id(DISPID_ABOUTBOX), helpstring("About AxCars")] HRESULT AboutBox(); };
Step Three: Implement the Custom Properties
CAxCar will need to make use of the following member variables to implement your custom properties. Add them to your private sector, and assign default values in your constructor:
// CAxCar's initial private data. short m_maxSpeed; // Holds the car's max speed. CComBSTR m_bstrPetName; // Holds the car's pet name. AnimVal m_bAnimate; // Holds animation flag (Yes or No) short m_currSpeed; // Holds the car's current speed. // Constructor. CAxCar() { m_bWindowOnly = TRUE; // Must ensure a valid handle. m_maxSpeed = 0; m_bstrPetName = L""; m_currSpeed = 0; m_bAnimate = No; } Implementing Animate, Speed, MaxSpeed, and PetName should be old hat to you by now. The [propput] method makes a new assignment to the correct data member, and the [propget] returns the correct value. Flesh out the details of each property, and move on to step 4.
Step Four: Implement the CreateCar() and AboutBox() Methods
The CreateCar() method should also pose no problems. Simply assign the private state variables to the incoming parameters. Even though we expose each data point as a custom property, this method allows the activating client to save a round trip when creating the control:
// Set state data. STDMETHODIMP CAxCar::CreateCar(BSTR petName, short maxSp) { m_maxSpeed = maxSp; m_bstrPetName = petName; return S_OK; } Now as for the AboutBox() method, we first need to create a new dialog resource. Go ahead and do so now. We will be making use of the CSimpleDialog<> template we examined in Chapter 13 to show our dialog. Recall that the only required parameter to this ATL template is the resource ID of the dialog. Figure 14-27 gives an example, which uses a Picture Holder widget to show the IDB_BLOWNUP image.

Figure 14-27: IDD_ABOUTBOX
Now that we have a dialog resource, implementing AboutBox() is a no-brainer:
// Show who made this lovely control. // (be sure to include resource.h!) STDMETHODIMP CAxCar::AboutBox() { CSimpleDialog<IDD_ABOUTBOX> d; d.DoModal(); return S_OK; } Because we have assigned this method to the well-known DISPID_ABOUTBOX, the end user can trigger the code in our AboutBox() method from the IDE. In Visual Basic, this is available from the (About) property found in the Property Window, as seen in Figure 14-28:
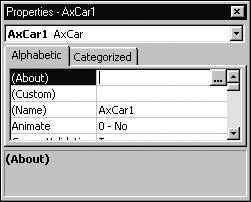
Figure 14-28: This will trigger the code in your AboutBox() method.
Step Five: Build Our [default, source] Interface
The CAxCar coclass is capable of firing two events to the container. The first event will be sent when the car is about to explode (10 miles below the maximum speed). The second event will be sent when the car does explode. Add the following methods to your [default, source] dispinterface:
// Feel free to use the Add Method CASE tool. [uuid(65A0EEC1-745F-11D3-B92E-0020781238D4), helpstring("_IAxCarEvents Interface")] dispinterface _IAxCarEvents { properties: methods: [id(1), helpstring("method BlewUp")] HRESULT BlewUp(); [id(2), helpstring("method AboutToBlow")] HRESULT AboutToBlow(); }; Now, build the connection point proxy class using the Implement Connection Point Wizard, after you have recompiled your IDL file. As we have seen in Chapter 12, this tool will add a new proxy class to your inheritance chain which defines the Fire_XXX() methods for use in your class. We will send these events in a moment. Also recall from Chapter 12 that this CASE tool tends to add the incorrect entry to your connection map. Be sure your map specifies the "DIID_" prefix for your event interface:
// Fix the bug... BEGIN_CONNECTION_POINT_MAP(CAxCar) CONNECTION_POINT_ENTRY(IID_IPropertyNotifySink) CONNECTION_POINT_ENTRY(DIID__IAxCarEvents) END_CONNECTION_POINT_MAP()
Step Six: Add the Animation Logic Variables
Now that we have built the basic infrastructure of CAxCar, we can focus on the logic responsible for rendering the bitmaps in an animation cycle. To begin this process, we need to add a few more data members to our private sector. First, we will define an array of HBITMAPs to hold the five bitmap images we designed in step one. As well, we need a variable to identify the current frame in the animation. Recall that we will be showing from three to five bitmaps during the animation loop. If the car is safely below the maximum limit, we render the first three. If we are about to blow up, we render the first four. If we did blow up, we render all five. To help avoid "magic numbers," we will also define some constants to hold the current maximum frames. Add the following constants to the header file of CAxCar:
// Some constants to refer to what the images are used for. const int MAX_IMAGES = 5; // Total number of images. const int MAX_NORMAL = 3; // Upper frame limit for safe speed. const int ABOUT_TO_BLOW = 4; // Upper frame limit for about to die. const int BLOWN_UP = 5; // Upper frame limit for destroyed car.
As well, here is the complete set of private data for CAxCar:
// Need more data! short m_maxSpeed; // Holds the car's max speed. CComBSTR m_bstrPetName; // Holds the car's pet name. short m_currSpeed; // Holds the car's current speed. HBITMAP m_carImage[MAX_IMAGES]; // An array of bitmaps to render. AnimVal m_bAnimate; // Holds animation flag (Yes or No) short m_currImage; // Holds the current image in the array. short m_currMaxFrames; // Holds the number of frames to cycle over.
Now, let's fill up our HBITMAP array with the bitmap resource IDs. For this animation cycle to work correctly, it is very important that the numerical values of your bitmap IDs are in order. If you added images sequentially, this should already be the case. To be sure, however, open up your <resource.h> file (File | Open) and be sure your IDs are arranged correctly:
// Your <resource.h> file should have an (n+1) numbering scheme. #define IDB_LEMON1 201 #define IDB_LEMON2 202 #define IDB_LEMON3 203 #define IDB_ALMOSTBLOWNUP 204 #define IDB_BLOWNUP 205
Override FinalConstruct() in your CAxCar class, and load up your images using the LoadBitmap() API call. The first parameter to this function is the HINSTANCE of your control, which can be obtained from the project-wide CComModule global variable. Notice that we are using IDB_LEMON1 (the resource ID of the first bitmap) as a baseline:
// Load up all bitmaps. HRESULT FinalConstruct() { for(int i = 0; i < MAX_IMAGES; i++) { m_carImage[i] = LoadBitmap(_Module.m_hInst, MAKEINTRESOURCE(IDB_LEMON1 + i)); } return S_OK; } Next, override FinalRelease() to free up the bitmap handles using DeleteObject():
// Free up the resources. void FinalRelease() { for(int i = 0; i < MAX_IMAGES; i++) DeleteObject(m_carImage[i]); } The remaining new data members (m_currMaxFrames and m_currImage) can be assigned in the constructor as so:
// Set all new state data. CAxCar() { m_bWindowOnly = TRUE; // Must ensure a valid handle. m_maxSpeed = 0; m_bstrPetName = L""; m_currSpeed = 0; m_bAnimate = No; m_currImage = 0; m_currMaxFrames = MAX_NORMAL; }
Step Seven: Configure the Timer
To cycle among the bitmap images, we will need some way to advance the current frame. For this lab, we will advance the current frame from within a WM_TIMER handler. Use the Add Windows Message Handler Wizard to route a WM_TIMER message to your CAxCar class. This will update your message map and add stub code for a method named OnTimer(). The implementation of this method needs to increment the current frame, and test against the current maximum frame (which could be from three to five, based on the speed of the car). When you have advanced the frame, force a redraw of the control via FireViewChange():
// Increase the frame and test for upper bounds. // Redraw when finished. LRESULT CAxCar::OnTimer(UINT uMsg, WPARAM wParam, LPARAM lParam, BOOL& bHandled) { // If we are at the max, reset to the first frame. m_currImage = m_currImage + 1; if(m_currImage >= m_currMaxFrames) m_currImage = 0; FireViewChange(); return 0; } Now that OnTimer() is ready to advance our frame, we need to enable a window timer. Go to your current implementation of the Animate property, and edit it to call SetTimer() or KillTimer() based on the AnimVal parameter. This will allow your end user to start and stop the animation cycle through a COM property:
// Create or terminate the timer. STDMETHODIMP CAxCar::put_Animate(AnimVal newVal) { // Set the animation property. m_bAnimate = newVal; // Test for a valid window before calling these CWindow methods. if(::IsWindow(m_hWnd) && (m_bAnimate == Yes)) SetTimer(1, 250); else if(::IsWindow(m_hWnd)) KillTimer(1); return S_OK; } The last step we need to do before actually rendering the bitmaps in OnDraw() is to advance the current max frame variable. We will do this in the SpeedUp() method. After advancing m_currMaxFrames, send out each of your custom events:
// Set the current upper limit of frames and send out our custom events. STDMETHODIMP CAxCar::SpeedUp() { // Speed up and check for problems... m_currSpeed += 10; // About to explode? if((m_maxSpeed - m_currSpeed) <= 10) { Fire_AboutToBlow(); m_currMaxFrames = ABOUT_TO_BLOW; } // Maxed out? if(m_currSpeed >= m_maxSpeed) { m_currSpeed = m_maxSpeed; Fire_BlewUp(); m_currMaxFrames = BLOWN_UP; } return S_OK; }
Step Eight: Draw the Images
Everything is now in place! The last detail is to render the correct bitmap within our implementation of OnDraw(). The code behind OnDraw() is not too nasty, but ATL does force you to drop to the Win32 API. Here is the full implementation:
// Draw our bitmaps. HRESULT CAxCar::OnDraw(ATL_DRAWINFO& di) { RECT& rc = *(RECT*)di.prcBounds; Rectangle(di.hdcDraw, rc.left, rc.top, rc.right, rc.bottom); BITMAP bmInfo; HBITMAP oldBitmap; HBITMAP newBitmap; HDC memDC; SIZE size; // Get the stats on the current image. GetObject(m_carImage[m_currImage], sizeof(bmInfo), &bmInfo); size.cx = bmInfo.bmWidth; size.cy = bmInfo.bmHeight; // Grab the current image. newBitmap = m_carImage[m_currImage]; // Create offscreen DC and select object into it. memDC = CreateCompatibleDC(di.hdcDraw); oldBitmap = (HBITMAP)SelectObject(memDC, newBitmap); // Now transfer to screen. StretchBlt(di.hdcDraw, rc.left, rc.top, rc.right, rc.bottom, memDC, 0, 0, size.cx, size.cy, SRCCOPY); // Clean up. SelectObject(di.hdcDraw, oldBitmap); DeleteDC(memDC); return S_OK; } So to recap what we have accomplished, here is the basic flow of animation logic: The Animate property is used to start and stop the animation. Internally this will create or kill a timer resource. The WM_TIMER method handler is responsible for increasing the current frame, while checking m_currMaxFrames for overflow. The value of m_currMaxFrames represents the upper limit of frames, which is adjusted by the SpeedUp() logic.
Step Nine: A Visual Basic Container
For ease of use, we will use VB as our test container. Begin by creating a new Standard EXE workspace, and insert your control using the Project | Components menu selection:
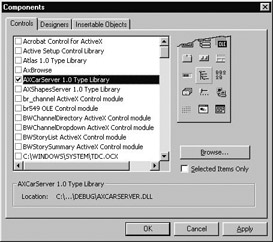
Figure 14-29: Inserting our control.
When you close this dialog box, you should see your control's toolbar bitmap pop up in the VB Toolbox. Create a GUI which allows the user to enter a pet name and maximum speed for the CAxCar object, as well as buttons to speed up and create the car. Finally, place a Label control on your form to print out diagnostic messages based on the control's incoming events, and another to hold the current speed. Here is one possible design (Figure 14-30) and the code behind it:
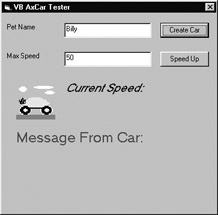
Figure 14-30: The VB test client.
' Event sinks. ' Private Sub AxCar1_AboutToBlow() lblEventMsg.Caption = "Your car is about to blow up, careful!" End Sub Private Sub AxCar1_BlewUp() lblEventMsg.Caption = "Your car has EXPLODED!" End Sub ' Create the car and start animation. ' Private Sub btnMakeCar_Click() AxCar1.CreateCar txtPetName, txtMaxSpeed AxCar1.Animate = Yes End Sub ' Speed up. This will adjust the images you see ' based on the current max frame. ' Private Sub btnSpeedUp_Click() AxCar1.SpeedUp lblCurrSpeed.Caption = "Current Speed: " & AxCar1.Speed End Sub ' Show control defaults in edit boxes when starting ' Private Sub Form_Load() txtPetName = AxCar1.petName txtMaxSpeed = AxCar1.MaxSpeed End Sub
Go ahead and run your project. You should see your car animate down the road, getting progressively more worn down based on your current speed.
That wraps up the first iteration of our ActiveX CoCar control. As you have seen, developing a control can take a bit of work, even with this simple tester coclass. Now that you have built a control with ATL, it is time to look deeper into the framework and begin to examine these new ATL templates.
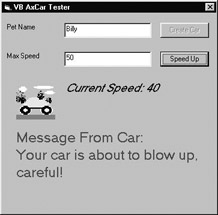
Figure 14-31: Approaching critical speed!
|
| < Free Open Study > |
|
EAN: 2147483647
Pages: 171