10.4 More Object Selection Methods
10.4 More Object Selection Methods
As our drawings get busier, selecting multiple objects for erasure or modification becomes more difficult. Fortunately, AutoCAD has provided several additional methods to create a selection set. These are WindowPoly ( wp ), CrossingPoly ( cp ), Fence , Last , All , Previous , Add , and Remove . You'll find it easy to master each.
-
WindowPoly and CrossingPoly behave like Window and Crossing Window , except that you line out each side of the window. Neither is restricted to the four-sided windows of their non-poly counterparts.
-
Fence acts like a single-line crossing window. That is, AutoCAD includes everything crossed by the single-line Fence in the selection set.
Fence is a wonderful tool when it works; unfortunately , it isn't always reliable.
-
Last refers to the last object drawn.
-
Previous refers to the last active selection set.
-
Be careful with the All tool. All places all the thawed objects in the drawing in the selection set. Erasing All , then, may empty your drawing if you're not careful.
-
Remove allows you to remove objects from the selection set. It's often easier to remove one or two objects from a selected group than it's to individually select multiple objects around the one or two you want to keep.
-
Add enables you to put objects into a selection set. Use this when you've made your selection, removed an object, and then decided to add something else.
Let's see these in action.
Do This: 10.4.1 Selection Practice
-
Open the sel-prac drawing in the C:\Steps\Lesson10 folder. It looks like Figure 10.4.1a.
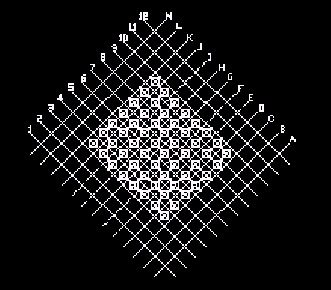
Figure 10.4.1a:Notice that the lines exist on different layers with different colors and linetypes . The objects between the lines are nodes.
-
Follow these steps.
Tools
Command Sequence
Steps

Command: e
1. Enter the Erase command
Select objects: wp
2. Tell AutoCAD you wish to select objects using a WindowPoly by typing wp at the prompt.
Specify endpoint of line or [Undo]:
Specify endpoint of line or [Undo]:
3. AutoCAD tells you to draw a polygon around the objects you wish to select.
Draw the polygon around the brown nodes. (Be sure your OSNAPs are off.) AutoCAD will continue to prompt until you hit enter to tell it that you've completed the set.
14 found
Select objects: [enter]
4. AutoCAD tells you how many objects it has found and repeats the Select objects prompt. Hit enter to complete the command.
Your drawing looks like Figure 10.4.1.4a.
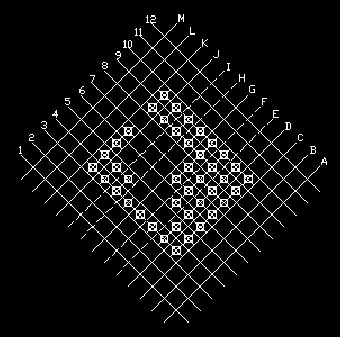
Figure 10.4.1.4a:
Command: u
5. Undo the changes.

Command: rec
6. Draw a rectangle in the drawing, as shown in Figure 10.4.1.6a.
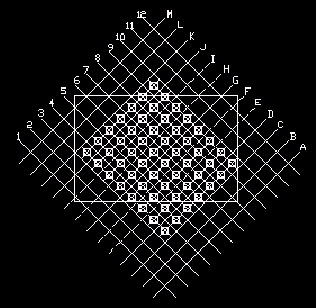
Figure 10.4.1.6a:
Command: tr
7. Now enter the Trim command.
Current settings: Projection=UCS, Edge=Extend
Select cutting edges ...
Select objects: l
8. Select the rectangle as your cutting edge, but do it by typing l for Last . AutoCAD selects the last object you drew. Hit enter to complete the selection.
First fence point:
Specify endpoint of line or [Undo]: [this line repeats]
Specify endpoint of line or [Undo]: [enter]
9. Tell AutoCAD you want to use a Fence to select the objects to trim. Then draw the fence line around the outside edge of the rectangle (Figure 10.4.1.9a). Be sure to cross all the lines.
Hit enter when you've finished.
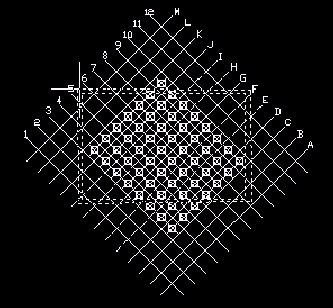
Figure 10.4.1.9a:Select object to trim or shift-select to extend or [Project/Edge/Undo]: [enter]
10. AutoCAD trims the lines, then prompts for more selection. Hit enter to confirm completion of the command.
Does your drawing look something like Figure 10.4.1.10a? Notice that not all the lines were trimmed . Remember that the Fence method isn't always reliable.
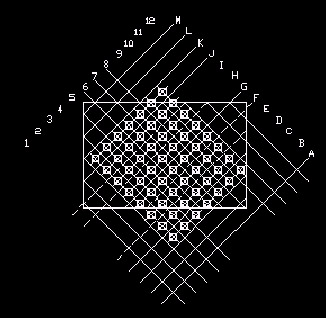
Figure 10.4.1.10a: Command: e
Select objects: p
Select objects: [enter]
11. Erase the rectangle now, but tell AutoCAD you want to erase the Previous selection set. AutoCAD remembers that you selected the rectangle in your last modification and removes it.
Command: u
12. Undo all the changes.
Command: e
Select objects: cp
13. This time, let's use the CrossingPoly method. Enter the Erase command and tell AutoCAD to use a CrossingPoly as indicated.
First polygon point:
Specify endpoint of line or [Undo]: [this line repeats]
Specify endpoint of line or [Undo]: [enter]
81 found
14. Draw a polygon that crosses all the lines but doesn't touch the numbers (Figure 10.4.1.14a).
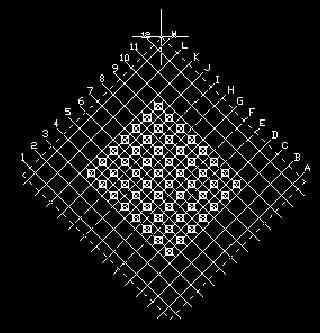
Figure 10.4.1.14a:Select objects: r
15. Now tell AutoCAD to remove some objects from the selection set.
Remove objects: f
First fence point:
Specify endpoint of line or [Undo]:
Specify endpoint of line or [Undo]:
5 found, 5 removed, 76 total
16. Use a Fence to select the objects to remove, and place it across lines E through I (Figure 10.4.1.16a).
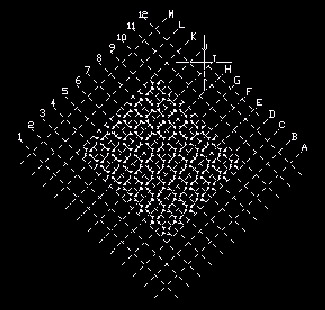
Figure 10.4.1.16a:Remove objects: a
Select objects:
17. Now tell AutoCAD you want to Add one of the lines back into the selection set, then select line G .
Select objects: [enter]
18. Complete the Erase command. Your drawing looks like Figure 10.4.1.18a.
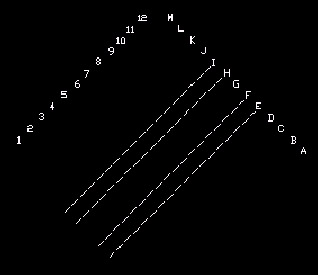
Figure 10.4.1.18a: Command: u
19. Undo all the changes.
Command: e
20. This last method is the easiest , but I must again caution you. It erases everything ! Enter the Erase command.
Select objects: all
Select objects: [enter]
21. At the prompt, type all and hit enter at the next prompt. See that AutoCAD has removed all the objects in the drawing.
Command: quit
22. Quit the drawing without saving your changes.
Well, now you've used all of AutoCAD's selection techniques. What do you think? They sure beat the simple windows we've used up to now, don't they?
Certainly, you'll almost always use those simple windows and single-object selection boxes in your work. But occasionally, you'll be ever so glad to have learned these advanced selection tricks.