Using GNOME
| This section discusses the Nautilus file manager and several GNOME utilities. The Nautilus File ManagerNautilus is a simple, powerful file manager. You can use it to create, open, view, move, and copy files and directories as well as execute programs and scripts. Nautilus gives you two ways to work with files: an innovative spatial view (Figure 8-2) and a traditional File Browser view (Figure 8-4 on page 244). Figure 8-2. The Nautilus spatial view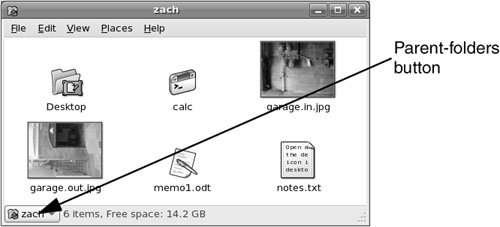 Spatial ViewThe Nautilus object window presents a spatial view (Figure 8-2). This view has many powerful features but may take some getting used to. The spatial (as in "having the nature of space") view always provides one window per folder. By default, when you open a folder, Nautilus displays a new window. To open a spatial view of your home directory, double-click the home icon on the desktop and experiment as you read this section. If you double-click the Desktop icon in the spatial view, Nautilus opens a new window that displays the Desktop folder. A spatial view can display icons or a list of filenames; select your preferred format by choosing one of the View as selections from View on the menubar. To create files to experiment with, right-click in the window (not on an icon) to display the Nautilus context menu and select Create Folder or Create Document. Tip: GNOME desktop and Nautilus The GNOME desktop is run from a back-end process that runs as part of Nautilus. If that process stops running, it usually restarts automatically. If it does not restart, give the command nautilus to restore the desktop. You do not have to keep the Nautilus window open to keep the desktop alive. Tip: Use SHIFT to close the current window as you open another window If you hold the SHIFT key down when you double-click to open a new window, Nautilus closes the current window as it opens the new one. This behavior may be more familiar and can help keep the desktop from becoming overly cluttered. If you do not want to use the keyboard, you can achieve the same result by double-clicking the middle mouse button.
Window memory Move the window by dragging the titlebar. The spatial view has window memory. The next time you open that folder, Nautilus opens it at the same size in the same location. Even the scrollbar will be in the same position.
Parent-folders button The key to closing the current window and returning to the window of the parent directory is the Parent-folders button (Figure 8-2). Click this button to display the Parent-folders pop-up menu (Figure 8-3). Select the directory you want to open from this menu. Nautilus then displays in a spatial view the directory you specified. Figure 8-3. The Parent-folders pop-up menu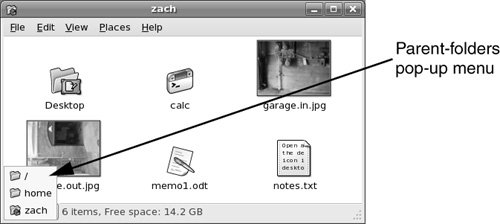 From a spatial view, you can open a folder in a traditional view by right-clicking the folder and selecting Browse Folder. Traditional ViewFigure 8-4 shows the traditional, or file browser, window with a Side pane (sometimes called a sidebar), View pane, menubar, toolbar, and location bar. To open a Browser view of your home directory, either right-click the home icon on the desktop and select Browse Folder or select Applications: System Tools Figure 8-4. Nautilus traditional (file browser) window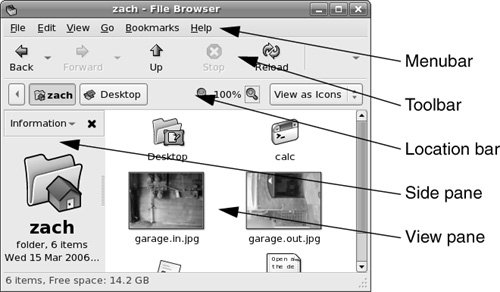 Side PaneClick the button at the top of the Side pane to display the Side pane menu. From this menu select the type of items you want Nautilus to display in the Side pane: Places, Information (information about the folder displayed in the View pane; see Figure 8-4), Tree (directory hierarchy), History (list of recent locations displayed by Nautilus), Notes, or Emblems (drag emblems [page 247] to files in the View pane). View PaneYou can display icons or a list of filenames in the View pane. Choose your preferred view by making a selection from the drop-down menu that appears at the right end of the location bar. View as Icons is shown in Figure 8-4 and View as List is shown in Figure 8-5. Figure 8-5. Nautilus displaying a List view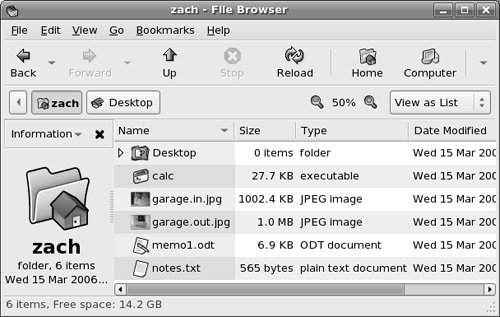 Control BarsThis section discusses the three control barsmenubar, toolbar, and location barthat initially appear at the top of a Nautilus browser window (Figure 8-4).
Menubar The menubar presents a drop-down menu when you click one of its selections. The menu selections depend on what Nautilus is displaying in the View pane.
Toolbar The Nautilus toolbar holds navigation tool icons: Back, Forward, Up, Stop, Reload, Home, Computer, and Search. Click the down arrow button at the right end of the toolbar to display and select icons that do not fit on the toolbar.
Location bar The buttons on the location bar depict the pathname of the directory that is displayed in the View pane and highlighted in the Tree tab, when it is displayed in the Side pane. You can display a text box in the location bar by pressing CONTROL-L. In this text box you can specify a local directory that you want to display in the View pane. When you enter the absolute pathname of the directory and press RETURN, Nautilus displays the contents of the directory. The location bar also holds the magnification selector and the View as drop-down menu. To change the magnification of the display in the View pane, click the plus or minus sign on either side of the magnification percentage; click the magnification percentage itself to return to 100% magnification. Click View as (to the right of the magnifying glass) to display and choose from the viewing selections. Features Available from Both Spatial and Traditional Views
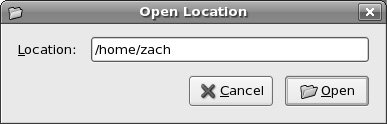
Open Location dialog box You can display deeply nested directories quickly by using the Open Location dialog box (Figure 8-6) or the location bar. Press CONTROL-L while the cursor is over a Nautilus window to display the Open Location dialog box (spatial view) or to move the cursor to the location bar (traditional view). Enter the absolute pathname of the directory you want to display. Nautilus provides assistance by completing directory names as you type. Press TAB to accept a suggested completion or keep typing to ignore it. Figure 8-6. Open Location dialog box
Zooming images Use the Open Location dialog box or the location bar to display the directory named /usr/share/backgrounds/images. Double-click an image file to display that file in a preview window. Position the mouse pointer over the image and use the mouse wheel to zoom the image. When the image is bigger than the window, you can drag the image to view different parts of it.
Opening files By default, you double-click a filename or icon to open it, or you can right-click the icon or filename and choose Open from the pop-up menu. When you open a file, Nautilus figures out the appropriate tool to use by determining the file's MIME type (page 96). GNOME associates each filename extension with a MIME type and each MIME type with a program. Initially GNOME uses the filename extension to try to determine a file's MIME type. For example, when you open a file with a filename extension of ps, Nautilus calls KGhostView, which displays the PostScript file in a readable format. When you open a text file, Nautilus opens a text editor that displays and allows you to edit the file. When you open a directory, Nautilus displays its contents. When you open an executable file such as Firefox, Nautilus runs the executable. When Nautilus cannot determine which tool to use to open a file, it asks you for assistance. See "Open With" on page 248 for information on how to change the program that GNOME associates with a MIME type. PropertiesYou can view information about a file, such as ownership, permissions, size, ways to work with it, and so on, by right-clicking a filename or icon and selecting Properties from the drop-down menu. The Properties window initially displays some basic information. Click the tabs at the top of the window to display additional information. Different types of files display different sets of tabs, depending on what is appropriate to the file. You can modify the settings in this window only if you have permission to do so.
Basic The Basic tab displays information about the file and enables you to select a custom icon for the file or change its name. To change the name of the file, make your changes in the text box. If the filename is not listed in a text box, you do not have permission to change it.
Emblems The Emblems tab (Figure 8-7, left) allows you to add or remove emblems associated with the file by placing (removing) a check mark in the box next to an emblem. Figure 8-8 shows some emblems on a file icon. Nautilus displays emblems in both its Icon and List views, although there may not be room for more than one icon in the List view. You can also place an emblem on an icon by dragging it from the Side pane Emblems tab to an icon in the View pane. Drag the Erase emblem to an icon to remove all emblems from the icon. Figure 8-7. Properties window: Emblems tab (left); Permissions tab (right)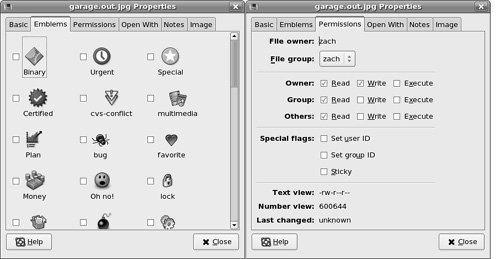 Figure 8-8. Emblems
Permissions The Permissions tab (Figure 8-7, right) allows you to change file permissions (page 181). When the box to the left of the word Read in the Owner row (called user elsewhere; see the tip "chmod: o for other, u for owner" on page 183) has a check mark in it, the owner has permission to read the file. When you click the boxes in the Owner row so all of them contain check marks, the owner has read, write, and execute permissions. The owner of a file can change the group that the file is associated with to any other group the owner is associated with. When you run as Superuser, you can change the name of the user who owns the file and the group the file is associated with. Directory permissions work as explained on page 184. See page 183 for information on set user ID and set group ID permissions, and page 1057 for a description of the sticky bit.
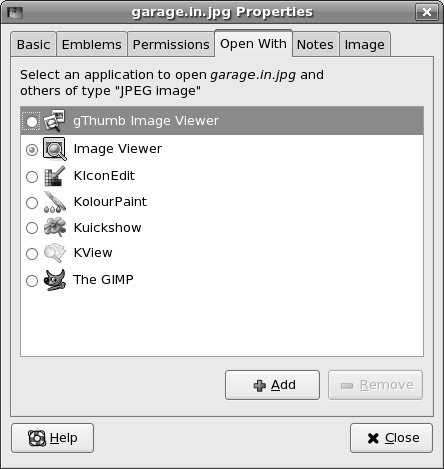
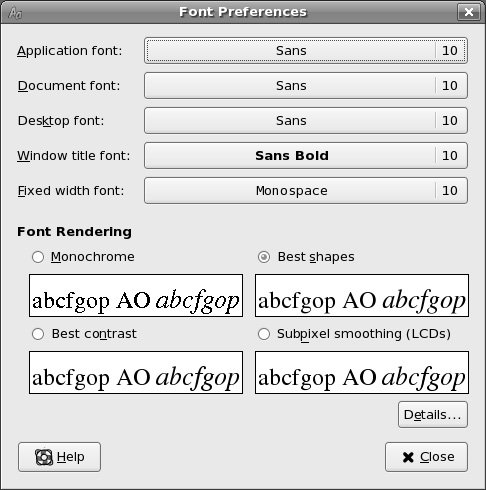
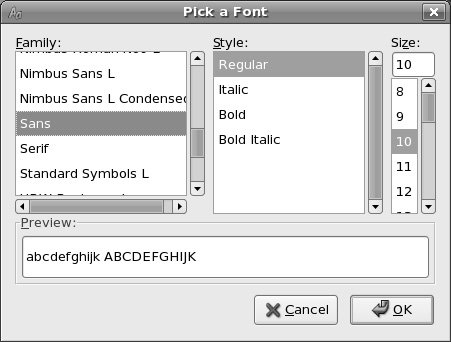
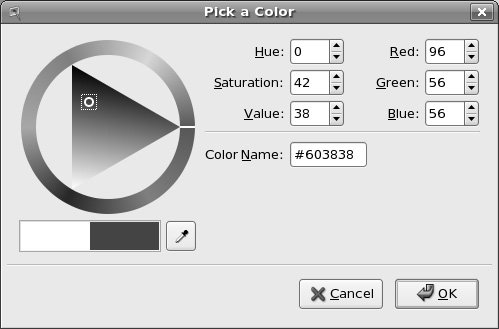
Open With When you ask it to open a file that is not executable (by double-clicking its icon or right-clicking and selecting Open with), GNOME must figure out which application or utility to use when opening the file. GNOME uses several techniques to determine the MIME type (page 96) of a file and selects an appropriate application based on that determination. The Open With tab (Figure 8-9) enables you to change which applications GNOME uses to open the current file and other files of the same MIME type (typically files with the same filename extension). Click Add to add an application and then click the radio button next to the application to cause GNOME to use that application to open the current file and others of the same MIME type. Highlight an application and click Remove to remove an application from the list. You cannot remove the default application. Figure 8-9. Properties window, Open With tab GNOME UtilitiesGNOME comes with numerous utilities intended to make your work on the desktop easier and more productive. This section covers several tools that are integral to the use of GNOME. beagle: Desktop Search (FEDORA)To run beagle, enter beagle-search on a command line or select Places: Search on the panel at the top of the screen. This utility displays the Desktop Search window (Figure 8-10), from which you can search for a string of characters in a filename and in the contents of a file. To choose the type of files you want to search, make a selection from the menu displayed when you click Search on the menubar. By default, beagle searches files in your home directory hierarchy. Click Search Figure 8-10. Desktop Search window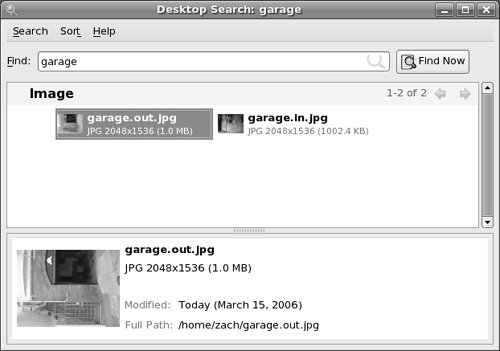 To begin a search, enter the word or string of characters you want to search for in the Find text box. The beagle utility starts searching a moment after you stop typing. Click Find Now to display additional information about the selected file. The Sort selection on the menubar allows you to sort the results of a search alphabetically by filename, by the date the file was modified, or by the relevance of each result. Font PreferencesTo display the GNOME Font Preferences window (Figure 8-11, next page), enter gnome-font-properties on a command line. You can also select System: Preferences Figure 8-11. Font Preferences window Examine the four sample boxes in the Font Rendering frame in the lower part of the window and select the one with the best appearance. Subpixel smoothing is usually best for LCD monitors. Click Details to refine the font rendering further, again picking the box in each frame that has the best appearance. Pick a Font WindowThe Pick a Font window (Figure 8-12) appears when you need to choose a font. From this window you can select a font family, a style, and a size you want to use. A preview of your choice appears in the Preview frame in the lower part of the window. Click OK when you are satisfied with your choice. Figure 8-12. Pick a Font window Pick a Color WindowThe Pick a Color window (Figure 8-13) appears when you need to choose a color, such as when you choose Desktop menu: Change Desktop Background and click the box below and to the right of Desktop Colors. When the Pick a Color window opens, the bar below the color circle displays the current color. Click the desired color from the color ring, and click/drag the lightness of that color in the triangle. As you change the color, the right end of the bar previews the color you are selecting, while the left end continues to display the current color. Use the eyedropper to pick up a color from the workspace: Click the eyedropper, and then click the resulting eyedropper mouse pointer on the color you want. The color you choose will appear in the bar. Figure 8-13. Pick a Color window Run Application WindowThe Run Application window (Figure 8-14) enables you to run a program as though you had initiated it from a command line. To display the Run Application window, press Alt-F2. Enter a command; click Run with file to specify a filename to use as an argument to the command in the text box. Click Run in terminal to run textual applications, such as vim, in a terminal emulator window. Figure 8-14. Run Application window GNOME Terminal Emulator/ShellThe GNOME terminal emulator (gnome-terminal; see Figure 8-15) displays a window that mimics a character-based terminal (page 93). To display the terminal emulator window, select Applications: Accessories Figure 8-15. GNOME terminal emulator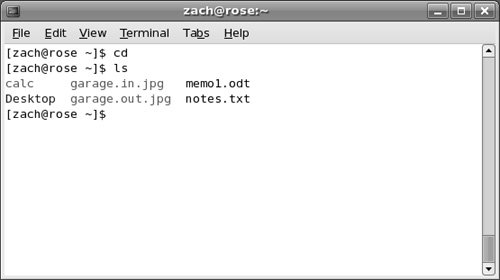 To open an additional terminal session within the same window, right-click the window and select Open Tab from the context menu or select Menubar: File A session you add from the context menu uses the same profile as the session you open it from. When you use the menubar to open a session, GNOME gives you a choice of profiles, if more than one is available. You can add and modify profiles, including the Default profile, by selecting Menubar: Edit |

EAN: 2147483647
Pages: 383