JumpStart I: Configuring a Local Printer Using system-config-printer
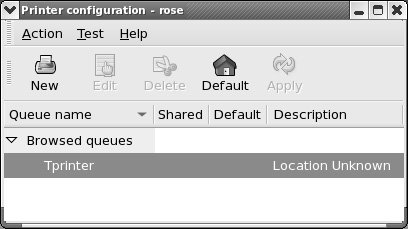
| This JumpStart configures a printer that is connected directly to the local system. The fastest way to add a new printer is to use system-config-printer. To display the Printer configuration window (Figure 14-1), enter system-config-printer on a command line. From KDE select Main menu: Administration Figure 14-1. The main Printer configuration window
Browsed queues If the words Browsed queues appear in the Printer configuration window, click the adjacent triangle to display a list of queues that CUPS has found. If the printer you want to add is listed here, you are done. To make it the default printer, highlight it, click Default and then Apply on the toolbar, and close the window. If the printer you want to add is not listed, continue with the next paragraph. From the Printer configuration window (Figure 14-1), click New on the toolbar to open the Add a new print queue wizard. Click Forward to display the Queue name window (Figure 14-2). Enter a name for and a short description of the printer. The name is a short identifier that starts with a letter and does not contain any SPACEs. The optional description can be a short sentence. Click Forward. Figure 14-2. The Queue name window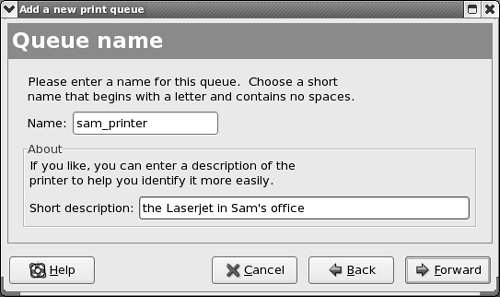 The next window, Queue type, asks you to specify the printer connection (Figure 14-3). By default, the Locally-connected queue type is selected in the combo box at the top of the window. Figure 14-3. The Queue type window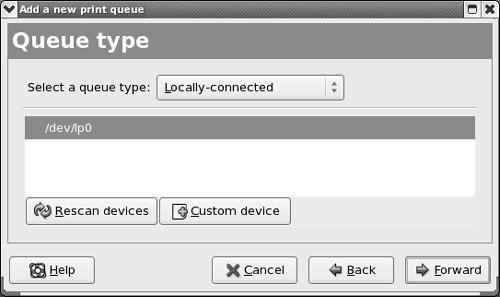 Most printers connect to a parallel or USB port, although older printers may connect to a serial port. The default list in the box in the middle of the window lists the system's parallel ports. Under Linux, a parallel port is identified as /dev/lpn, where n is the number that identifies the port. The first parallel port (LPT1 under Windows) is /dev/lp0. Unless the local system has several parallel ports, the printer is probably connected to /dev/lp0. USB devices appear in the /dev/usb directory. USB printers appear as standard parallel printers within the usb directory hierarchy. The first USB printer port is /dev/usb/lp0, with subsequent printers appearing as lp1, lp2, and so on, exactly as parallel ports do. The first serial port (COM1 under DOS or Windows) is /dev/tty0. Click to highlight the line that names the port to which the printer you are installing is connected. If the device is not listed, click Custom device and enter the pathname of the device as /dev/xxx where xxx is the name of the device in the /dev directory. Click Forward. The wizard displays the Printer model window (Figure 14-4). Specifying the printer model is a two-step process: First click the bar that has the words Generic (click to select manufacturer) on it; the wizard displays a long pop-up menu of manufacturers. Move the mouse pointer over the menu until the manufacturer of the printer is highlighted; then click. The wizard replaces the words in the bar with the name of the manufacturer and displays that manufacturer's known printer models in the frame below the bar. Scroll through these models and click the printer that is attached to the system. Click Notes to display notes on the selected printer from the Linux Printing Database. Figure 14-4. The Printer model window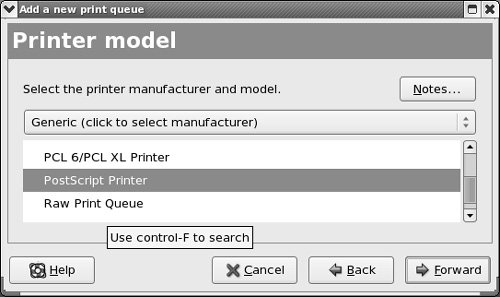 If the printer is not listed, check whether it can emulate another printer (if it has an emulation mode). If it can, check whether the printer it can emulate is listed and set it up that way. If all else fails, reselect Generic in the bar and choose a generic printer from the list in the box. Choose PostScript Printer if your printer is PostScript capable. If there is no match, select Text Only Printer; you will not be able to print graphics, but you should be able to print text. If you are using a winprinter, select GDI Printer from the list of generic printers. Click Forward to display the Finish, and create the new print queue window. The wizard has not saved any information up to this point; click Cancel to abort the process or click Finish to create the new print queue. Next the wizard asks if you want to print a test page; do so to ensure that the configuration was successful. Printing the test page automatically commits the configuration changes. If you do not print a test page, click Apply on the toolbar to commit the changes. If you have more than one print queue and want to set up the new print queue as the default, highlight the print queue and click Default on the toolbar. |
EAN: 2147483647
Pages: 383
- Step 1.1 Install OpenSSH to Replace the Remote Access Protocols with Encrypted Versions
- Step 3.1 Use PuTTY as a Graphical Replacement for telnet and rlogin
- Step 3.2 Use PuTTY / plink as a Command Line Replacement for telnet / rlogin
- Step 3.3 Use WinSCP as a Graphical Replacement for FTP and RCP
- Conclusion