Installing Snort
|
Now we can get into the actual installation of Snort. So far, we have covered the basics of Linux package management, including RPM installs, source compilation, and installing libpcap, so this next section should be fairly easy for us to get through. Luck for us, the installation of Snort is painless, so we can save all of our energy for the setup, configuration, and rules management.
First, you need to get Snort. The latest version as of press time is 2.0.1, so we will use it in our example install. This is the most current stable version available at press time. Please note that we strongly recommend going to www.snort.org and downloading the very newest stable release, as you will benefit from new functionality, bug fixes, stability, and speed enhancements. This software is constantly changing, growing, and getting better every day.
Installing Snort from Source
There is something to be said about installing software from source code. In our opinion, it is the easiest and best way to install a properly functioning software package. In this section, we will be installing the Snort 2.0.1 package from a source tarball located at the Snort Web site (www.snort.org). To install Snort, follow these simple steps:
-
As root, download the latest version of snort from www.snort.org/dl. The latest version at press time is Snort 2.0.1.
-
Change directories to /tmp by typing cd /tmp at the command line.
-
Copy the tarball to the /tmp directory by typing wget http://www.snort.org/dl/ snort-2.0.1.tar.gz at the command line.
-
Extract the tar archive by issuing the command tar –zxvf snort-2.0.1.tar.gz.
-
Change directories into the newly created Snort directory by typing cd snort-2.0.1.
-
At the command line, type ./configure to configure the package. You should see text start to scroll by (similar to the example in Figure 30.6)
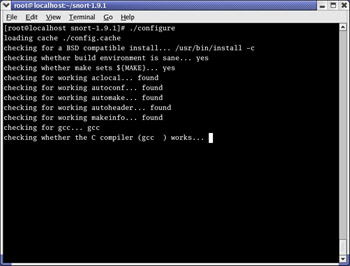
Figure 30.6: Running the Snort configure Script -
Next, type make at the command line. This will create the makefile.
Note This might take some time depending on the speed of the target machine.
-
As the final step in the build process, type make install at the command prompt. This action will deliver the package and its files to where they belong in the system. The Snort install is now officially complete. We can now move on to basic customization.
Customizing Your Installation: Editing the snort.conf File
The first order of business after completing the Snort install is to customize it to your needs. We are going to begin with the snort.conf file located in the /etc/snort directory. This file contains the configuration settings that Snort will use every time it is invoked. This configuration file is lengthy, but the sample file that the developers provided us is complete with basic instructions on syntax and use. Although it is very thorough in its descriptions, we would still like to cover a few basic settings that will allow Snort to function properly.
First, we will need to change the var HOME_NET variable in the snort.conf file. What this variable signifies is the internal network address of your LAN. In most textbook cases, this value will be an entire subnet, but it can also be in the form of a single IP address. In this example, we are going to use the subnet of our internal network card. In this case, it will be 192.168.0.0/24, which means that the address space of 192.168.0.1–192.168.0.254 will be represented, using a subnet mask of 255.255.255.0 (Figure 30.7).
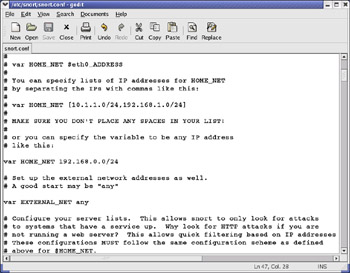
Figure 30.7: Editing the snort.conf File in gedit
The next variable we need to look at is var EXTERNAL_NET. You can set this to whatever subnet your external network adapter is answering requests (or in this case, listening) on. In this example, we will use var EXTERNAL_NET any. This tells Snort to listen for all addresses on the external network. In our opinion, this value should be left at the default state of any.
If you scroll down further into the config file, you will see a section dedicated to server-specific variables. These variables will look similar to var HTTP_PORTS 80 or var ORACLE_PORTS 1521. These variables (or vars) specify specific ports on which Snort should watch for attacks. The only downside to the current implementation is that you either have to list ports in succession (for example, 80:82, which means 80 through 82 inclusive) or on separate lines. Work is underway to add support for port lists.
Other areas of initial interest should include the preprocessors, output plug-in, and ruleset sections. Preprocesses are the filters that Snort puts the incoming data stream through before it actually processes the data. In the example snort.conf file, notice that IP defragmentation is turned on. This helps to detect fragmentation and denial-of-service (DoS) attacks. You can also enable other preprocessors in this section to fit your particular scenario.
The output plug-ins section defines whether Snort will use various logging and alert features, and tells it what format to use to dump the data. The ruleset section defines what the system will consider "suspicious" activity. Based on this alone, you should visit www.snort.org frequently to download the latest rulesets to ensure that your IDS is doing the job you meant for it to do—without an up-to-date ruleset, you machine will be nothing more than an expensive paperweight. It is also a good practice to comment out rules that do not apply to your organization and/or needs. Unnecessary and extra rules can lead to false positive alerts from the system.
Also make note that you can alter the path to your rulesets here as well, by changing the include $RULE_PATH/rule.rules line to reflect the location of your updated rules.
The final step in this section is to simply verify that Snort will actually run without error. To accomplish this, we will run Snort with a generic configuration/ruleset and no options. To do this, open a terminal window, type snort –v, and verify that the program loads without error. You will see a screen similar to the one in Figure 30.8. All we are doing here is running Snort in verbose mode (hence the –v flag). Since everything looks good, let's move on to the next section.
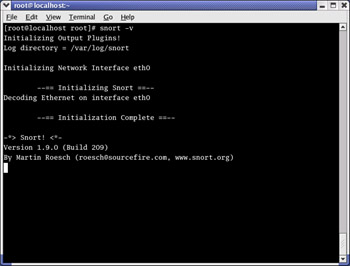
Figure 30.8: Running Snort with the Verbose Option Enabled
Enabling Features via configure
During the build process (more specifically, during the configure script portion), we can pass options to the installer to customize it to whatever specific situation or needs we might have. These were harvested from the INSTALL file in the Snort 2.0.1 tarball.
-
--enable-debug Enable debugging options (bug reports and developers only).
-
--with-snmp Enable SNMP alerting code.
-
--enable-smbalerts Enable the SMB alerting code, which is somewhat unsafe because it executes a popen() call from within the program (which runs at root privs). You've been warned, use it with caution!
-
--enable-flexresp Enable the "Flexible Response" code, which allows you to cancel hostile connections on IP-level when a rule matches. When you enable this feature, you also need the libnet-library that can be found at www.packetfactory.net/libnet. See README.FLEXRESP for details. This function is still alpha, so use with caution.
-
--with-mysql=DIR Support for MySQL; turn this on if you want to use ACID with MySQL.
-
--with-odbc=DIR Support for ODBC databases; turn this on if you want to use ACID with a nonlisted DB.
-
--with-postgresql=DIR Support for PostgreSQL databases; turn this on if you want to use ACID with PostgreSQL.
-
--with-oracle=DIR Support for Oracle databases; turn this on if you want to use ACID with Oracle.
-
--with-openssl=DIR Support for OpenSSL (used by the XML output plug-in).
-
--with-libpq-includes=DIR Set the include directories for PostgresSQL database support to DIR.
-
--with-libpq-libraries=DIR Set the library directories for PostgresSQL database support to DIR. Setting both of these values enables the Postgres output plug-in module.
-
--with-libpcap-includes=DIR If the configuration script can't find the libpcap include files on its own, the path can be set manually with this switch.
-
--with-libpcap-libraries=DIR If the configuration script can't find the libpcap library files on its own, the path can be set manually with this switch.
Installing Snort from RPM
Depending on your distribution and release number, there might not be RPMs available. In most cases, you can probably find contributed source RPMs from a Web site such as www.rpmfind.net, and then you can build your own. We recommend building your own because all systems are inherently different and have their own file system structure and environments. We cover installation via RPM and source RPM in this section. This should seem pretty easy to you in comparison to installation by tar archives.
Let's start with the RPM installation. The installation is simple, just follow one of two things after you download the RPM:
-
In console mode At a console prompt, just enter the command rpm –Uvh snort-1.9.1-snort.i386.rpm. This will complete the installation routine for you. Note that we used the –U (upgrade) option versus –i (install)—it will install with either. We are always concerned that if we use –i, the installer will not upgrade files properly (if there are any files to upgrade to newer versions), but if we use the –U flag, it will do a more thorough job of installing the software. What we're trying to say is that you can install the software simply by typing rpm –i snort-1.9.1-1snort.i386.rpm.
-
Inside X Windows If you are using KDE, GNOME, or one of the many X Windows systems out there, this set of instructions is for you. Under Red Hat Linux 8, you will be prompted with a dialog asking if you would like to proceed. All you have to do is click Continue and RPM will install the package. As stated earlier, depending on your distribution instructions might vary; so make sure to consult the documentation or man files that came with your distribution. Most of the RPM-based distributions are not much different from what we have witnessed here. Another point that is distribution dependent is that you might not get a confirmation that the package was successfully installed onto the system. In true UNIX/Linux fashion, some distributions do not waste time displaying unnecessary information to the screen. The only time you might ever hear Linux speak is when something went dreadfully wrong (and we all hope that day never comes).
Now we will look at the source RPM (or SRPM) as a means of a more solid installation. This is the preferable way to install packages if you use RPM-based distributions such as Red Hat, and the SRPMs are readily available to you. Usually, sites such as www.freshrpms.net and www.rpmfind.net will have these available for most packages and almost all RPM-based distros.
Recompiling a source RPM is not as daunting as it might sound. RPM takes care of all the minute details involved in a recompile and rebuild. Depending on the version of RPM you are using, the syntax can vary slightly. The first example we will give you will run on RPM version 4.1 or higher (Red Hat 8.0 includes this version). At a console prompt, all you have to do is download the source rpm (which ends in .src.rpm) folder and enter rpmbuild —rebuild snort-2.0.10-1snort.src.rpm. This will prompt RPM to rebuild the file into a regular RPM specifically designed for your system.
The second example is for versions lower than 4.1. For these systems, just enter rpm —rebuild snort-2.0.1-1snort.src.rpm. This command will do exactly the same thing as in the previous example, but in a slightly different syntax. Both versions will place the completed RPM package in a subfolder under the /usr/src/ directory. On a Red Hat 8.0 system, the completed builds are located under /usr/src/redhat/RPMS/i386.
| Note | The only drawback to building a package from an SRPM is that all of the package's dependencies must be met, even though you are not actually installing the program. In the case of Snort, you must have MySQL, PostgreSQL, and UCD-SNMP installed (including devels and libraries). The reason for this is simple: With Snort, the developers have coded the software to support a variety of databases. When you attempt to rebuild the SRPM, it looks for all of the various dependencies required for all database systems it was built to run with. This is true even if you don't ever intend to use all of the options. The fact of the matter is that they are present and must be rebuilt into the final package for it to function properly. If you do not satisfy all of the program's dependencies, the rebuild will fail. One good thing is that it will explain what components it is missing to allow you to install them and try the rebuild again. |
Installation on the MS Windows Platform
All you Microsoft users were probably wondering when we were going to get to the section designated for you. Well, we are here. Sorry for the delay. Please keep in mind that we have not pushed the Microsoft portion to the end for any reason other than for the simple fact that it is an easier task installing on this system than on its Linux counterparts. This is going to be much shorter in terms of installation steps. Configuration should be a breeze as well. As a personal opinion, we always recommend installing on Linux (rather than Windows) if you have the resources to do so—for reasons of stability and pure speed. Linux is also far superior at performing network-related tasks.
Let's get started with the installation. First, we'll need to install the packet capture library for Windows, WinPcap, which is available at winpcap.polito.it/install/default.htm.
-
Download WinPcap.exe.
-
Double-click WinPcap.exe to launch the installer.
-
The installer will present you with a Welcome dialog as in Figure 30.9. Click Next.

Figure 30.9: The Snort Installer Welcome Screen -
The next dialog is a simple notification that lets you know that the installation was completed successfully (Figure 30.10). Click OK.
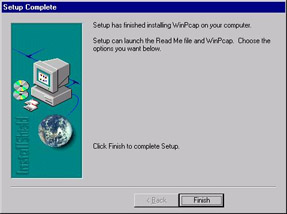
Figure 30.10: Confirming a Successful WinPcap Installation -
The next screen is another confirmation that the installation has finished on your computer (Figure 30.11). Click Finish.
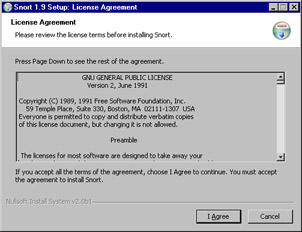
Figure 30.11: Completing the WinPcap Install
Congratulations! The WinPcap installation was a success. Although it is not noted during the installation, we recommend rebooting the machine for any changes to take effect, as Windows always seems to need a little extra coaxing. If you ever need to uninstall WinPcap, it places an entry in the Add/Remove Programs applet in the Windows Control Panel. Simply remove it from there if something goes wrong.
The latest version of Snort is available at www.snort.org/dl/binaries/win32 to download the latest and greatest version.
-
Download snort-2.0.1.exe and double-click on it. This will start the installer.
-
Once the installer launches, you will be presented with the GNU General Public License (GPL). We strongly recommend reading this in its entirety if you have the patience and the time. It is a wonderful piece of literature and has remained unchanged since its inception in 1991. This is the license under which most open-source software is distributed, including Linux. When you have finished reading the license, click I Accept.
-
The next screen to appear is the Installation Options dialog. Here, you will be able to select optional components to fit your unique situation. As the software states, if you choose the SQL option, make sure that the SQL client software is already installed on the target machine. Click Next when you are ready to continue.
-
Next, you are presented with a list of components to install. Again, you can choose what you would like to install here to fit your needs. Please note that it is pretty important to make sure that Snort is one of your choices—it might make for an interesting installation without it. Your component options are as follows:
-
Snort Installs Snort, configuration files, and rules.
-
Documentation Installs the Snort documentation.
-
Contrib Copies additional user-contributed add-on modules and tools.
-
-
Click Next when you are satisfied with your choices.
-
You should be prompted for an installation location. The default is fine unless you're feeling creative. Click Install.
-
The installer will start copying files to your hard drive. It doesn't take long, so don't go anywhere.
-
The installation is now complete. Just click Close and consider Snort to be ready to use! Optionally, you can click Show Details to view the output of the installer. This is especially helpful if something goes wrong.
Detailed Component Selection Options
During the install of the Win32 version of Snort (when the custom install option is chosen), we are presented with more a detailed selection of choices. Here, we will attempt to discuss, in general terms, what each option does and how it will affect your installation.
-
Snort-Barebones This is the installation we are performing in this chapter, and is subsequently the base, or "bare," version of Snort.
-
Snort-Flexresp This will install Snort with flexible response (session sniping) activated.
-
Snort-MySQL-Flexresp This will install Snort with added support for MySQL and Flexresp.
-
Snort-MSSQL-MySQL-Flexresp This will install Snort with added support for Microsoft SQL, MySQL, and Flexresp.
-
Snort-MSSQL-MySQL This will install Snort with added support for Microsoft SQL and MySQL.
-
Snort-MySQL This will install Snort with added support for MySQL.
Please note that in order to install most of these custom options with Snort, you will need to have a fully functioning dependency tree. For example, if you want to install Snort with MySQL support, you must have a functioning MySQL database server before you attempt to install Snort. If you don't, Snort will fail miserably and your network security needs will go unattended.
Installing Bleeding-Edge Versions of Snort
If you are one of those types who like to live life to the fullest, you might want to just go out and get the latest version of the software directly from the developers, and they are always happy to provide you with what you need and crave. For this reason, they make their daily Concurrent Version System (CVS) (see the following section) snapshots available for download. You can find them at www.snort.org/dl/snapshots if you would like to try them out. Keep in mind that CVS builds are the equivalent to beta builds and must be approached as such. They can contain bugs, and there is not a reasonable amount of support for that type of installation.
The CVS System
The CVS is a versioning system that allows many developers to work on the same project simultaneously, while keeping track of what changes have been made, who made them, and most importantly, what versions exist and keeping them separated. You will generally find many versions of a project in a CVS tree.
You will find that CVSs exist on many Web sites for almost every open-source project. For example, SourceForge (www.sourceforge.net) has CVS repositories for all of the projects it contains. To browse most CVS trees, you will need a CVS client application. However, SourceForge has a Web interface for browsing as well, which is a nice feature if you need to quickly get some information or code from a CVS tree. Here are a couple of GUI applications for CVS:
-
If you would like a CVS front-end app for Linux, VisualCVS (www.scentech.ch/products/visualcvs) is a client worth checking out.
-
If you would like a CVS application for Windows, WinCVS (www.wincvs.org) is a pretty good client.
|
EAN: 2147483647
Pages: 240
- Information Security and Risk Management
- Understanding Certification and Accreditation
- Appendix B Glossary of Terms and Acronyms
- Appendix C The Information System Security Architecture Professional (ISSAP) Certification
- Appendix D The Information System Security Engineering Professional (ISSEP) Certification