Customizing the Transitions Palette
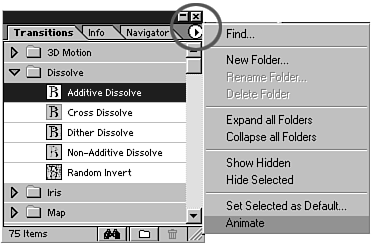
| Speed and efficiency are key with any video-editing project. When putting the finishing touches on your edited rough cut, you will probably spend a great deal of time adding effects and transitions. Premiere offers you a way to reduce your time and increase efficiency by allowing you to customize the Transitions Palette. One feature allows you to see a cycling animation of how the transition looks after you edit it into your timeline. Another feature allows you to hide transition icons that you are not using for this project so that you can quickly and easily work with the transitions you need for the current project. You can even create your own custom folders to sort and store favorite transitions any way you desire. There are many different ways you can group and display the transition icons. To animate the icons, do the following:
note To stop the icons from animating, click the Animate menu choice to cease the cycling animation. To display only selected icons, do the following:
To restore the hidden icons individually or to restore the entire hidden group, do the following:
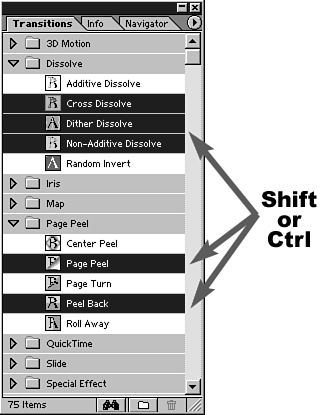
tip Hold down the Shift key while clicking to select a contiguous group of icons. Hold down the Ctrl key (Windows) or Option key (Macintosh) to select multiple icons not in contiguous order. (See Figure 5.5.) Figure 5.5. Use modifier keys to select different groupings.
Do the following to create new folders in the Transitions Palette:
Even though you have neatly categorized all your effects, it might be difficult to locate one. A quick and easy way to find the desired transition, even inside folders, is to use the Find feature. Click the binoculars icon at the bottom of the Transitions Palette. Type the effect's name and click the Find button. If you don't remember the exact name, type the first few letters and click Find. Premiere locates any transitions that contain that spelling. If you have the Expand Folders check box marked, Premiere automatically searches and expands folders that contain effects similar to your search. Click the Find Next button to search for the next match. With all the folders collapsed, type "dis" for "dissolve" to see what I mean. |