Adding the Default Transition
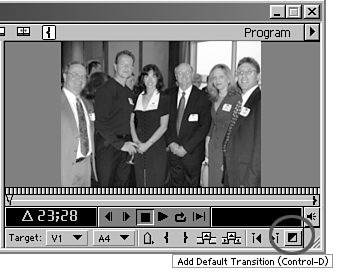
| The Transitions Palette can take up some good working real estate on your desktop, especially if you have only one monitor. (I like to use two monitors and spread everything out.) Even with Premiere's workspaces, it's a pain to constantly open and close the Transitions Palette every time just to add a dissolve to your timeline. Premiere gives you a feature on your regular interface that allows you to add the default transition (initially set up as the dissolve transition) to your timeline with one click of the mouse. You can customize this to make the default transition any transition you use most often. To use this feature, do the following:
note You can always adjust the transition's duration in the timeline regardless of the default duration previously set. When you're editing in your timeline, simply click the Add Default Transition button in the Monitor window or use the keyboard shortcut Ctrl-D (Windows) or Command-D (Macintosh) to add the transition you selected to your timeline. (Figure 5.3). Figure 5.3. The Add Default Transition button adds a dissolve or whichever transition you preselect.
|
