Inserting Data with the DetailsView
| While the GridView makes editing and deleting data a breeze, it doesn't provide a way to insert a new record into the database. The DetailsView, however, does, and configuring the DetailsView to provide inserting support is quite similar to adding editing and deleting support to a GridView.
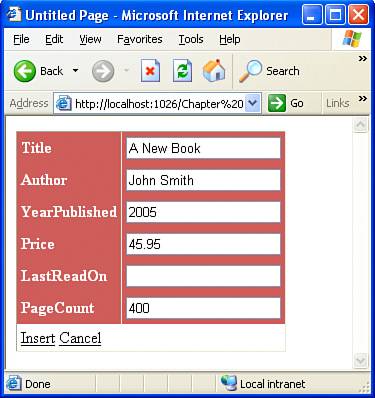
As with the GridView, the first step in creating a DetailsView that supports inserting is to add a SqlDataSource control to the page that has been configured to include the INSERT, UPDATE, and DELETE statements. Take a moment to create a new ASP.NET page and add and configure the SqlDataSource control as we've done throughout this chapter. Next, add a DetailsView to the Design view and bind it to the SqlDataSource control. In the DetailsView control's smart tag, you'll find an Enable Inserting check box. Check this. Doing so adds a New button beneath the other DetailsView fields, as shown in Figure 16.15. (Also take a moment to check the Enable Paging check box so that we can scroll through the records rather than just sitting at the first record.) Figure 16.15. The DetailsView has been configured to support inserting.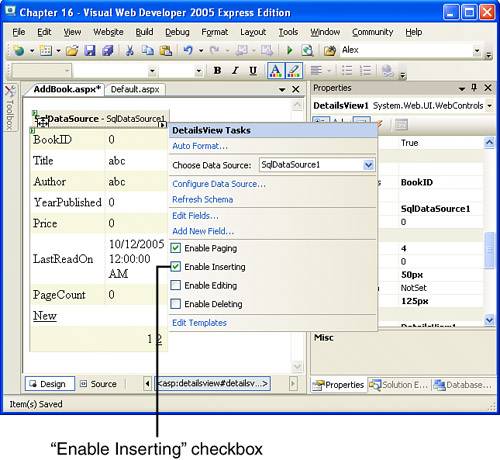 When you view the ASP.NET page through a browser, you'll see that the first book, Visual Studio Hacks, is displayed, with links to page through the results. Additionally, there's a New link that, when clicked, will display the DetailsView in an insertable mode (see Figure 16.16). When the DetailsView is in insertable mode, the user can enter values for the various editable fields, creating the new record by clicking the Insert button. Figure 16.16. Clicking the New button displays the DetailsView in insertable mode. Customizing the Insertable DetailsViewLike the GridView, the insertable DetailsView is highly customizable. Enabling inserting in a DetailsView adds an Insert field to the DetailsView, which can be examined through the Fields dialog box. Like the Edit or Delete fields in an editable or deletable GridView, the Insert field's appearance can be customized. By default, it displays the text "Insert" in a link, but these aesthetic settings can be changed via the field's ButtonType and InsertText properties. Just like with the GridView, you can make the DetailsView's Insert field a link, button, or image, and for buttons or links, you can specify the text displayed. Each DetailsView field has an InsertVisible property that can be set through the Fields dialog box. If this property is set to False, the field does not appear when adding a new record. By default, all primary key columnsBookID in our examplehave this InsertVisible property set to False. As Figure 16.16 shows, the BookID field is nowhere to be seen when inserting a new record into the Books table.
Like an editable GridView, an insertable DetailsView emits a default inserting interface, which results in a TextBox Web control for each field displayed in the insertable view. If you need to customize this inserting interface, convert the BoundFields into TemplateFields and edit the InsertItemTemplate accordingly. As you can see, working with an insertable DetailsView is very similar to working with an editable GridView. The same issues and customization options exist with both data Web controls. |
EAN: 2147483647
Pages: 233