| There are a couple of places in which you can change a song's tags. Labeling a Song in the Info Window You can use the Info window to change a song's tags, as you can see in the following steps: 1. | Open the Info window for the song whose information you want to change.
| 2. | Click the Info tag, and the Info pane will appear.
| 3. | Enter or change the information shown in the various fields. For example, you can change the song's name or artist. Or you might want to add comments about the song in the Comments box.
| 4. | To change a song's genre, select the new genre from the Genre menu.
| 5. | When you are done entering or changing tags, click OK. The Info window will close, and any changes you made will be saved.
|
note  | One of the more useful tags is Genre. This can be used for browsing and also in playlists. |
Labeling Multiple Songs at the Same Time You can change some tags, such as Genre, for a group of songs at the same time. This can be a faster way to entering data because you can change multiple songs at the same time. Here are the steps to follow: 1. | Select the songs whose data you want to change.
tip  | If a genre by which you want to classify music isn't listed on the menu, you can add it to the menu by selecting Custom on the menu and then typing the genre you want to add. That genre will be added to the menu and associated with the current song. You can use the genres you create just like the default genres. |
| 2. | Open the Info window. You'll be prompted to confirm that you want to change the information for a group of songs.
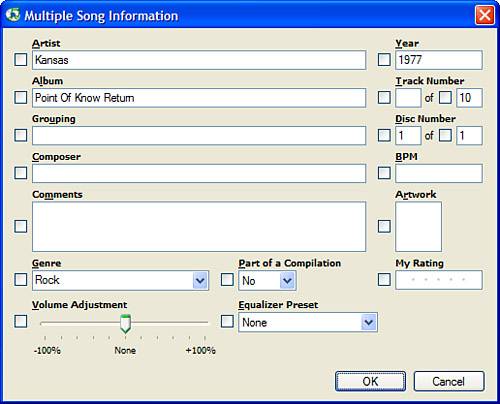
| 3. | Click Yes to clear the prompt. The Multiple Song Information window will appear (see Figure 17.5). The information and tools in this window work in the same way as they do for individual songs. The difference is that the information and settings apply to all the songs you have selected.
Figure 17.5. You can use this window to change the data for multiple songs at the same time. 
| 4. | Enter data in the fields, make changes to existing data, or use the other tools to configure the songs you have selected. As you change information, the check box next to the tag will become checked to show that you are changing that data for all the selected songs.
tip  | To select multiple songs that are next to each other, hold down the Shift key while you click songs. To select multiple songs that aren't next to each other, hold down the Ctrl (Windows) or  (Mac) key while you click songs. (Mac) key while you click songs. |
| 5. | When you are done making changes, click OK. The window will close and the changes you made will be saved.
|
Labeling a Song in the Content Pane note  | You haven't yet learned about some of the fields on the Multiple Song Information window, such as My Rating, but you will soon. |
You can also edit tags within the Content pane: 1. | Click once on a song to select it.
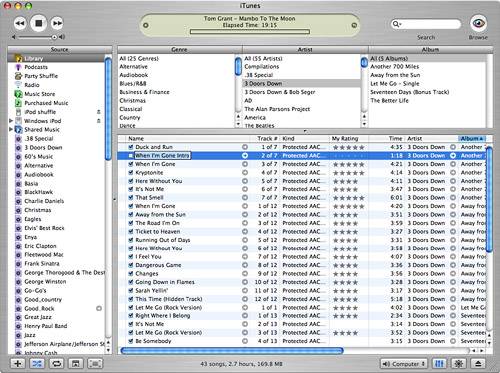
| 2. | Click once on the tag you want to edit. The tag will become highlighted to show that it is ready to be edited (see Figure 17.6).
Figure 17.6. You can also change tags from the Content pane; in this example the album name is highlighted and can be changed. 
| 3. | Type the new information.
| 4. | Press Enter (Windows) or Return (Mac). The changes you made will be saved.
|
|

