Upgrade 1: Creating a Wired Network
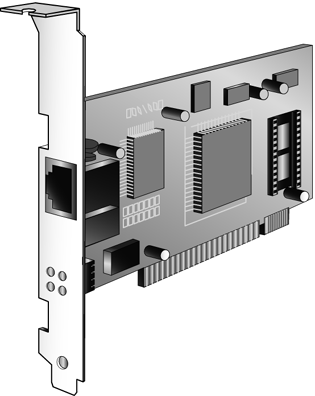
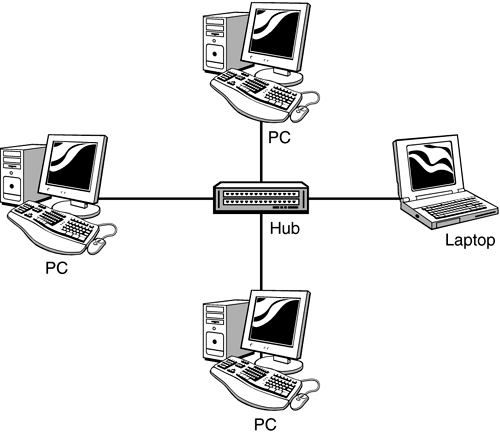
Upgrade #1: Creating a Wired NetworkConnecting multiple computers in a wired network is actually fairly simple. Just make sure you do the proper planning beforehand and buy the appropriate hardware and cables; everything else is a matter of connecting and configuration. Wired Network Hardware and TopologyYou need to install a network interface card, as shown in Figure 15.2, in each computer in your wired network. Each NIC then connects, via Ethernet cable, to the network hub, which is a simple device (like the one in Figure 15.3) that functions like the hub of a wheel and serves as the central point in your network. Then, after you make the physical connections, each computer has to be configured to function as part of the network and to share designated files, folders, and peripherals. Figure 15.2. A typical network interface card, complete with Ethernet connector.
Figure 15.3. A typical network hub.
The whole thing, when complete, should look like the network in Figure 15.4. Figure 15.4. Setting up a wired Ethernet network.
If you're using your network to share a broadband Internet connection, you have a couple of options here. Most users will run the broadband modem directly into the network hub, which lets all computers share the connection even if one computer isn't turned on. An alternative setup connects the broadband modem to your main, or gateway, PC; this lets you use the gateway PC as a firewall to protect the other machines from unauthorized access. Another setup involves connecting your broadband modem to a router that functions both as a hub and as a gateway to the Internet (sometimes called a residential gateway). The best course of action is to follow the recommendation of your broadband service provider because some ISPs will need to assign multiple IP addresses if you're connecting multiple computers. Just ensure you properly configure each PC to share the Internet connection; in Windows 98 Second Edition and later, you can do this with Windows' Internet Connection Sharing (ICS) utility. Here's the hardware you'll need to set up your wired network: Upgrade Checklist for Wired Networking
note
When you assemble this equipment, make sure you buy devices that all work at the same speed; there's no point buying a 100Mbps hub if all your NICs are 10Mbps. Along the same lines, you can save some headache by purchasing equipment from a single manufacturer. It's not that you can't mix and match devices from different companies, it's just that you're likely to have fewer configuration issues if you stick to a single supplier. As to cost, you'll pay between $25 $50 for your network hub and $20 or less for each NIC. The cost for the Ethernet cables varies by length. Popular manufacturers include the following:
Making the ConnectionsNaturally, you should follow the instructions that come with your networking hardware to properly set up your network. In general, however, here are the steps to take:
After you've connected all the computers on your network, you can proceed to connect your broadband modem, as well as configure any devices (such as printers) you want to share over the network. For example, if you want to share a single printer over the network, it connects to one of the network PCs (not directly to the hub), and then is shared through that PC. |
EAN: 2147483647
Pages: 206


