Tracking Dealings with Contacts
|
| < Day Day Up > |
|
Microsoft Office Specialist Keeping track of what's been done or needs to be done in connection with a particular contact can be challenging. For example, you might have agreed to provide additional information for a sales contact and want to follow up after the material has been received. With Outlook, you can link contacts to other Outlook items including appointments or events, Journal entries, notes, and e-mail messages. You can also track all items related to a contact and flag contacts for follow up at a specified time.
You can track items through either the Activities tab of the Contact form, or through the Outlook Journal. The Activities tab is the preferred tracking method; it automatically displays contacts, e-mail messages, journal entries, tasks, and notes associated with the selected contact. You can filter the list to display only items of a certain type.
With the Outlook Journal, you can keep a record of any kind of interaction or activity, even if it is not associated with an item on your computer. You can log phone conver sations and meetings with contacts, as well as hard-copy letters you've mailed or received. For example, you might track all interactions with a client to support the hours you bill to that client at the end of the month. Or you might use the Journal to record meeting minutes and document phone conversations related to a particular project so that you can reference them as you work. In addition to tracking items such as e-mail messages and Microsoft Office documents, you can choose which Outlook items will be automatically tracked for the contacts you specify.
In this exercise, you will link items to a contact, track the items linked to a contact, flag a contact for follow up, and resolve the follow-up flag.
| Important | You can work through this exercise in your own Contacts folder or in the practice Contacts folder. If you use your own contacts, substitute them for the names given in the exercise. |
USE the SBSContacts data file in the practice file folder for this topic. This practice file is located in the My Documents\Microsoft Press\Outlook 2003 SBS\Contacts folder and can also be accessed by clicking Start/All Programs/Microsoft Press/Outlook 2003 Step by Step.
-
In the Inbox, right-click the Shipped Presentation Materials to Hotel message, and then click Options.
The Message Options form appears.
-
Click the Contacts button.
The Select Contacts dialog box appears.
-
In the Items list, click Berg, Karen, and click OK.
The contact is added to the Message Options form, indicating that this message is linked to the contact entry for Karen Berg.
-
Click the Close button.
Tip You can link appointments, tasks, and even other contacts to a contact in much the same way. Open the item, and click the Contacts button in the bottom left corner. E-mail messages sent to a contact are automatically linked to the contact.
-
In the Navigation Pane, click the Contacts icon.
The contents of the Contacts folder are displayed.
-
Double-click the contact entry for Karen Berg.
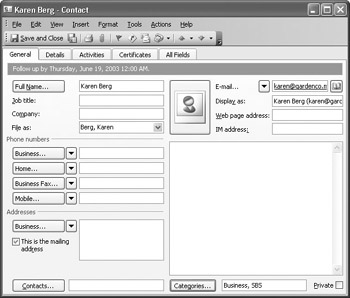
The Karen Berg - Contact form appears.
-
Click the Activities tab.
The Activities tab is displayed, showing that the Shipped Presentation Materials to Hotel message is linked to this contact.
Important The Activities tab also shows a Calendar item for Karen's birthday. This item was created by Outlook when Karen's birth date was added to the Details tab of the contact entry.
-
With the Shipped Presentation Materials to Hotel message selected, on the toolbar, click the Follow Up button.
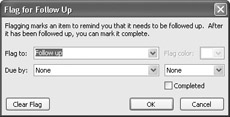
The Flag for Follow Up dialog box appears.
-
Click the down arrow to the right of the Due by box, scroll to and click June 19, 2003, and click OK. (If you are completing this step on a date later than June 19, 2003, click a date that is a few days in the future rather than clicking June 19.)
-
Click the General tab.
The Contact form is updated to indicate that a follow-up flag has been set.
-
On the Contact form's toolbar, click the Save and Close button.
The Contact form closes. In the Contacts folder, the entry for Karen Berg indicates that a follow-up flag has been set.
-
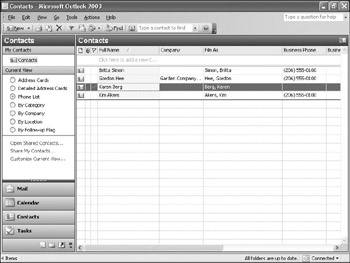
On the View menu, point to Arrange By, point to Current View, and click Phone List.
The contacts are displayed in the Phone List view. A red flag icon to the left of the entry for Karen Berg indicates that a follow-up flag has been set.
-
Double-click the contact entry for Karen Berg.
The Karen Berg - Contact form appears.
-
On the toolbar, click the Follow Up button.
The Flag for Follow Up dialog box appears.
-
Select the Completed check box, and click OK.
The Contact form is updated to show that the follow up is complete.
-
On the Contact form's toolbar, click the Save and Close button.
The Contact form closes. In the Contacts folder, the flag icon to the left of the entry for Karen Berg has turned into a gray check mark, indicating that follow up is complete.
-
On the View menu, point to Arrange By, point to Current View, and then click Address Cards.
The contact information is displayed in Address Cards view.
Tip When viewing contact information in a list, you can quickly mark a follow-up flag as complete by clicking the flag icon and clicking Completed in the drop-down list. If you need to remove a follow up flag, you can clear the flag by displaying the Follow-Up Flag dialog box and clicking the Clear Flag button.
|
| < Day Day Up > |
|
EAN: 2147483647
Pages: 116