Organizing Contact Information
|
| < Day Day Up > |
|
Microsoft Office Specialist As your collection of contact entries grows, managing and organizing contact informa tion can become a challenge. With Outlook, you can delete contact information you no longer need and restore information that has been inadvertently deleted. You can view and sort your contact information in a number of ways to help you find what you need more quickly.
-
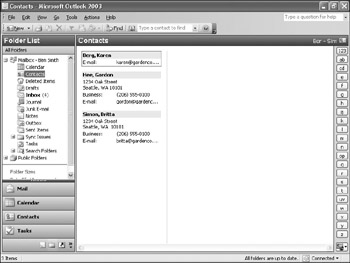
Address Card view displays contact information as it might appear on a business card. Contact entries are displayed in alphabetical order by first or last name, depending on the File as selection.
-
Detailed Address Card view displays contact information in a similar format, but includes details about the contact including the job title and company name. Contact entries are displayed in alphabetical order by first or last name.
-
Phone List view is a columnar list displaying key contact information such as name, company, and contact numbers.
Other columnar views list contacts by category, company, location, and follow-up flag. You can sort these views by any column and customize each view to display the specific information (columns) that you find most useful.
Another way to organize and find contacts is to assign them to categories. For example, you might assign entries for potential new customers to the Hot Contacts category. Then when you are ready to follow up on your initial sales call, you could use this category to find only those entries that require follow up.
In this exercise, you will delete and restore contact entries, view and sort contact entries, and organize contact entries using categories.
| Important | You can work through this exercise in your own Contacts folder or in the practice Contacts folder. If you use your own contacts, substitute them for the names given in the exercise. |
USE the SBSContacts data file in the practice file folder for this topic. This practice file is located in the My Documents\Microsoft Press\Outlook 2003 SBS\Contacts folder and can also be accessed by clicking Start/All Programs/Microsoft Press/Outlook 2003 Step by Step.
BE SURE TO start Outlook and open the SBSContacts data file before beginning this exercise.
OPEN the Contacts folder in the SBS Contacts data file.
-
Click the contact entry for Kim Akers.
-
On the toolbar, click the Delete button.
The entry is removed from the Contacts folder and placed in the Deleted Items folder.
Tip You can also delete a contact entry using the keyboard. Simply click the entry, and press the [DEL] key.
-
In the Navigation Pane, click the Folder List icon.
-
Click the Deleted Items folder.
-
On the View menu, point to Arrange By and then click Subject.
The contents of the Deleted Items folder are displayed. The contact entry you deleted appears in the folder, with a subject line of Kim Akers.
-
In the Deleted Items folder, click the contact item for Kim Akers, and drag it to the Contacts icon at the bottom of the Navigation Pane.
The deleted contact is restored to the Contacts folder.
Tip You can also restore deleted items using the Undo command. Immediately after deleting the item, on the Edit menu, click Undo Delete, or press [CTRL+z] on the keyboard.
-
In the Navigation Pane, click the Contacts icon.
The contents of the Contacts folder are displayed, including the restored entry for Kim Akers.
Tip You can create a new message to a contact at any time by right-clicking the contact entry and clicking New Message to Contact.
-
On the View menu, point to Arrange By, point to Current View, and click Detailed Address Cards.
Additional information for each contact is displayed.

-
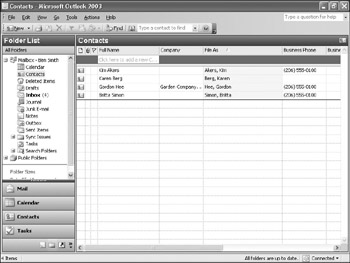
On the View menu, point to Arrange By, point to Current View, and click Phone List.
The contacts are displayed in a grid of columns and rows and are in ascending order based on the File As column.
Tip In the Phone list and other list views, you can quickly add a new contact by using the row at the top of the list. Simply type the information in each cell, press the [TAB] key to move from one column to the next, and press the [ENTER] key when you have finished.
-
Click the Full Name column heading.
The contact entries are sorted in ascending order based on the Full Name column, as indicated by the up arrow to the right of the column heading.
-
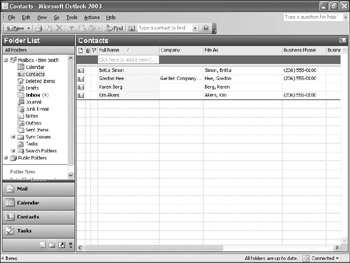
Click the Full Name column heading again.
The contact entries are sorted in descending order based on the Full Name column. The sort arrow now points downward.
-
On the View menu, point to Arrange By, point to Current View, and click By Company.
The contact entries are now displayed in a grid that is grouped by company, and sorted by the File As column.
If the company groups are collapsed, click the plus (+) sign to the left of the company name to see the individual contacts for a company.
-
Double-click the contact entry for Karen Berg.
The Karen Berg - Contact form appears.
Tip From the Contact form, you can access a contact's Web site. Simply click the link in the 'Web page address' box. You can also get a map to the contact's address. On the toolbar, click the Display Map of Address button.
-
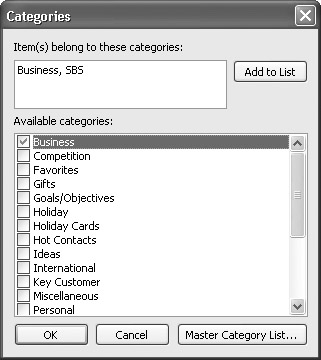
Click the Categories button.
The Categories dialog box appears.
-
In the Available categories area, select the Business check box.
-
Click OK.
The Categories dialog box closes.
-
On the toolbar of the Karen Berg - Contact form, click Save and Close.
The Contact form closes, and the contents of the Contacts folder are displayed, including the updated entry for Karen Berg.
-
Double-click the contact entry for Kim Akers.
The Kim Akers - Contact form appears.
-
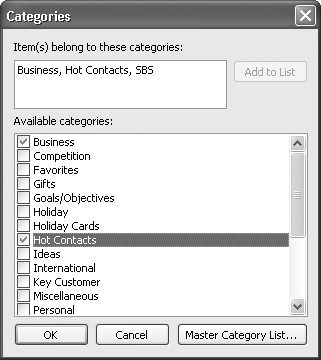
Click the Categories button.
The Categories dialog box appears.
-
In the Available categories area, select the Business check box, and then select the Hot Contacts check box.
-
Click OK to close the Categories dialog box.
-
On the toolbar for the Kim Akers - Contact form, click the Save and Close button.
The Contact form closes, and the contents of the Contacts folder are displayed, including the updated entry for Kim Akers.
-
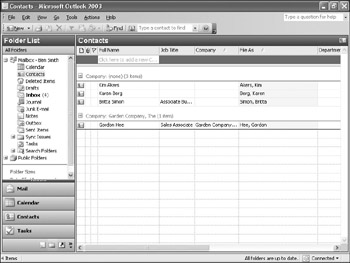
On the View menu, point to Arrange By, point to Current View, and click By Category.
The contact entries are displayed in a grid grouped by category and sorted by the File As column.
-
If the Business category is not displayed, click the plus (+) sign to its left.
The contact entries in the Business category are displayed.
-
If the Hot Contacts category is not displayed, click the plus (+) sign to its left.
The contacts in the Hot Contacts category are displayed. Note that the entry for Kim Akers appears in both categories.

-
On the View menu, point to Arrange By, point to Current View, and click Address Cards.
The contact entries are displayed as address cards.
Tip You can customize the existing contact views or define your own new view from scratch. To get started, on the View menu, point to Current View, and click Customize Current View or Define Views.
|
| < Day Day Up > |
|
EAN: 2147483647
Pages: 116